SP-5 Operator Manual
7
OPERATION INSTRUCTIONS
1. Set SELECTOR to ‘OFF.”
2. Load rotisserie with product. Set SELECTOR switch to “JOG” to jog wheel during loading.
3. Set required cooking temperature by turning the TEMP ADJUST knob to the right to raise temperature or left to
lower it. (The temperature setting will appear on the right side of the display window and will flash on and off until
the oven reaches the set point.) Check actual oven temperature by holding TIMER START for 5 seconds. NOTE:
Temperature should not be set above 425°.
4. Set required cooking time by turning the TIME ADJUST knob to the right to increase time or to the left to lower it.
Allow approximately 15-20 minutes preheat time. (The time setting will appear as minutes and hours on the
display.)
5. Start cooking by turning selector switch to “COOK” position and press TIMER START. (The two dots between
hours and minutes will flash on and off when timer is running.) When cooking time is completed an alarm will
sound.
6. After cooking is completed, turn the selector to “OFF” to stop the rotisserie, or to “JOG” for holding the product.
7. The buzzer can be turned off by pressing TIMER RESET.
8. To stop unit at any time, turn selector switch to “OFF.”
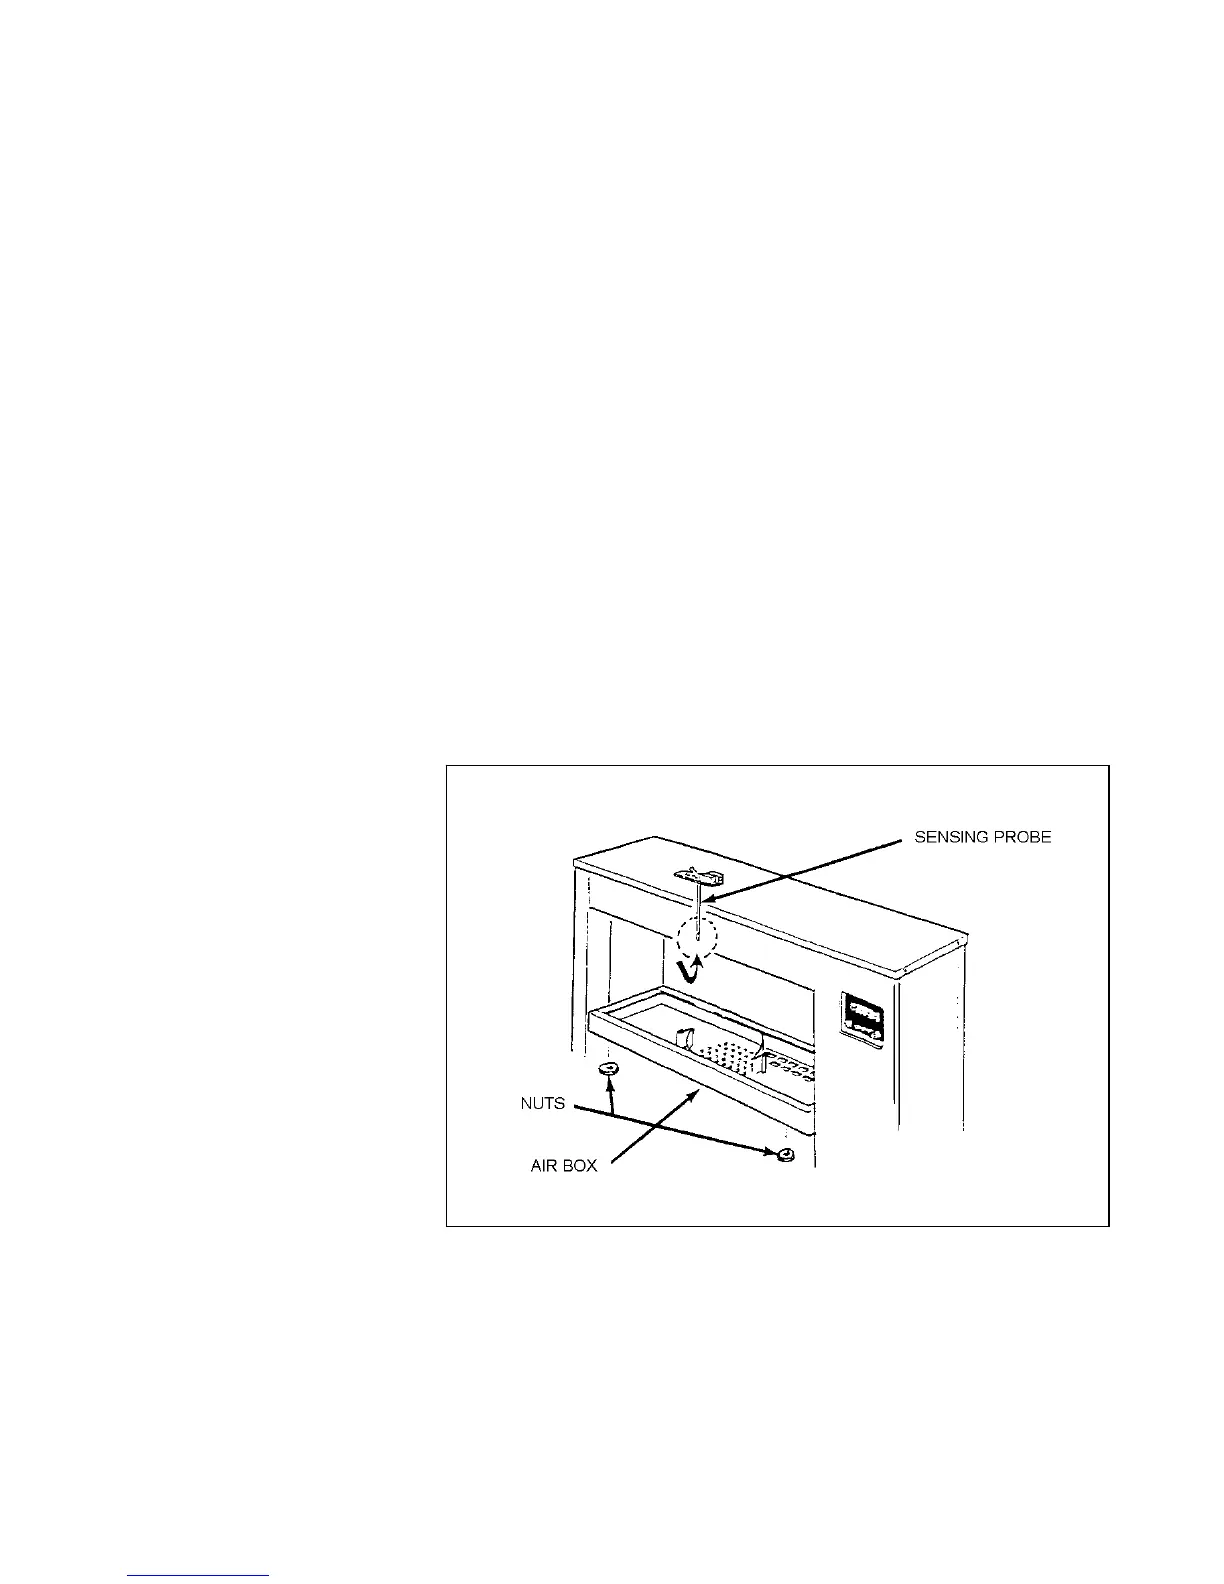
WEEKLY AIR BOX CLEANING
The Air Box should be removed weekly for cleaning.
WEEKLY CLEANING
IMPORTANT: The Air Box must be
cleaned weekly.
1. Open the door and remove the 4
large hex head nuts located in
the upper cooking chamber. See
illustration.
2. Pull Air Box down and place it in
a sink or dishwasher.
3. Be certain that all grease residue
is removed from the interior of
the Air Box. Rinse and dry
thoroughly.
4. Wipe down the temperature
sensing probe which is shown in
the illustration. Gently wipe
clean the blower fan blades.
5. Replace the Air Box, carefully
fitting over the 4 studs. Secure
with hex head nuts.
IMPORTANT: The hex buts are
only to be hand tightened. DO
NOT use tools.
 Loading...