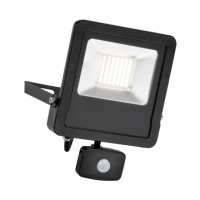
Surge (Floodlight) PIR
78963, 78965, 78967, 78969, 78970
Instruction leaflet
Care and Safety
• We recommend cleaning with a soft dry cloth. Do not use solvents or abrasive cleaners as these could damage
the finish.
• For your safety, always switch off the supply before cleaning.
Iss .2 22/11/2018
WWW.saxbylighting.com Saxby lighting. BH23 3PE
PIR Specification
• 78963, 78965, 78967 and 78969 are fitted with PIR motion sensor. The specification is as follows:
• Turn the time dial to minimum(-), the sensitivity dial to maximum(+) and the lux dial to maximum (sun).
• To override the PIR, switch off the power to the floodlight then re-apply the power within 3 seconds.
• To return to automatic mode, switch off the power to the floodlight then re-apply the power after 10 seconds.
Dials shown in maximum positions
• Switch on the power supply electricity and but not activate the PIR sensor.
• Wait approximately 15 seconds while the floodlight initiates
by turning on and off.
• After the floodlight deactivates, it can be activated with motion
in fornt of the PIR sensor.
• Adjust the time dial for the desired duration on and the sensitivity
dial to the desired distance.
• Initial setup and testing in daylight is now complete.
If in doubt, contact a qualified electircian.
• Turn the lux dial to minimum(moon). When the ambient light
level is at the desired level (to turn on the floodlight),
rotate the lux dial until the floodlight turns on.
Please read in full before installation and keep for future reference take care not to over rotate the dials.
They do not rotate through 360 for testing in daylight.
Installation Instructions
Manual Override Instructions
Optimum mounting height: 1m-3m.
Timer Function (TIME): 10±5 seconds to 8±2 minutes
Detection angle: 120˚
Detection distance (adjustable) : 8±2m( <24 )℃
Lux Range (LUX): 2-2000 lux
Working TemperaturePower:-10℃— +45℃
• You have correctly
identified the wires.
• The connections are tight.
• No loose strands have
been left out of the terminals.
Terminal block not included. Installation may require advice from a qualified person. Connect to an approved
outdoor rated terminal block, observing the wiring diagram here:
SUPPLY
NEUTRAL
EARTH
SWITCHED LIVE
BLUE (N)
GREEN/YELLOW
BROWN (L)
LIGHT FITTING
Wiring
Check that...