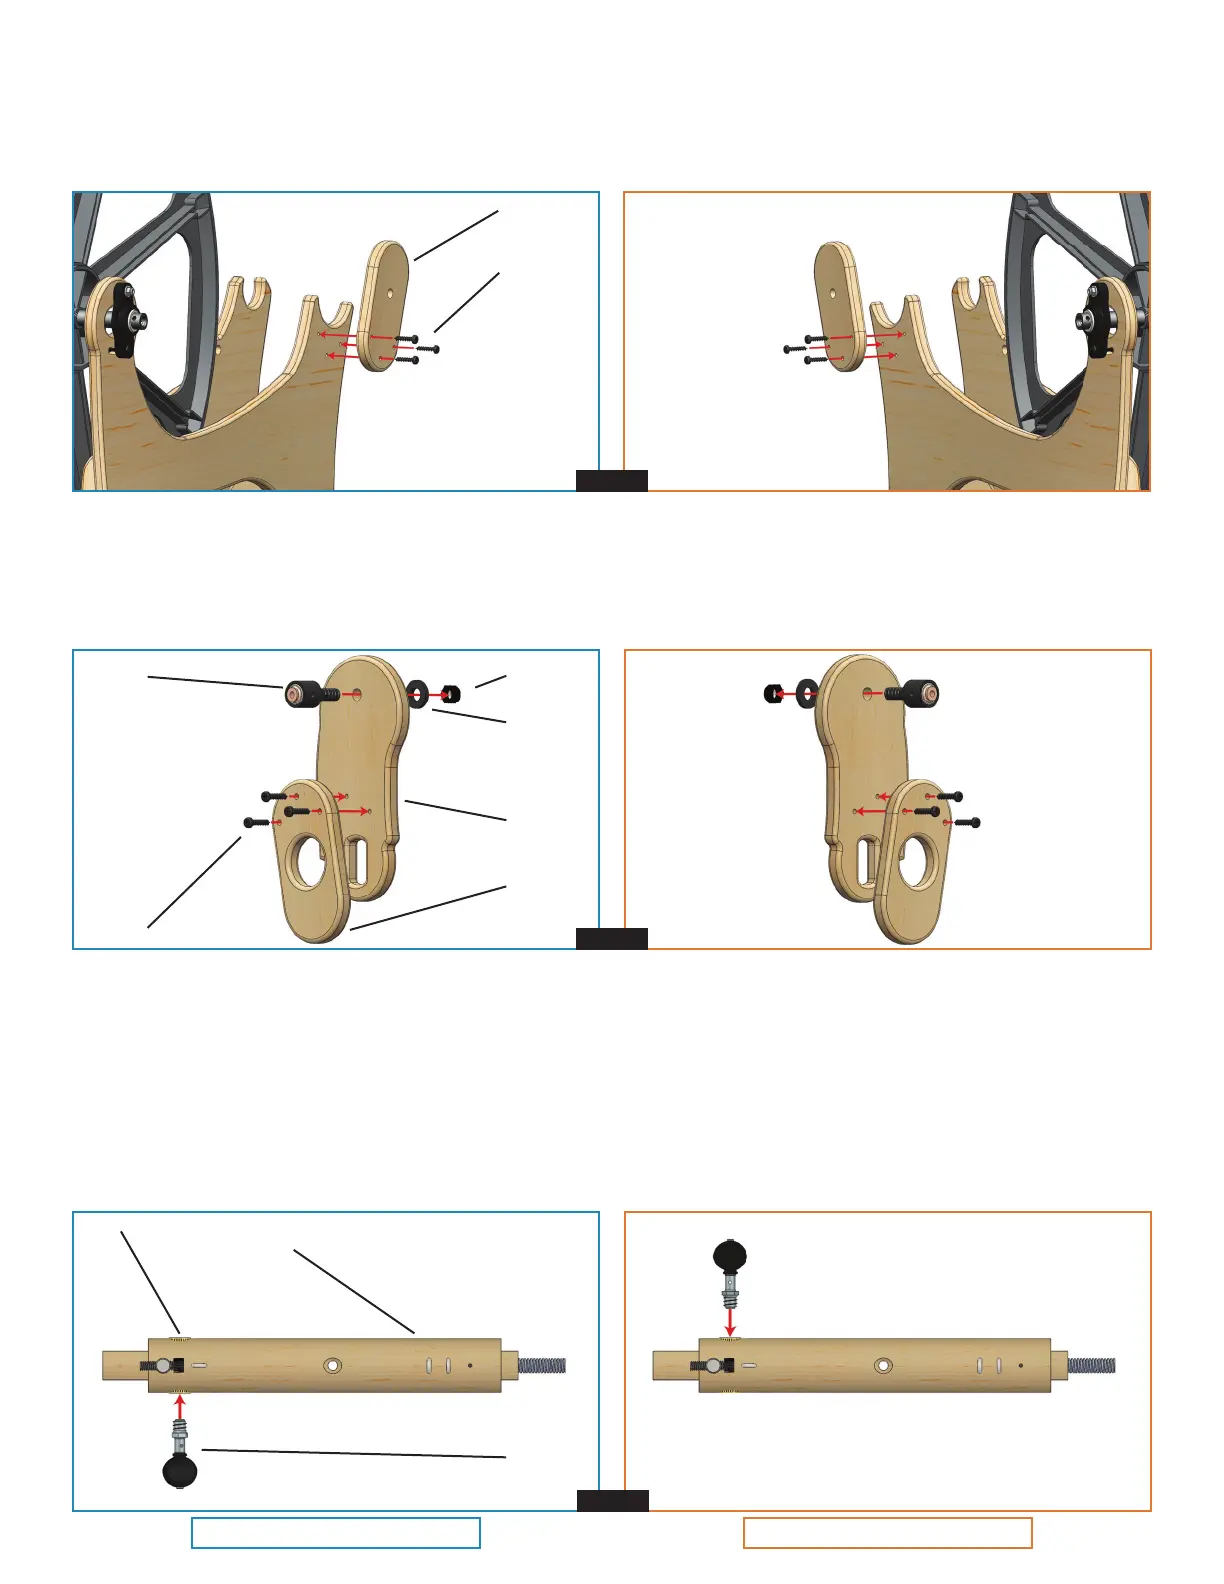
FLYER ON THE LEFT FLYER ON THE RIGHT
-7-
3. ASSEMBLING THE MAIDEN GUIDES [Parts bag #3]
1. Attach the rear maiden back guide to the outside of the rear frame using #8 x 7/8" maiden screws.
3.1
rear maiden
back guide
#8 x 7/8"
maiden screw
2. Assemble the rear maiden based on your decision to have the yer on the left or the right. Tip: Insert
the T-handle wrench through the hole in the side of the yer bearing assembly and use it to hold the
bearing in place while fully tightening the 3/8-16 thin lock nut until the bearing assembly is ush against
the wood of the rear maiden.
3.2
#8 x 7/8"
maiden screw
3/8-16
thin lock nut
yer bearing
assembly
rear maiden
3/8" washer
(black)
rear maiden
front guide
4. INSTALLING THE MOTHER-OF-ALL (MOA) [Parts bag #4]
1. Thread the Scotch/Irish tension adjustment knob into the brass insert of the MOA assembly based
on the yer direction you have chosen for your Flatiron. Tighten using the 3/8" wrench.
3. Tighten, but do not over-tighten, all of the frame bolts so that the frame sides take on the curves of
the leg braces. Tighten the 3/8-16 thin lock nut installed on the drive wheel axle in Step 2.8.
MOA
assembly
brass insert
Scotch/
Irish tension
adjustment
knob
4.1


 To Next Page