L’innovation française depuis 1965
P. 3
L’innovation française depuis 1965
Installation instructions
• This device must be placed in a place protecting it from any risk of water splashing.
Install in a ventilated location
• Do not install on supports that are sensitive to heat, such as carpet or PVC ooring, etc.
• The product must be installed away from heat and humidity
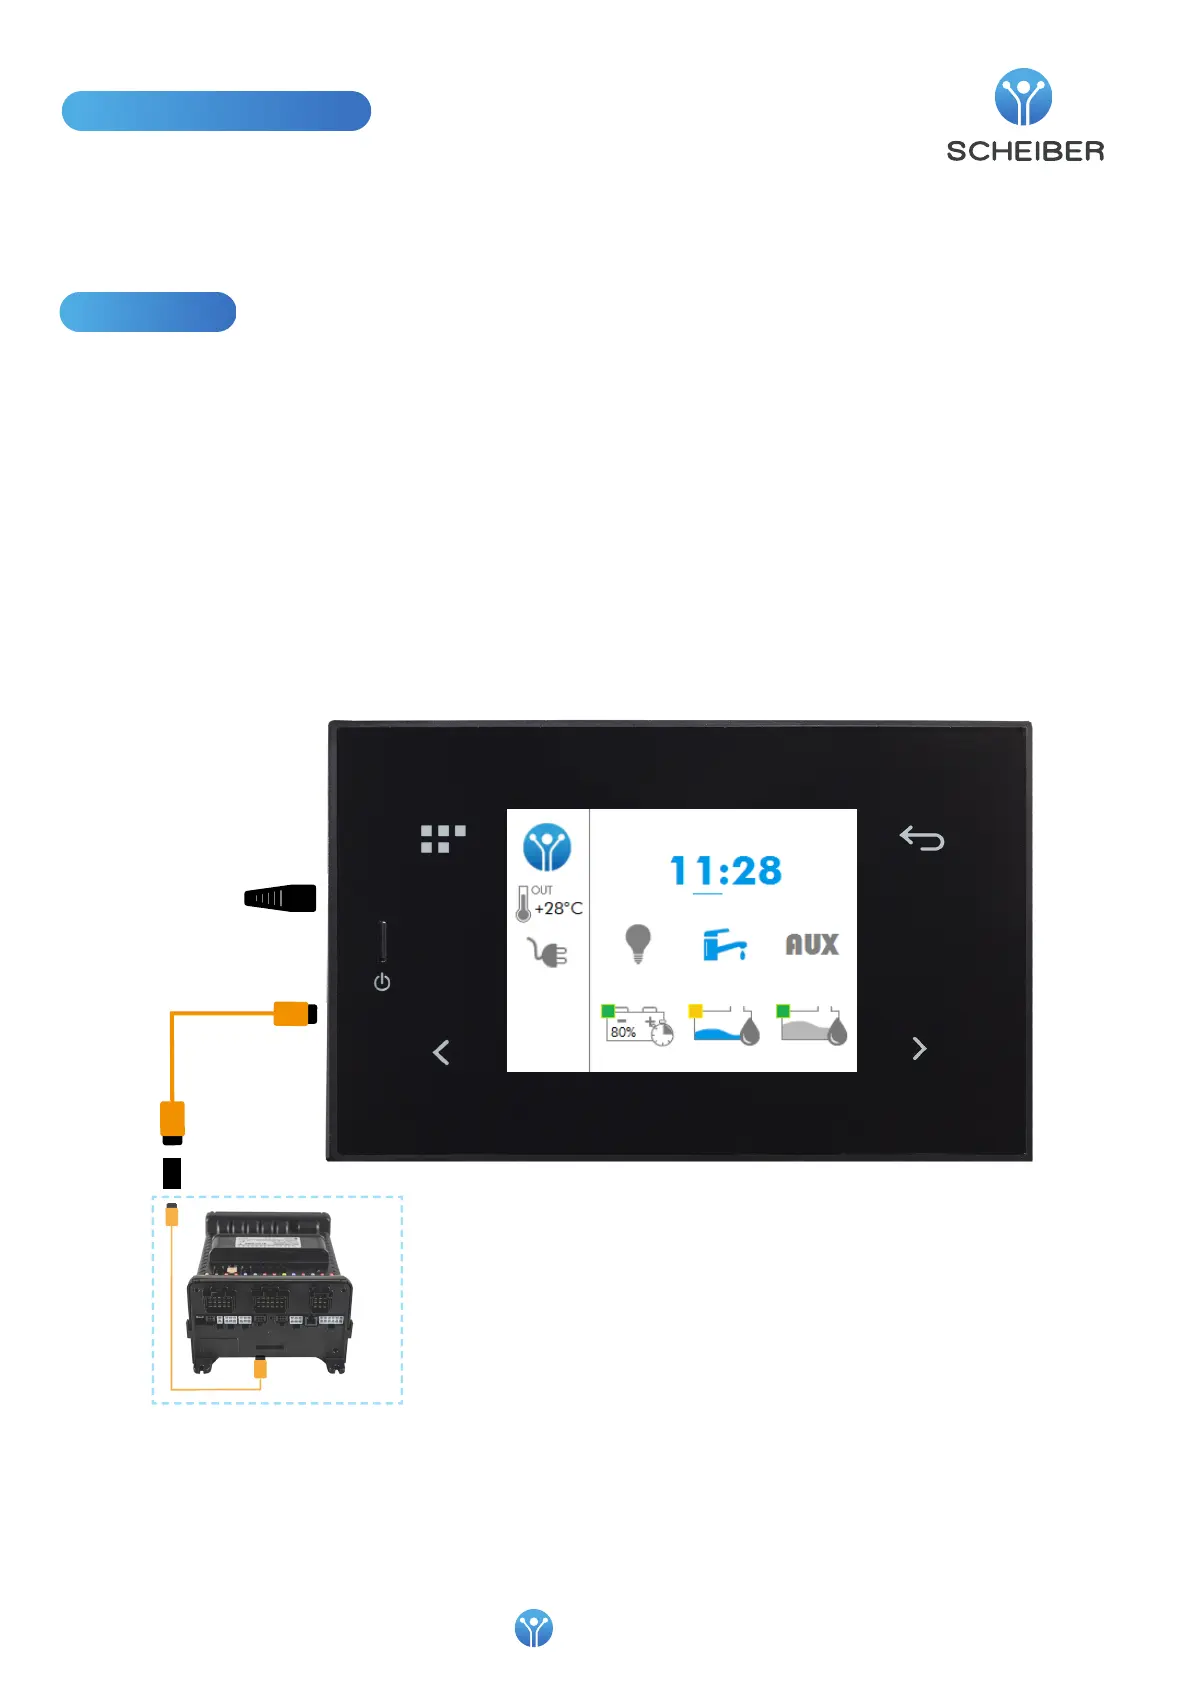
Connection
1. Power off the system
2. Identify the CAN / USB interface (reference 36.15951.00, present upstream of the EXPERIENCE tablet)
3. Disconnect the gateway and keep only the CAN cable (orange cable)
4. Connect the CAN cable to the CAN BUS connector on the back of the Navicolor
If the length of the existing cable is not sufcient, use the extension and cable provided in the packaging.
5. Place the 120Ω termination on the CAN BUS connector available on the back of the Navicolor.
6. Switch on
NOT INCLUCED IN THE KIT
120Ω termination
CAN cable
Navicolor
Friday, April 10
 Loading...