www.scheppach.com
24
|
GB
2 Now release the two counternuts B and tension
the vee-belt with both bolts C.
3 $IWHUWHQVLRQLQJWKHYHHEHOW¿UPO\UHWLJKWHQWKH
bolts A and the counternuts B. Fig. 4.1
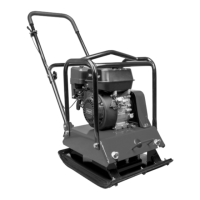
HP 1400 S
7HQVLRQLQJWKHYHHEHOW)LJ
After 5 hours in use, the fan belt must be tightened.
1 To tighten the fan belt, the screws A on both sides
of the motor housing must be loosened.)LJ
2 Now tighten the fan belt with the nut C.
3 After tightening of the fan belt 4, tighten the
screws A again. Fig. 4.4
&KDQJLQJWKHPRWRURLO)LJ
$IWHURSHUDWLQJKRXUVWKHRLOPXVWEHFKDQJHG
IRUWKH¿UVWWLPHWKHQHYHU\RSHUDWLQJKRXUV
1 5HPRYHWKHÀH[LEOHKRVH'DQGSRRUWKHRLOLQWR
a suitable bin.
2 2SHQWKH¿OOLQJFDSPHDVXULQJVWLFNDQGOHWWKH
oil drain.
3 5HFRQQHFWWKHÀH[LEOHKRVH
4 Fill the oil in, check with the measuring stick, and
close.
5 SXOO VWDUWHU VORZO\ IRU WLPHV VR WKDW WKH RLO
VSUHDGVZLWKRXWLJQLWLRQ
5HFRPPHQGHGPRWRURLO6$(:
'LVSRVHRIZDVWHRLODFFRUGLQJWR\RXUFRXQWU\¶VUHJ-
ulations.
It is not allowed to drain waste oil onto the ground or
mix it with other waste material.
,PSRUWDQWKLQWLQFDVHRIVHQGLQJWKHSODWHVWRD
VHUYLFHVWDWLRQ
'XHWRVHFXULW\UHDVRQVSOHDVHVHHWRLWWKDWWKHYL-
EUDWRU\SODWHVDUHVHQWEDFNIUHHRIRLODQGJDV
To remove the oil proceed as follows:
1 5HPRYHWKHÀH[LEOHKRVH'DQGSRRUWKHRLOLQWR
a suitable bin.
2 2SHQWKH¿OOLQJFDSPHDVXULQJVWLFNDQGOHWWKH
oil drain.
3 5HFRQQHFWWKHÀH[LEOHKRVH
&KDQJLQJ WKH RLO LQ WKH HFFHQWULF YLEUDWLRQ XQLW
)LJ
&KDQJHWKHRLOLQWKHHFFHQWULFYLEUDWLRQXQLWDI
WHURSHUDWLQJKRXUV
1. 2QO\FKDQJHWKHRLORQFHWKHHFFHQWULFYLEUDWLRQ
unit has cooled.
2. 5HPRYHWKH9EHOWFRYHUDQGWKH9EHOW
3. /RRVHQWKHVFUHZVRQWKHHFFHQWULFYLEUDWLRQ
unit housing.
4. Lift the entire upper part of the plate vibrator with
the engine off the eccentric vibration unit housing
10. 3XWWLQJLQWRRSHUDWLRQ
$WWHQWLRQ%HIRUHWKH¿UVWXVH¿OOLQPRWRURLO
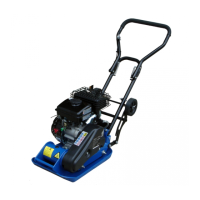
HP 1900 S / HP 2300 S
6WDUWLQJWKHPRWRU)LJ
1. 6HWWKHFKRNHWR21ZLWKZDUPPRWRUWR23(1
2. Open the gasoline tap
3. Move the gas lever to starting position.
4. 6HW WKH VWDUW VZLWFK WR 21 IRUFHIXOO\ SXOO WKH
starter cable
5. 0RYHJDVOHYHUWRZRUNLQJSRVLWLRQWKHYLEUDWRU\
plate starts to work
6. 0RWRUUXQQLQJVORZO\RSHQFKRNH
7. Move gas lever to working position
8. 9LEUDWRU\SODWHVWDUWVWRZRUN
+366WDUWLQJWKHPRWRU)LJ
1. &ORVHWKHFKRNHEXWOHDYHLWRSHQLIWKHPRWRULV
DOUHDG\ZDUP
2. Move the gas lever to the starting position
3. Set the start switch to “on”
4. 3XOOWKHVWDUWHUFRUGVWURQJO\
5. 0RWRULVUXQQLQJ±VORZO\RSHQWKHFKRNH
6. Move the gas lever to the working position
7. Plate compactor will begin to function
6WRSSLQJWKHPRWRU
1. Set the gas lever to slow.
2. Switch machine to OFF.
2SHUDWLQJWKHYLEUDWRU\SODWH
$WWHQWLRQ :HDU VDIHW\ VKRHV LQ RUGHU WR DYRLG
LQMXULHV
• Before putting the machine into operation it is im-
SRUWDQW WR VWXG\ DQG REVHUYH WKH VDIHW\ LQVWUXF-
tions.
• Observe the national regulations for working when
XVLQJWKHYLEUDWRU\SODWHRQSXEOLFJURXQGRUURDGV
• .HHSSHUVRQVFKLOGUHQDQGDQLPDOVDZD\IURPWKH
dangerous area.
• Search the working area for foreign bodies and
remove them.
• :KHQ OHDYLQJ WKH YLEUDWRU\ SODWH DOZD\V VKXW
down the motor.
11. 0DLQWHQDQFH
%HIRUH VWDUWLQJ PDLQWHQDQFH RU UHSDLU ZRUN DOZD\V
shut down the motor.
HP 1900 S / HP 2300 S
7HQVLRQLQJWKHYHHEHOW)LJ
7KHYHHEHOWPXVWEHUHWHQVLRQHGDIWHU¿YHRSHUDW-
ing hours.
1 For tensioning the vee-belt, the bolts A of the
PRWRU¿[LQJPXVWEHUHOHDVHGRQERWKVLGHVFig.
 Loading...