SCC Fault Isolation Manual 6/03/2020
Page 8 of 11 Rev. 01 9/20/2021
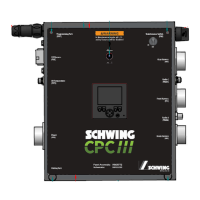
Fault Isolation Manual:
Use the table below to find the problem that is most relevant to your issue. Then go to that item number.
• Page 9 Section 1. Display does not turn on
• Page 9 Section 2. Primary PLC does not turn on (No lights on PLC)
• Page 9 Section 3. Throttle control does not work
• Page 9 Section 4. Oil Cooler does not turn on
• Page 9 Section 5. Slew Limits do not work
• Page 9 Section 6. Fuse F9 blows while in maintenance mode
• Page 10 Section 7. Stroke Counter and Strokes/Min do not count
• Page 10 Section 8. Work Lights do not work
• Page 10 Section 9. Hopper Light does not work
• Page 10 Section 10. System does not turn on
• Page 10 Section 11. Radio Display shows “NO CAN BUS MESSAGES”
• Page 10 Section 12. Radio Display has the “E” indicator light lit up.
• Display shows the following message at the top:
o “Slew Limit [Left/Right]” Normal message when slew limits are reached.
o “E-Stop [Rear/Boom/Remote]” An E-Stop is triggered. Check your E-Stops.
o “Hopper Grate Open” Hopper Grate circuit is open
o “Soft Stop-Neutral all switches” Appears when switching to remote mode and a remote switch is on. Take all remote switches to neutral.
o “Reset E-Stop Request” Appears when switching modes and during first startup. Honk the horn to reset the e-stops.
o “No comms Keypad<>PLC” No comms to the rear keypad. Check the CAN lines & power/ground wires to the rear keypad then replace keypad. In local mode you can reset the e-stop at the display when this error is present.
o “Dirty Oil Filter” Change the Oil Filter
o “Telescopic Boom Limit” Boom Limitation is preventing further telescoping.
o “No Driveshaft Speed Detected” Check prox sensor on drive shaft and make sure the pickup bolts are 2-4mm away from the sensor. Then replace sensor. There is a light on the prox that tells you when it is triggered.
o “No Alt D+ Voltage” This is a normal message when the vehicle is not running. This signal comes directly from the alternator.
o “Hydraulic Oil Temp High” Oil Temperature has been exceeded. Verify Oil Cooler is running and let the unit cool down.
o “Ram Change Mode Enabled” Normal message while in Ram Change Mode.
o “Teach Mode Enabled” Normal message while in Teach Mode.
o “Oil Pressure Sensor Fault” Check the connections to the sensor. Replace sensor or troubleshoot wiring. “999” will display if the circuit is shorted. “-999” will display if the circuit is open.
o “Water Tank Level Low” Normal message when no water is in the tank. Check the connections to the sensor. Replace sensor or troubleshoot wiring.
o “Maintenance Switch Enabled” The maintenance switch is activated. MOST functions of CPC3 are disabled
o “VBBS Volts Low-Check CB[#]” There is no voltage on one of the circuits. Open the PDM and check the indicated circuit breaker. Some features will not work when you get this error because it does not have full power.
o “No Comms HMI<>PLC” See Page 10 section 13. “No Comms HMI<>PLC”
o “PLC Temp High” The PLC is overheating. Open cabinet door and turn system off until cooled.
o “Pump RPM High-Check Gear” The ratio between the engine RPM and the driveshaft is not correct. Make sure you’re in the correct gear.
o “Error Code-Goto Maint. Page” Go to the Maintenance page and check the error code. Use the Error Code manual to see what it means.
o “No Comms PLC<>Receiver” There is no comms between the PLC and the receiver. Ensure Cable A and Cable C on side of panel is plugged in and the Radio Receiver is lit up.
o “Oil Temp Sensor Fault” Check the connections to the sensor. Replace sensor or troubleshoot wiring. “999” will display if the circuit is shorted. “-999” will display if the circuit is open.
o “Operate Oil Cooler Manually” If this error comes up the CPC3 system has determined an error in the Oil Cooler System. Either the D+ signal is not working, or the Oil Temp sensor is not working. Run the Oil Cooler manually.
o “[Boom/Remote/Rear] E-stop Error” See Page 11 section 14. “[Boom/Remote/Rear] E-stop Error”
 Loading...