IPL Goggle Specifications
2PL EN207 Certified
Luminious transmittance: 15% Green
CE Rating Optical Density
Wavelength (nm) L-Ratings Wavelength (nm) ODs
2NOIR 1F CE 190-1200
©2021 Sciton, Inc. All rights reserved. 925 Commercial Street, Palo Alto, California 94303
Phone: 888.646.6999 | Email: info@sciton.com
2600-047-02 Rev A
By SCITON
™
USB-C Dongle
Lemo Dongle
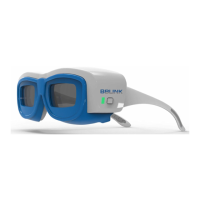
BBLINK
™
Goggles feature proprietary technology which syncs
with the BBL
®
system to blink with every pulse and block the
majority of the pulsed light.
Features
• Integrated IPL safety goggles
• Auto shutter blocks pulsed light
• Synced automatically to BBL System
• Compatible with all BBL
®
applications, including HERO
™
,
Forever Body
™
,
Forever Young
™
, and SkinTyte
™
treatments
SETUP
After unpacking the box, connect the supplied dongle:
Depending on your system, attach supplied BBLINK dongle
to the system in one of two ways:
JOULE
®
X or JOULE
®
7 systems with HALO
®
port
Dongle should look like image to the right, if not, contact Service
immediately 650-543-8371 or service@sciton.com
To install the dongle (Refer to Lemo Connection Illustration
on the left):
• Locate the HALO port on the top of Joule system at center,
it is the larger of two ports if system also equipped with a Fiber
port
• Grasp upper collar of dongle cable end, Red Dot facing front of
system as shown
• Press down firmly until you hear a click, DO NOT TWIST!
To remove the dongle (Refer to Lemo Connection Illustration
on the left):
• Grasp knurled collar only (do not hold any other part of cable
end)
• Pull up firmly, DO NOT TWIST!
• Note: lifting knurl releases hidden latch inside cable end
mJOULE
™
or JOULE
®
X sytems with USB-C port in the back
Dongle should look like image to the right, if not, contact Service
immediately 650-543-8371 or service@sciton.com
• Connect the dongle via the USB-C port located on the back of
the system
Lemo Connection
Illustration
CHARGING
Power On:
• Press the power button located on the left-hand side of the
Googles
• The power and pairing light next to the button will illuminate green
Power Off:
• Press the power button located on the left-hand side of the
googles
• Power and pairing light next to the power button will go out/
darken
• BBLINK Goggles will automatically power off after 10 minutes of
inactivity
Charging:
Charge for a minimum of 1 hour before using. The battery should
last between 5-8 hours operating time. It is recommended to
recharge each night after use.
Plug the supplied cable with the USB-C end into the port located on
the right-hand temple of the Goggles and the USB-A end into the
supplied wall plug, then into the wall outlet. You can also utilize the
system’s USB port to charge your BBLINK goggles.
Battery Charge LED light located on the same side as the USB-C
charge port on the Goggles will indicate:
• Solid Red: when charging
• Off: done charging
The power and pairing LED light located next to the power button
will illuminate:
• Solid Green: fully charged and ON
• Blinking: low battery
• Power Off/On when charging is complete
CLEANING
• Wipe lenses with included micro cleaning cloth
• Clean with 90% alcohol, wiping down all surfaces
• Do not submerge in water or liquid of any kind
Power and Pairing Indicator Light
BBLINK Battery Charge LED
BBLINK USB-C Port
grasp
knurled
collar
grasp here
align dot
to notch
Setting up your BBLINK Goggles is as easy as:
1. Activate License
2. Set Communication Channel
3. Pair BBLINK Goggles
4. Start Treating!
The intuitive set up software guides you through
the activation and pairing process so that you
can get to treating right away!