Do you have a question about the SCORPION EXO-COM and is the answer not in the manual?
Learn how to power on/off, adjust volume, and control basic functions.
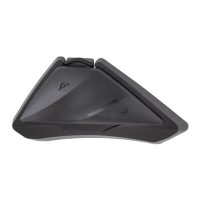
Instructions for installing the EXO-COM controller, battery, and non-smart version.
Steps to pair your EXO-COM device with the app, reset, recharge, and update firmware.
Pairing with mobile phones, managing music playback, and using voice assistants.
Instructions for setting up group intercom and controlling connections with other devices.
Details on FCC rules, operation conditions, and radio frequency exposure limits.
Information regarding Industry Canada compliance and RF exposure standards.
| Speakers | 40mm |
|---|---|
| Water Resistance | Yes |
| Charging Time | 2.5 hours |
| Waterproof Rating | IPX5 |
| Operating Distance | 800m (0.5 miles) |
| Range | 1.6 km (1 mile) |
| Compatibility | Bluetooth-enabled devices |