5. Pressthe desiredHeat Setting button.
The 3 mil setting should be used for
lammating standardprinter paper or
lighter weight items. The 5 mil setting
should be usedfor photo paper,
business cards and other thick items.
6. Wait for the greenReady light to come
on, which indicates the laminator is
warm enough for use.
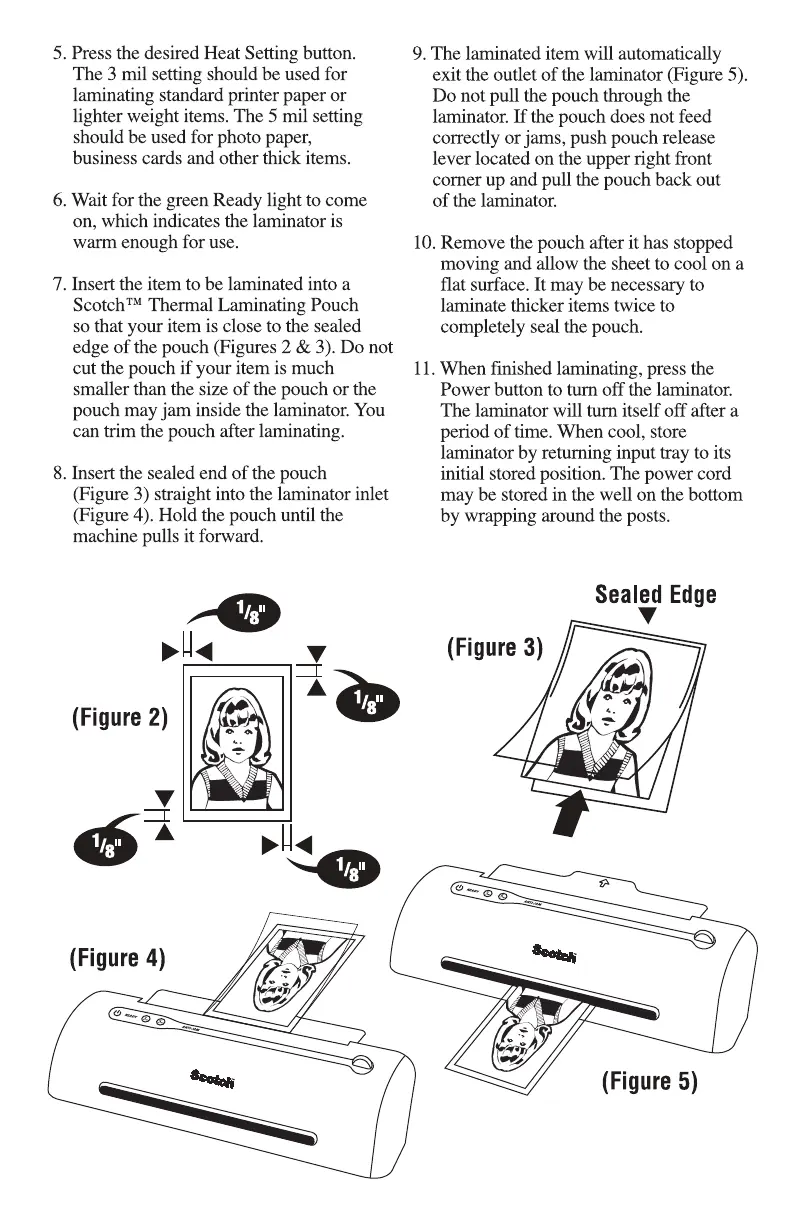
7. Insert the item to be laminated into a
ScotchTMThermal Laminating Pouch
so that your item is close to the sealed
edgeof the pouch (Figures 2 & 3). Do not
cut the pouch if your item is much
smaller than the size of the pouch or the
pouch may jam inside the laminator. You
can trim the pouch after lammating.
8. Insert the sealedend of the pouch
(Figure 3) straight into the laminator inlet
(Figure 4). Hold the pouch until the
machine pulls it forward.
(Figure 2)
(Figure 4)
9. The laminated item will automatically
exit the outlet of the laminator (Figure 5).
Do not pull the pouch through the
laminator. If the pouch does not feed
correctly or jams, push pouch release
lever located on the upper right front
corner up and pull the pouch back out
of the laminator.
10.Remove the pouch after it has stopped
moving and allow the sheetto cool on a
flat surface.It may be necessaryto
laminate thicker items twice to
completely sealthe pouch.
11.When finished laminating, pressthe
Power button to turn off the laminator.
The laminator will turn itself off after a
period of time. When cool, store
laminator by returning input tray to its
initial storedposition. The power cord
may be stored in the well on the bottom
by wrapping around the posts.
Sealed Edge
(Figure 3)
(Figure 5)
 Loading...