ser Tips•
• If you have multiple smal items, place them inside one pouch
After laminating, cut out. DO NOT cut pouch before laminating
• Place SEALED end of pouch into the machine first, with the open
end following behind
• Irregular shapes, place towards the sealed end
• Do not grab the hot end of the laminated item because it could deform
f done, run through the machine again Allow to cool before handling
Operating Instructions
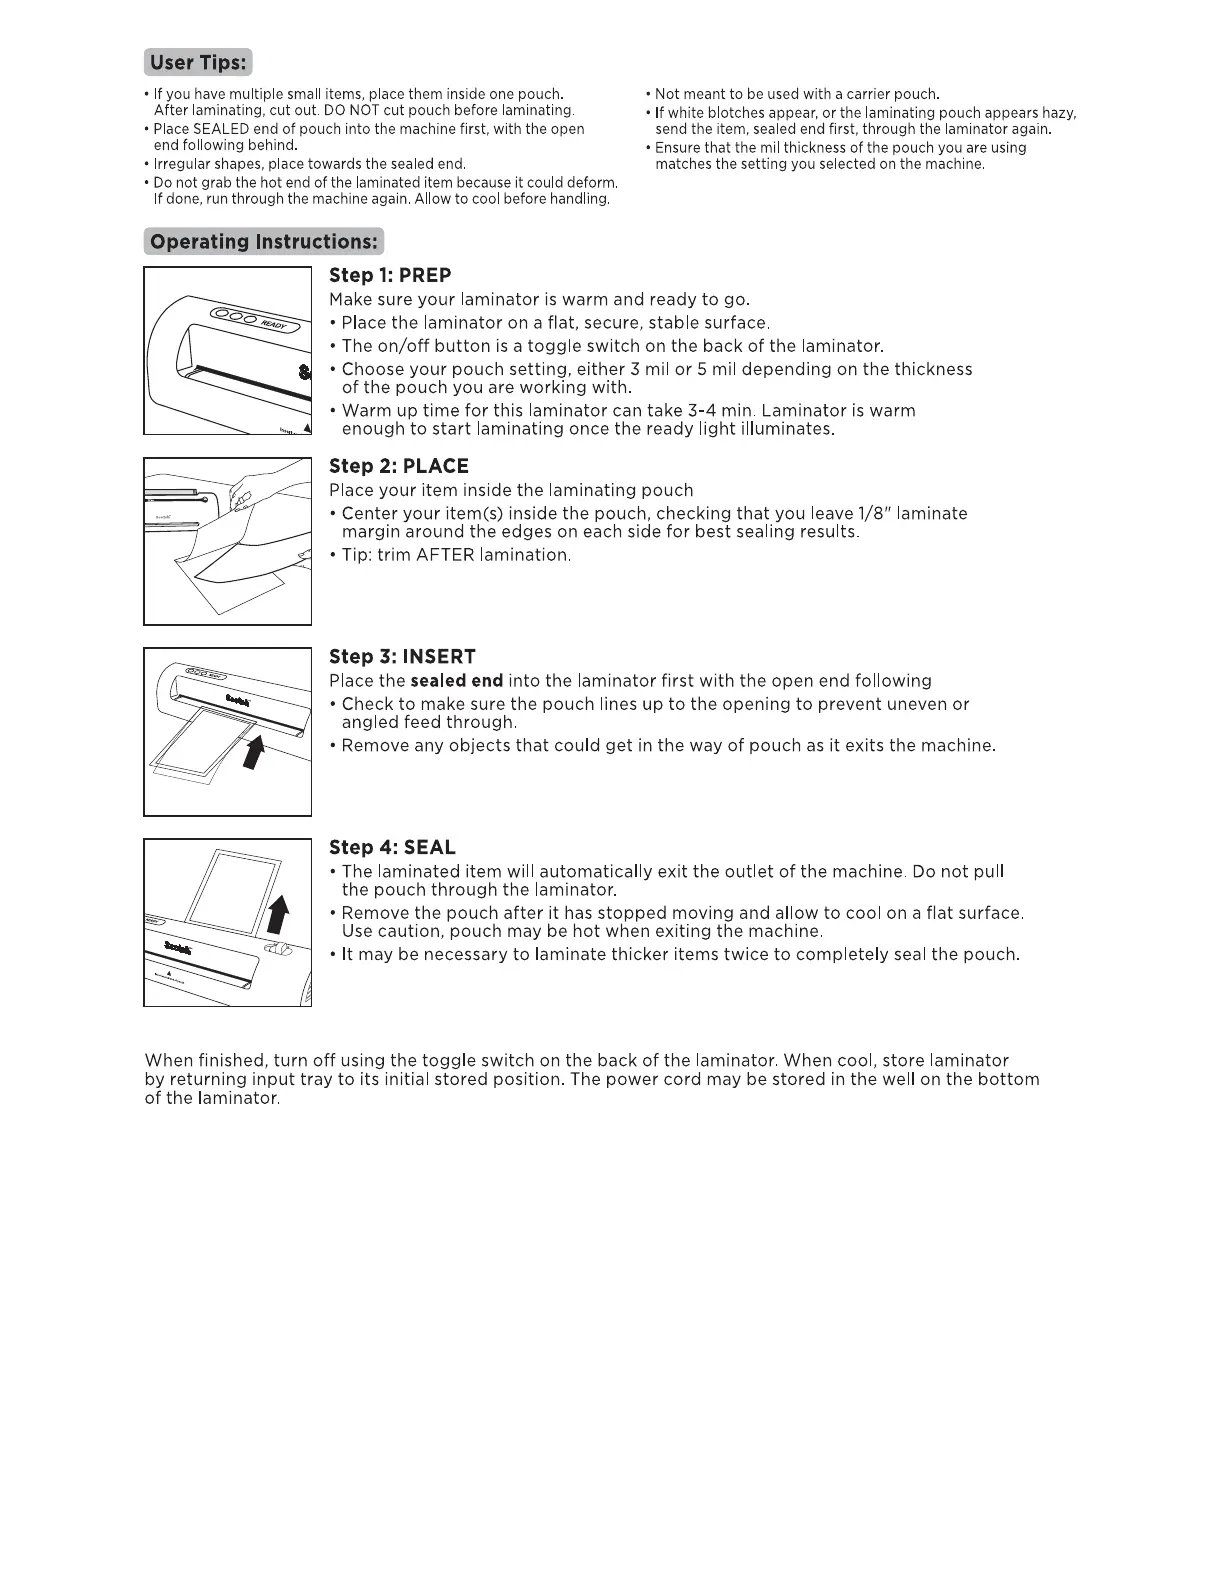
step 1: PREP
• Not meant to be used with a carrier pouch
• If white blotches appear, or the laminating pouch appears hazy,
send the item, sealed end first, through the laminator again.
• Ensure that the mil thickness of the pouch you are using
matches the setting you selected on the machine
Make sure your laminator is warm and ready to go.
• Place the laminator on a flat, secure, stable surface
• The on/off button is a toggle switch on the back of the laminator.
• Choose your pouch setting, either 3 mil or 5 mil depending on the thickness
of the pouch you are working with
• Warm up time for this laminator can take 3-4 min. Laminator is warm
enough to start laminating once the ready light illuminates
step 2: PLACE
Place your item inside the laminating pouch
• Center your item(s) inside the pouch, checking that you leave 1/8" laminate
margin around the edges on each side for best sealing results.
• Tip: trim AFTER lamination
step 3: INSERT
Place the sealed end into the laminator first with the open end following
• Check to make sure the pouch lines up to the opening to prevent uneven or
angled feed through.
• Remove any objects that could get in the way of pouch as it exits the machine.
step 4: SEAL
• The laminated item will automatically exit the outlet of the machine. Do not pull
the pouch through the laminator.
• Remove the pouch after it has stopped moving and allow to cool on a flat surface
Use caution, pouch may be hot when exiting the machine
• It may be necessary to laminate thicker items twice to completely seal the pouch
When finished, turn off using the toggle switch on the back of the laminator. When cool, store laminator
by returning input tray to its initial stored position. The power cord may be stored in the well on the bottom
of the laminator.
 Loading...