8
Model 51519S
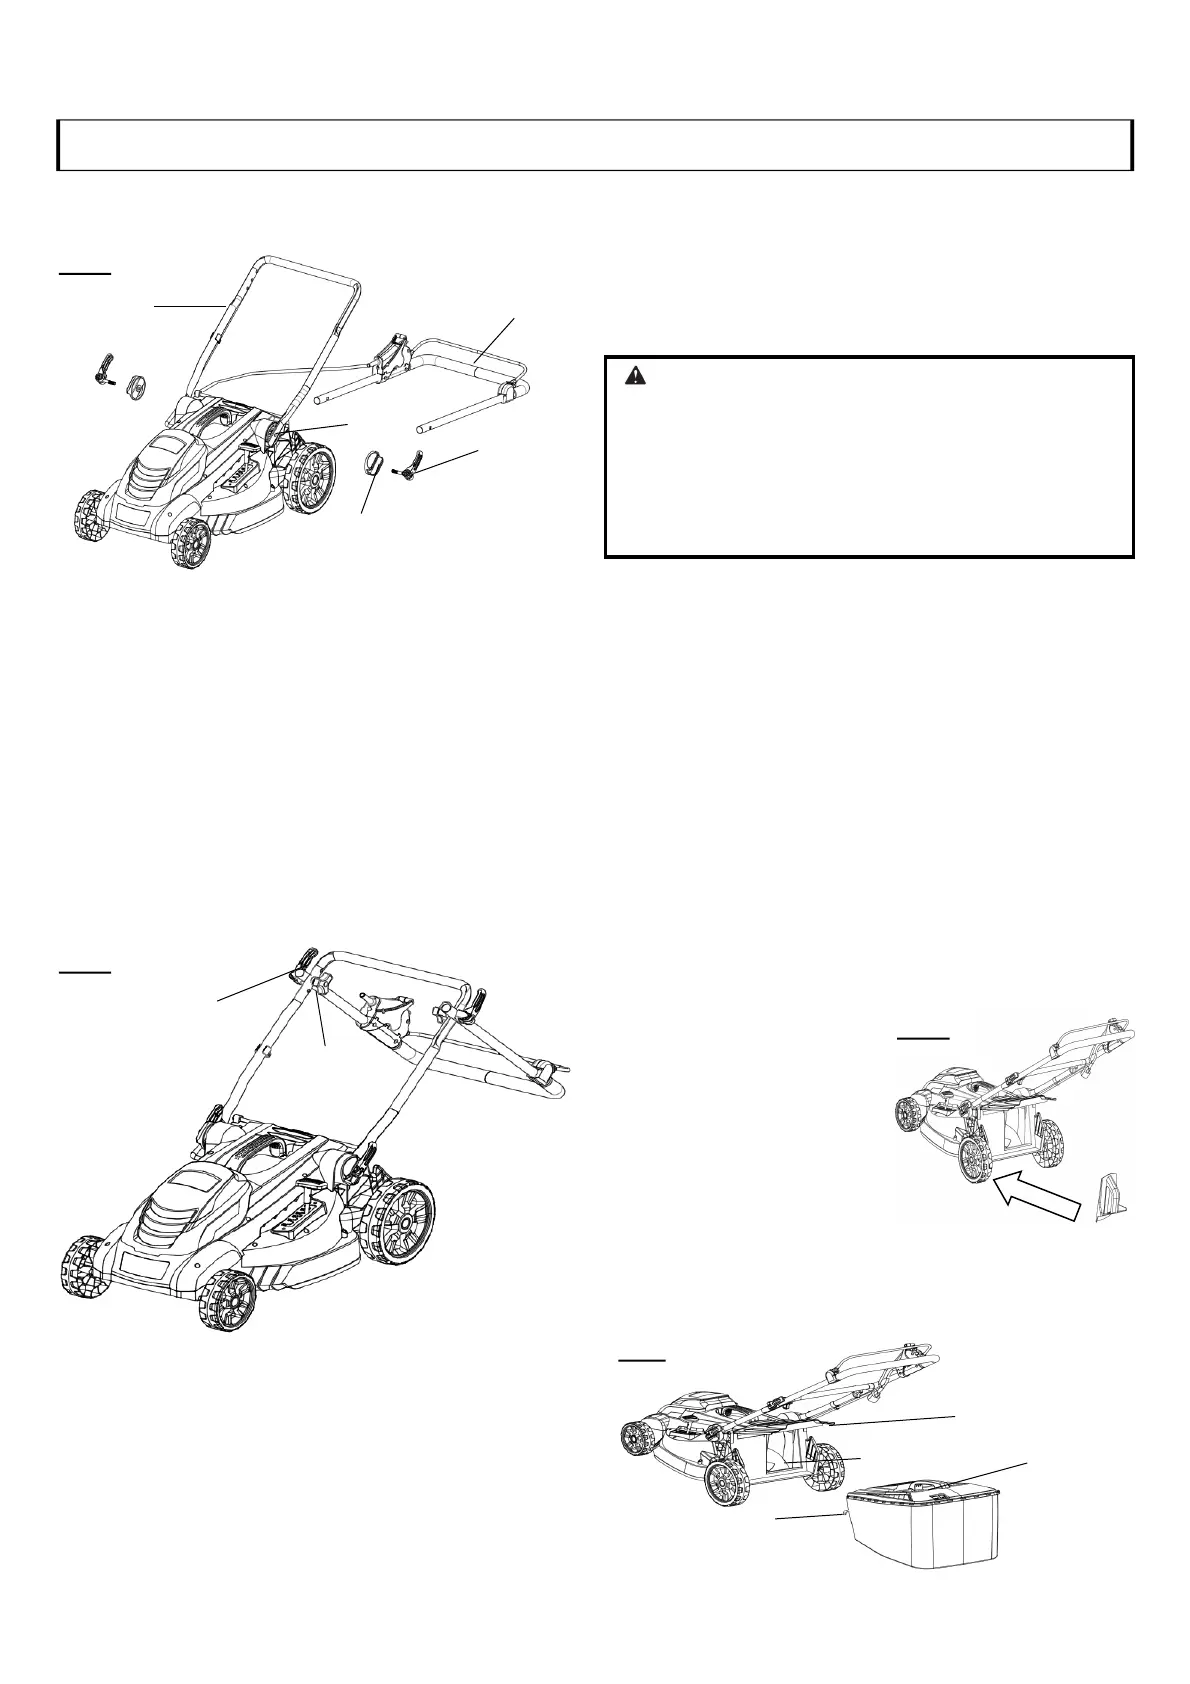
INSTALLING AND ADJUSTING HANDLE ASSEMBLY
See Figures 2 - 3
To install lower handle:
• Locate the lower handle locks and handle lock bolts.
• Place the upper handle assembly behind the mower as
shown.
• Align the lower handle with the slot on the motor
housing.
NOTE: Make sure the power cord is located inside and on top of
the handle.
• Insert the lower handle lock bolt through the lower handle
lock and thread into the mower housing until the lower
handle lock is approximately 1/4 in. from the mower housing.
• To secure the lower handle in place, close the lower han-
dle lock.
• Repeat for the other side.
To install upper handle assembly:
• Position the upper handle assembly over the lower handle as
shown in Fig.3, then insert the upper handle lock bolt
through the holes in both handles.
NOTE: The lower handle has three hole settings for height
adjustment. Make sure you use the same height setting for each
side.
ASSEMBLY
• Thread the upper handle lock knob onto the lock bolt.
• Repeat for other side.
• Pull up on the upper handle to raise it into operating
position. Make sure that the upper handle is seated in the
grooves at the top of the lower handle.
• To secure the upper handle in place, tighten the upper han-
dle knobs. Avoid pinching or trapping any power cords.
NOTE: If the upper handle is loose or separated from the lower
handle, tighten the knobs on the upper handle locks by turning
them clockwise.
To lower the handle assembly:
• Loosen the upper handle lock knobs.
NOTE: Loosen the knobs on the upper handle by turning them
counterclockwise.
• Lower the upper handle (B). Avoid pinching or trapping any
power cords.
• Release the lower handle lock.
• Push outward on each side of the lower handle until it
is free from the slot. Then, fold the handle to the
front of the unit. Avoid pinching or trapping any power
cords.
INSTALLING THE MULCHING PLUG (Fig.4)
(For Mulching Operation)
NOTE:When using the mulching plug,do not install the
grass catcher.
• Disconnect power supply.
• Lift and hold the rear
discharge door.
• Grasp the mulching plug by
its handle and insert it at a
slight angle, as shown.
• Push the mulching plug
securely into place.
• Lower rear discharge door.
• Connect to power supply
when you are ready to
mow.
INSTALLING THE GRASS CATCHER
(For Rear Bagging Operation)
See figure 5-6
DANGER:
Do not allow any part of the power cord on the mower or
extension cord to become pinched or trapped when
assembling or raising the handles. A pinched live power cord
can cause the handles to become electrically energized.
Contact with electrically live conductive parts will result in
death by electrocution, electric shock, and/or serious personal
injury.
Fig. 2
Lower Handle
Lock
Lower Handle
Lock Bolt
Slot
Upper Handle
Assembly
Lower Handle
Assembly
Fig. 3
Upper Handle
Lock Bolt
Upper Handle
Lock Knob
Fig. 4
Fig. 5
Rear Discharge Door
Grass Catcher
Handle
Hook
Rear Discharge
Opening
 Loading...