ASSEMBLY
UNPACKING
The edgermust be assembledbefore use. When removedfrom the box, the handlesections are connectedby an electrical cord andmust
be assembled.
Carefully remove everything from the box. Make sure that all items listed in the packing list are included.
Do not discard the packing material until you have carefully inspected and satisfactorily operated the edger
PACKING LIST
1 Edger
1 Auxiliary handle
2 Wingnuts and M6X50 curved head bolts for upper handle tube and lower handle tube
•
1 Knob and M6X45 bolt for auxiliary handle
4 ST4.2X20 Self-tapping screw
I Manual
Assembling the Pole Handle
Removeprotective packing material from tube ends and discard.
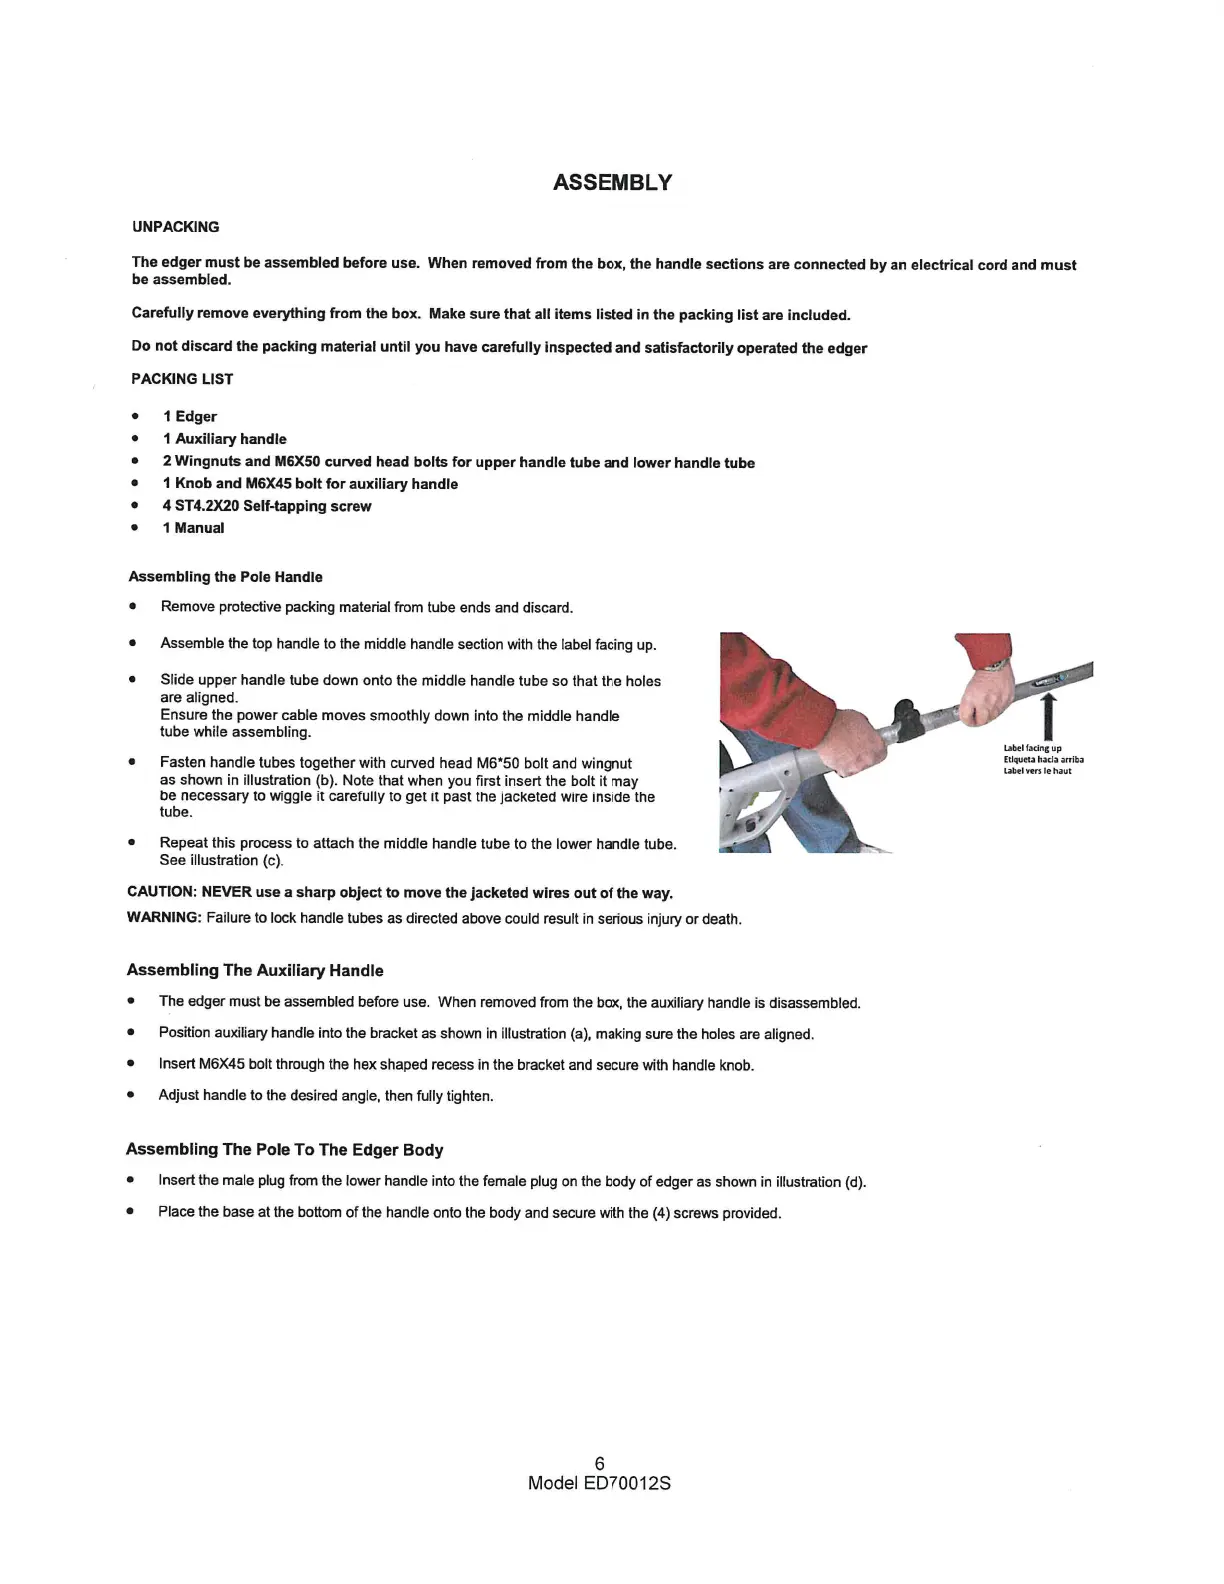
Assemble the top handleto the middlehandle section with the labelfacing up.
Slide upper handle tube down onto the middle handle tube so that the holes
are aligned.
Ensure the power cable moves smoothly down into the middle handle
tube while assembling.
Fasten handle tubes together with curved head M6*50 bolt and wingnut
as shown in illustration (b). Note that when you first insert the bolt it may
be necessary to wiggle it carefully to get it past the jacketed wire inside the
tube.
Repeat this process to attach the middle handle tube to the lower handle tube.
See illustration (c).
CAUTION: NEVER use a sharp object to move the jacketed wires out Ofthe way.
WARNING: Failure to lock handle tubes as directed abovecould result in serious injury or death.
Assembling The Auxiliary Handle
The edger must be assembled before use. When removed fromthe box, the auxiliary handle is disassembled.
Position auxiliary handle into the bracket as shown in illustration (a), making sure the holes are aligned.
Insert M6X45 bolt through the hex shaped recess in the bracket and secure with handle knob.
Adjust handle to the desired angle. then fully tighten.
Assembling The Pole To The Edger Body
• Insertthe male plug from the lower handle into the female plug on the body of edger as shown in illustration (d).
• Placethe base at the bottomof the handle onto the body and secure with the (4) screws provided.
6
Model ED70012S
Label facing up
Etlqueta
L*el vers Ie haut


 To Next Page