9
Rigging Your Fishing lines
This section details the procedure of how to use your downrigger in conjunction
with a shing rod, read it carefully. It is best to rig your lines while your boat is in
forward motion, this will help prevent tangles.
1. Once your downrigger is properly mounted, push the downrigger
brake handle forward to ensure it is in the locked position. Attach your
weight to the downrigger snap hook. Use enough weight to ensure the
downrigger cable does not drag back at more than a 30 degree angle
when travelling at trolling speeds. 12 to 15 lb. is adequate for most
shing conditions.
NOTE: Always keep tension on downrigger wire. Downrigger wire could
kink or spill off spool edges if it becomes slack.
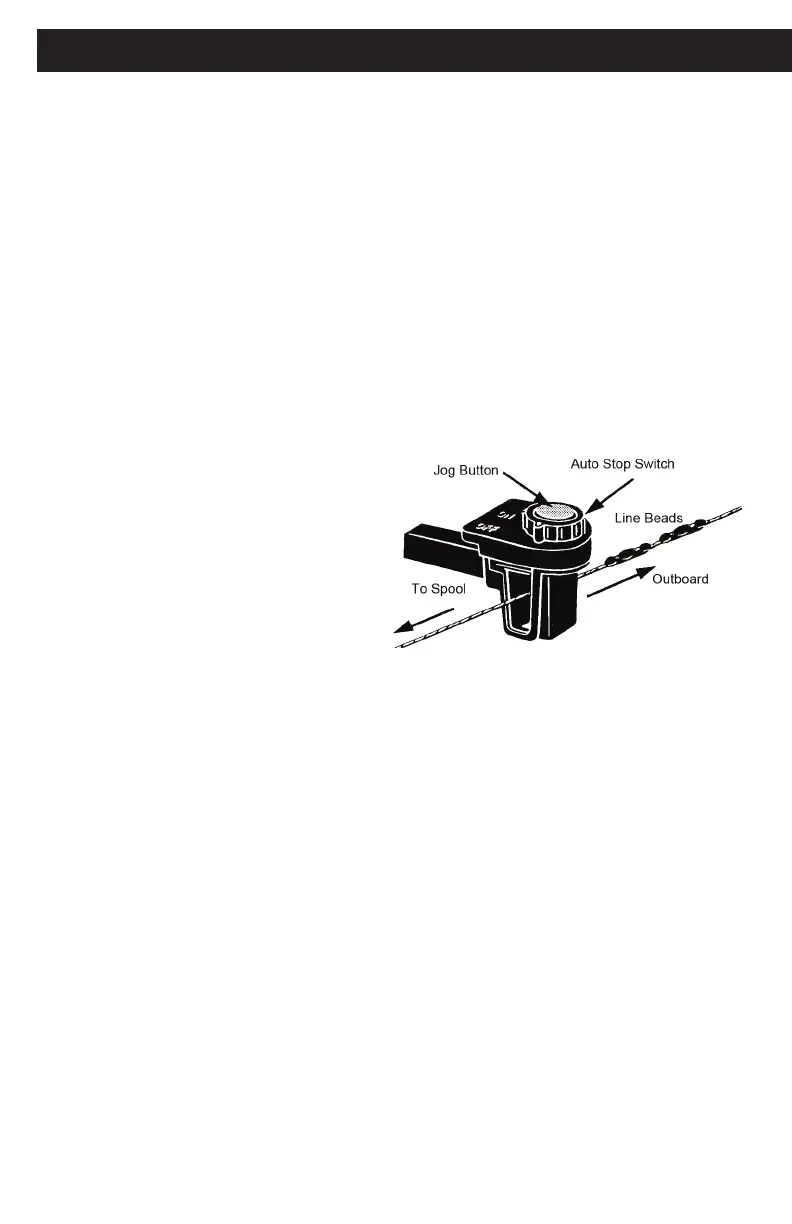
2. The AUTO STOP shuts off the downrigger when a line bead passes
through it and triggers the shut off switch (line beads have already been
installed on the downrigger cable). You can add more line beads at any
point on the cable where you would like the downrigger to stop.
3. Ensure your line beads are
present and properly located
prior to using your Scotty
Electric Downrigger
4. Have the AUTO STOP switch
in the “OFF” position, pointing
in line with the boom.
5. Connect the power source.
6. Lower the weight down
approximately ten feet.
7. Turn the AUTO STOP switch to “ON” and your downrigger will stop as
soon as your line beads enter the gate passage.
8. Your release clip should always be located at least ve feet lower than a
line bead.
9. Push the jog button to bring the weight or release clip up to the pulley.
NOTE: The Scotty High Performance downrigger is equipped with a high
speed, high torque motor. Extra caution should be observed when jogging
your downrigger weight near the surface. When retrieving your weight near
the surface you may want to apply the brake while pressing the jog button at
the same time. This will help you retrieve the weight at a slower speed. This
should only be done for the nal few feet at the surface when you wish to lift
your weight out of the water.