11
Right Box
Right Box
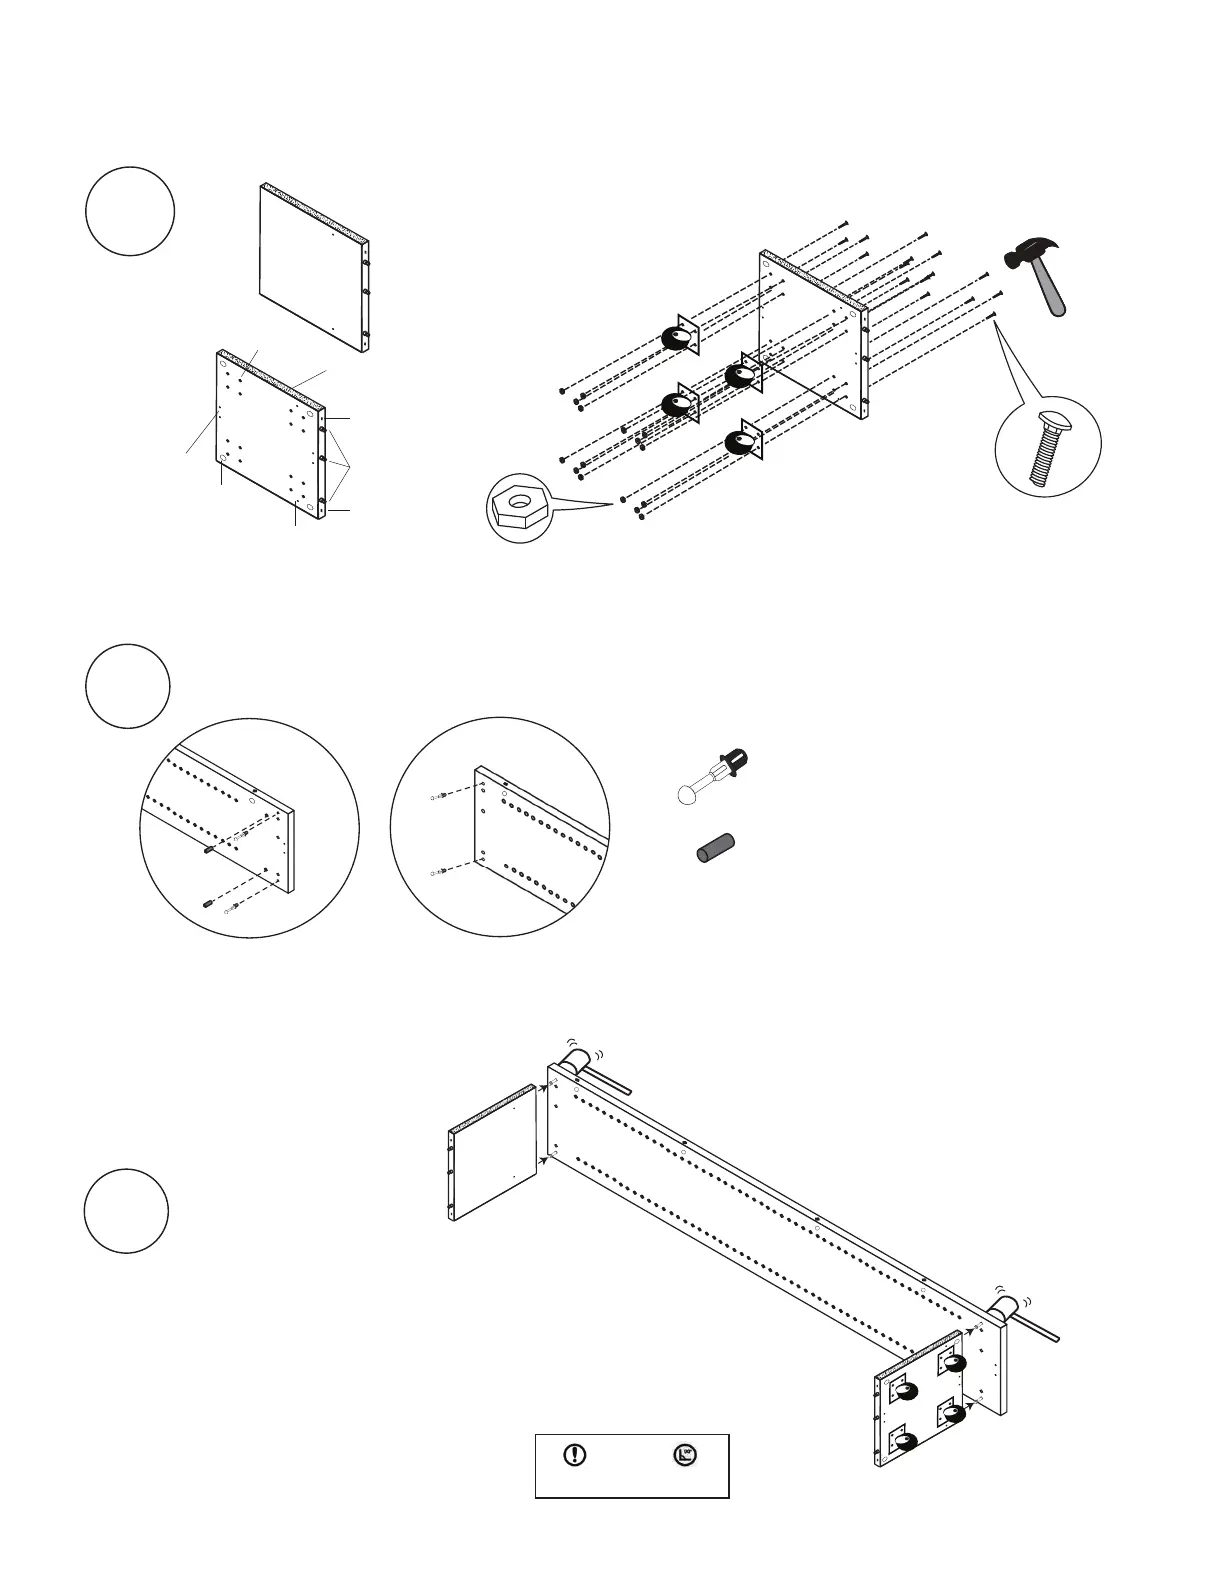
Lid
Base
16 Bolts
16 Nuts
Bottom View
Build on a blanket for best results
1
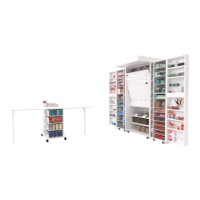
Right Box: Side 2
Small base support pins
2
Install small base support pins and posts into
BOTTOM of Side 2 as shown.
Install posts into TOP of Side 2 as shown.
Green dowel
Post hole
Locking
Cam hole
Unfinished edge
Pre-drilled
wheel screw
holes
Pre-drilled
angle bracket
holes
Post hole
Divider
screw
hole
Hammer (16) bolts into top of base.
Install (4) wheels onto bolts.
Tighten with (16) nuts using a
wrench or socket wrench.
DO NOT overtighten screws
(wheels should spin freely)
BOTTOM
TOP
x2
3
With finished edges of Base & Lid facing down,
match up posts with post holes on Side 2.
Use mallet to tap Base and Lid into Side 2.
IMPORTANT
All panels must be installed at a right angle.
Damage may occur if not properly assembled.
Right Box
Side 2
x4
Posts