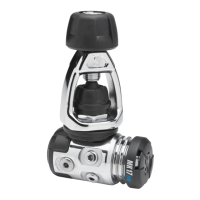
MK17 revision may 2005 7 / 7
THE 1
ST
STAGE IS NOW READY FOR THE ADJUSTMENT PHASE.
ADJUSTMENT
FOR THE ADJUSTMENT, IT IS VERY IMPORTANT TO HAVE A SUPPLY PRESSURE
CURRENTLY USED FOR DIVING WITH THE REGULATOR CONCERNED ( 200, 230 or
300 bars ).
1. Place the 1
st
stage on a full tank as previously indicated.
2. Place a precise interstage pressure gauge either at one of the interstage pressure
ports or at the end of the regulator hose
Warning ! : The gauge found on the adjustment tool is not precise enough because
of it's small size and should not be used as a workshop gauge. A bigger size and
more precise gauge should be used in a repair workshop.
3. Slowly open the tank valve.
4. Observe carefully the needle of the gauge that should move in a very smooth way
before coming to a sharp stop. Cycle the regulator about 10 times by purging the 2
nd
stage. This is to allow all the moving internal parts to reach their permanent working
position.
5. Take note of the interstage pressure when the needle of the gauge comes to a stop.
Three cases can occur:
the interstage pressure is in between 9 and 10 bars
the interstage pressure is lower than 9 bars
the interstage pressure is higher than 10 bars
6. If the gauge indicates an interstage pressure between 9 and 10 bars with a good sta-
bility of the needle of the gauge, a good adjustment has been reached.
7. If the interstage pressure is less than 9 bars, use a 6 mm Allen key to slowly screw
(clockwise) the adjustment screw. Every time the adjustment screw is turned, the
regulator should be cycled about 10 times before a reading of the interstage pressure
is taken. Proceed by 1/4 turn to reach the correct setting which should be in between
9 and 10 bars.
8. If the interstage pressure is higher than 10 bars, proceed as above but unscrew (an-
ticlockwise) the adjustment screw to reach the correct setting.
9. If after several unsuccessful attempts in reaching a stable interstage pressure,
change the diaphragm.
Note: As we previously carried out the leak test between the HP orifice and
seat, a bad interstage pressure lock does not come from these parts. A distort-
ed diaphragm is often responsible for a poor interstage pressure lock!!!
 Loading...