10
FastCat14.4 | ASSEMBLY & INFLATION
Start with floor grommets.
Adjust transom board to
align holes.
Place one washer on screw
and insert screw through
its grommet. Once through,
place second washer on the
screw and turn the knob
onto the screw. Leave knobs
loose until all screws are in
place.
Transom Attachment
Hardware
6 - M8 x 90 Hex Head Screws
12 - 1” Flat Washers
6 - Threaded Knobs
Motor Mount Transom Board
Transom installation is
easiest when floor
chamber is inflated to
working pressure but side
chambers are soft.
Once floor is inflated to
working pressure, insert
transom into motor mount
grommets.
Motor mounting plate with
loop faces inboard.
WARNING:
Air compressors that are
designed for other uses like
tire inflation (usually over
30 psi) can easily over-in-
flate and cause harm to
your Sea Eagle that uses a
much lower pressure. For
this reason, we recommend
using only Sea Eagle
manual or electric pumps.
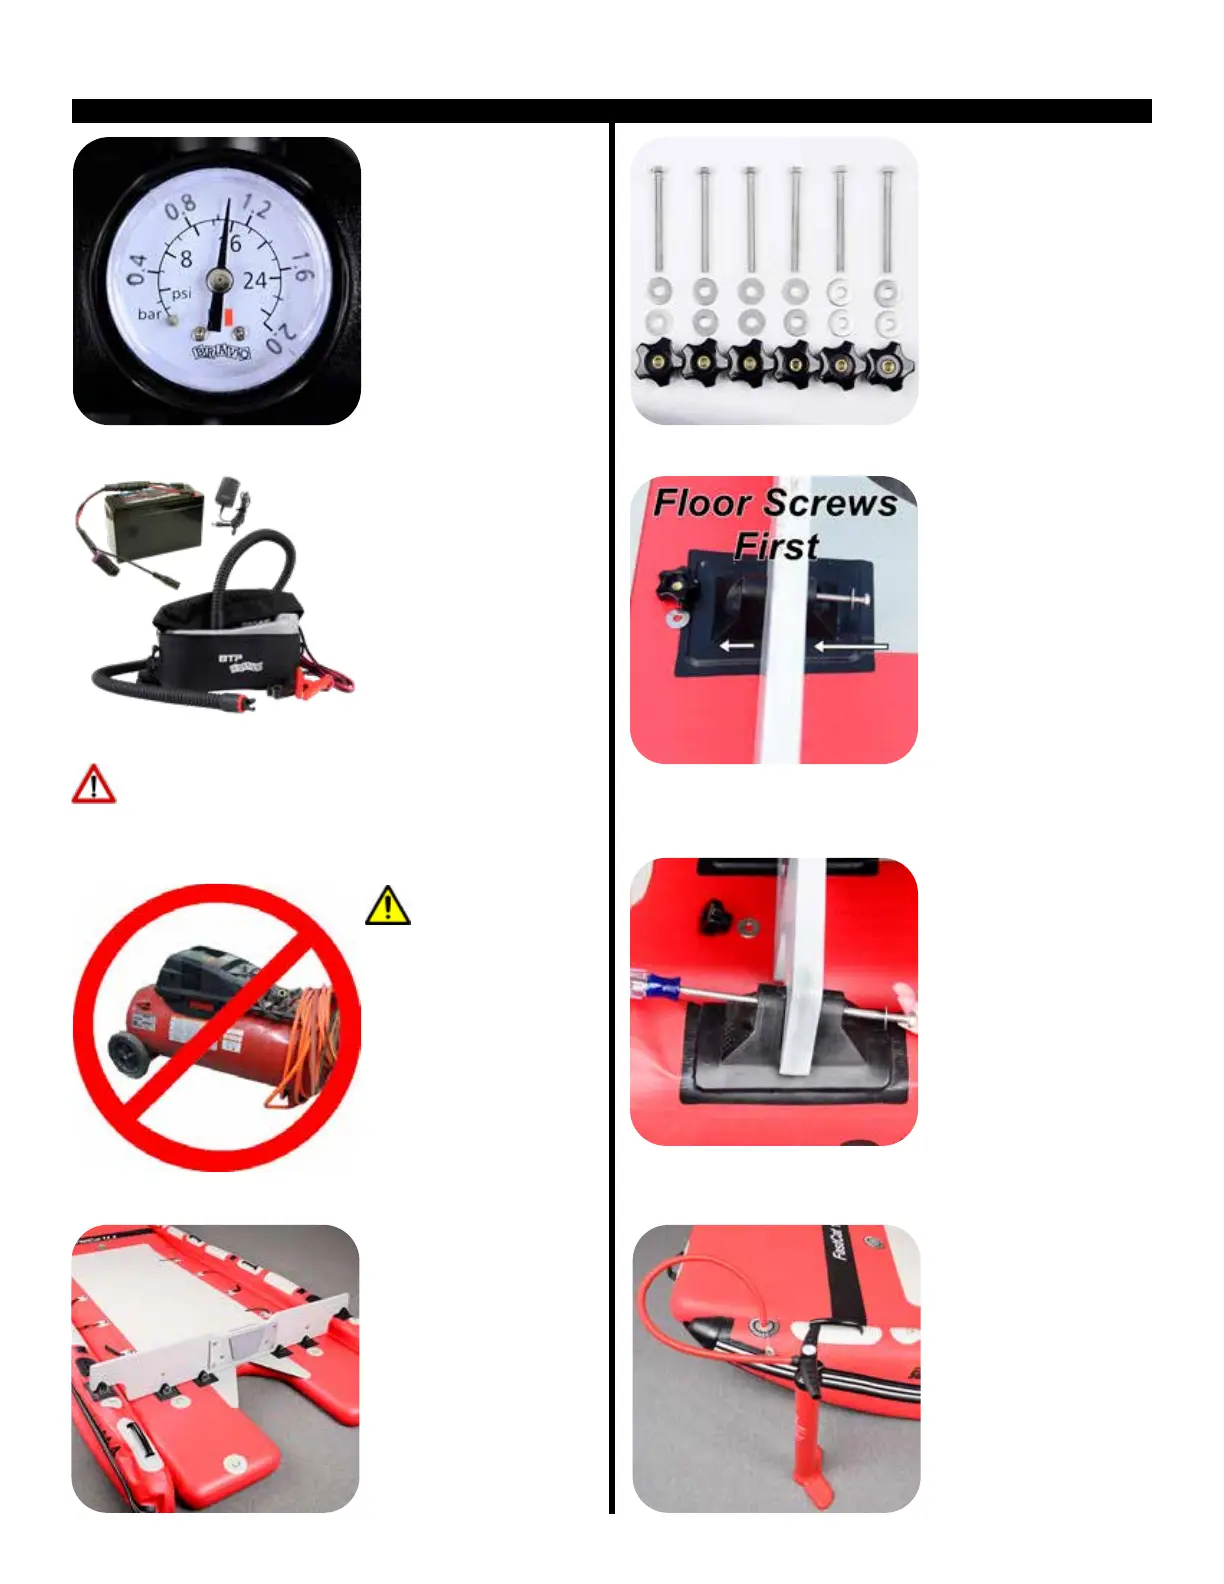
Pressure gauge will not
register until chamber
begins to get pressurized.
Pump until working
pressure of between 13-
14.5 PSI is reached. Do not
exceed 15 PSI (1 bar).
Inner numbers show
pressure in PSI.
An electric pump, like the
optional BTP Two-Stage
Turbo Electric Pump, is
recommended for inflating
the FastCat14.4.
One charged BTP battery
(8Ah) will not inflate the
entire boat.
Caution: Do not run the pump for more than 20 minutes.
A cooling period of 20 minutes is required.
Pump air into the side
chambers to give them
enough shape to raise the
motor mount grommet
near to the transom.
A phillips head screwdriver is
helpful for lining up holes.
Also, push and pull the
transom fore and aft to help
the screws through the
holes.
 Loading...