1.4.3 INSTALLATION OF SEAKEEPER
1. Locate and position the lower snubbing washers onto vessel foundation structure at each of
the 4 hole locations.
a. NOTE: Sealant or caulk is recommended to be applied around the outside edge of the
lower face of each lower snubbing washer, where it contacts the vessel structure. This will
maintain the position of the snubbing washer and prevent water from wicking between
the parts and setting up corrosion.
b. Sealant is not required between the snubbing washer faces and isolator bushings.
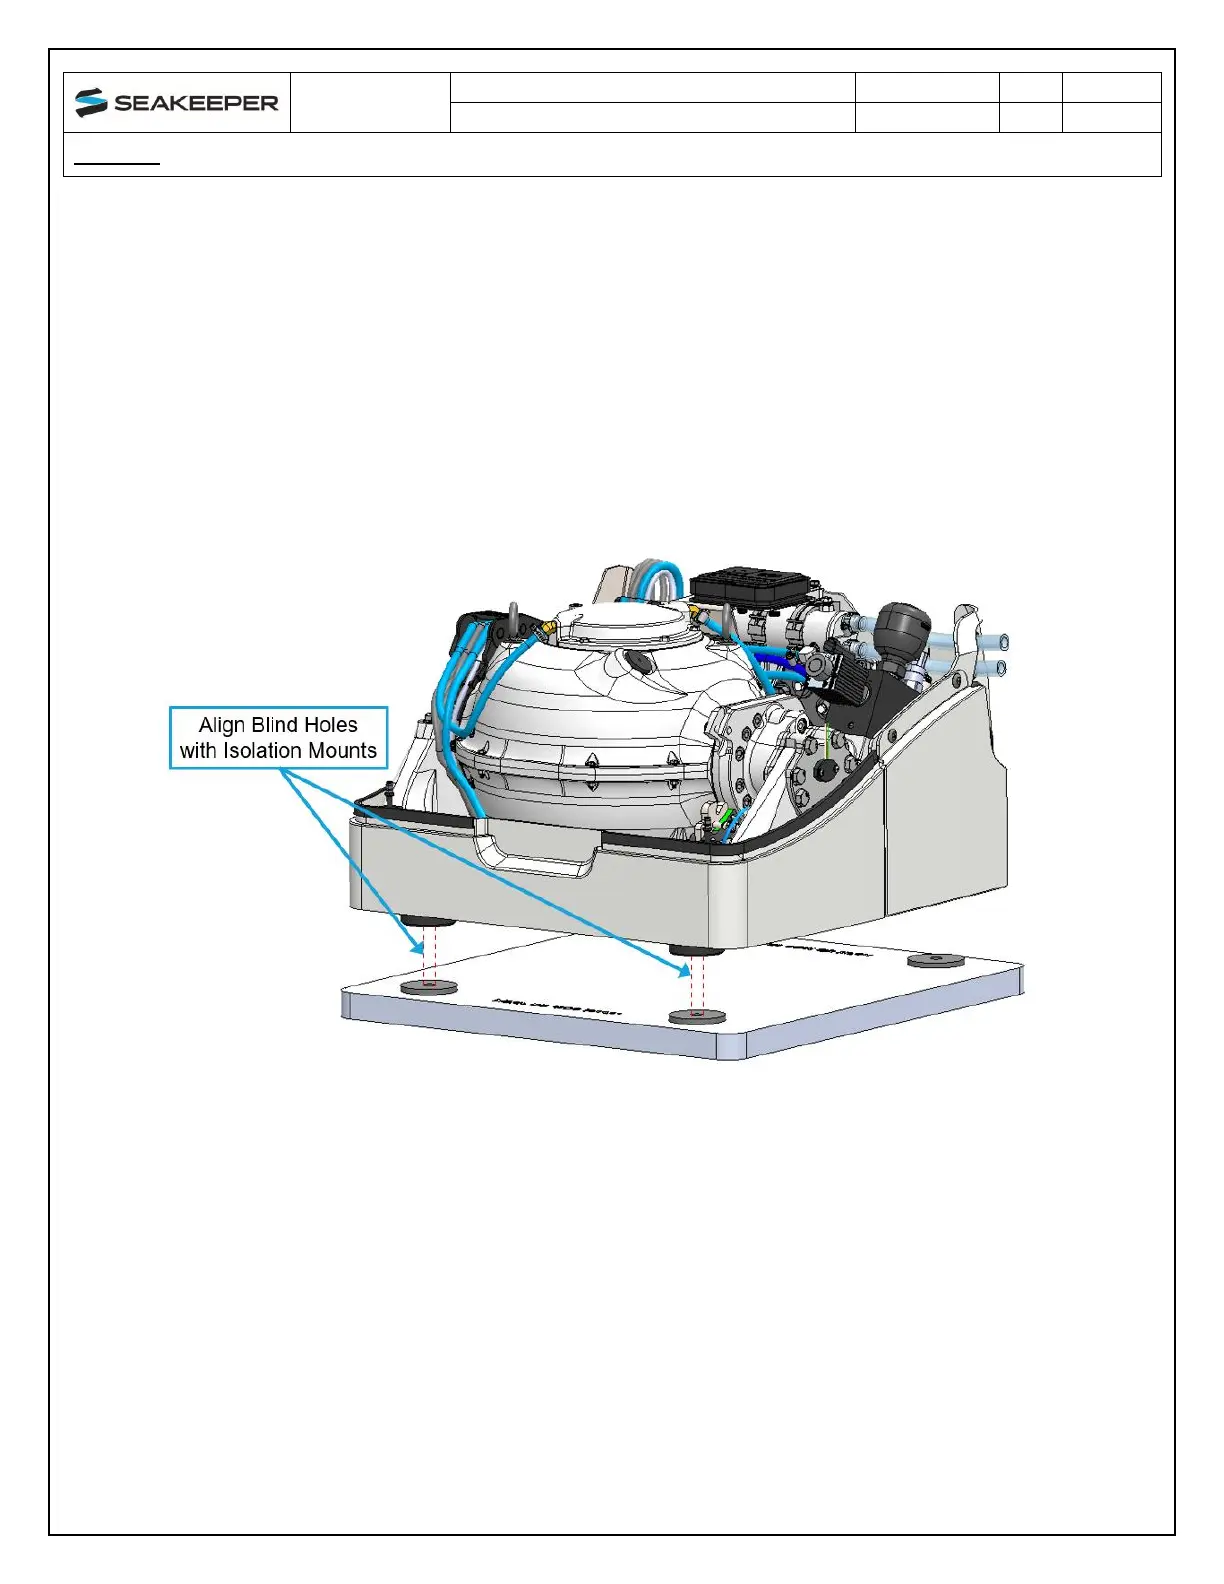
2. Lower the Seakeeper 1 onto the lower snubbing washer on the vessel structure and align over
drilled holes.
Figure 7: Seakeeper 1 Installation
3. Using a flexible extendable magnet (McMaster P/N: 3838A42 or similar), install the Seakeeper
1 Bolt-In Kit – P/N 90599: isolator mount sleeve tube, upper snubbing washer, wedge-lock
washer, and bolt at each isolation mount.
a. Figure 8 shows an exploded view of the Bolt-In Kit.
b. Before installation, apply a moderate coat of anti-seize to the threads of each bolt.
c. The upper snubbing washer, wedge-lock washer, and M14 Bolt can be stacked as one
assembly by attaching the magnet to the snubbing washer.
4. Torque all fasteners to 115 ft-lbs. (156 N-m). New bolts must be used for each installation and
reinstallation.
a. Threaded inserts can be reused if they are found to be intact and without damage.
 Loading...