5.3.2. During the “Track” mode, the real-time torque reached
during operation will be displayed.
5.3.3. To select either “Track” or “Peak” mode, rst press: and,
within 3 seconds: .
5.4. UNIT SELECTION:
With the unit switched on, press and hold for 5 seconds
to switch between Nm and lb/ft.
5.5. PROGRAMMING THE PRE-SET TORQUE VALUE.
5.5.1. Press and hold the button for 3 seconds to enter the
setting mode. Release the button when “Set” is shown on the
screen.
5.5.2. Press button to increase the pre-set torque. Note: In the
setting mode, the display will NOT show peak on the left side
of the screen.
5.5.3. To increase the value, keep the button pressed to increase
the rate of increase.
5.5.4. To decrease the value, press to zero the display, then
press to increase to the required value.
5.5.5. Once the target torque has been selected, the screwdriver will
memorise that torque after 3 seconds.
5.5.6. If a target torque of more than 100% maximum torque
value(5Nm)is selected, the display will zero and no setting will
be entered.
5.6. USING THE TORQUE SCREWDRIVER
5.6.1. After applied force, the maximum value reached will be saved
additionally and the value is shown on the display for approx.
2 seconds. If the target torque is reached,the buzzer will
sound, the LED indicator will light and the handle will vibrate
for approx. 2 seconds.
5.6.2. This value will continue ashing allowing the reading to be
used for the next application. Alternatively, the button may
be pressed to zero the reading before the next application.
5.6.3. When force is applied in an anticlockwise direction, the display will show a minus (-) sign on the left side of screen. The following
reading will be positive when clockwise torque is applied.
5.6.4. The meter will switch off automatically after approx. 2 minutes of inactivity.
WARNING: DO NOT use the screwdriver when the battery level is low. An inaccurate reading is possible in this condition.
6. MAINTENANCE
8 DO NOT apply force when the power is turned off.
8 DO NOT expose the unit to strong magnetic elds, corrosive agents, excessive heat or humidity.
9 Clean only with a damp cloth, do not use proprietary cleaners or solvents to clean this product.
9 If it is anticipated that the screwdriver will be out of use for a time, the batteries should be removed (g.2).
9 When not in use, store in a cool, dry location away from direct sunlight and out of the reach of children.
STS103 Issue 3 (H 2,3,4) 04/04/24
Original Language Version
© Jack Sealey Limited
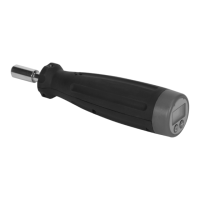
Loosen the 2 screws at location ‘‘B’’
then remove the cap to change the
batteries.
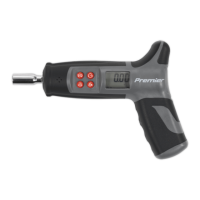
:Press to enter SETTING mode and press to increase the value to
programme pre-set torque.
FUNCTION KEYS
PREPARATION:
Battery Installation & Removal
KEYPAD
:Press to turn the screwdriver on/Press and hold the button for 5 seconds
to alter the display units/ in measurement mode, press to zero.
g.2
BATTERY REMOVAL: SEE FIG.2.
Under the Waste Batteries and Accumulators Regulations 2009, Jack Sealey Ltd are required to inform potential purchasers of products
containing batteries (as defined within these regulations), that they are registered with Valpak’s registered compliance scheme. Jack
Sealey Ltd Batteries Producer Registration Number (BPRN) is BPRN00705.
Note: It is our policy to continually improve products and as such we reserve the right to alter data, specifications and component parts without prior
notice.
Important: No Liability is accepted for incorrect use of this product.
Warranty: This product comes with a lifetime guarantee against manufacturing defects.
Sealey Group, Kempson Way, Suffolk Business Park, Bury St Edmunds, Suffolk. IP32 7AR
01284 757500 sales@sealey.co.uk www.sealey.co.uk
WEEE REGULATIONS
Dispose of this product at the end of its working life in compliance with the EU Directive on Waste Electrical and Electronic
Equipment (WEEE). When the product is no longer required, it must be disposed of in an environmentally protective way. Contact
your local solid waste authority for recycling information.
ENVIRONMENT PROTECTION
Recycle unwanted materials instead of disposing of them as waste. All tools, accessories and packaging should be
sorted, taken to a recycling centre and disposed of in a manner which is compatible with the environment. When
the product becomes completely unserviceable and requires disposal, drain any uids (if applicable) into approved
containers and dispose of the product and uids according to local regulations.
+
 Loading...