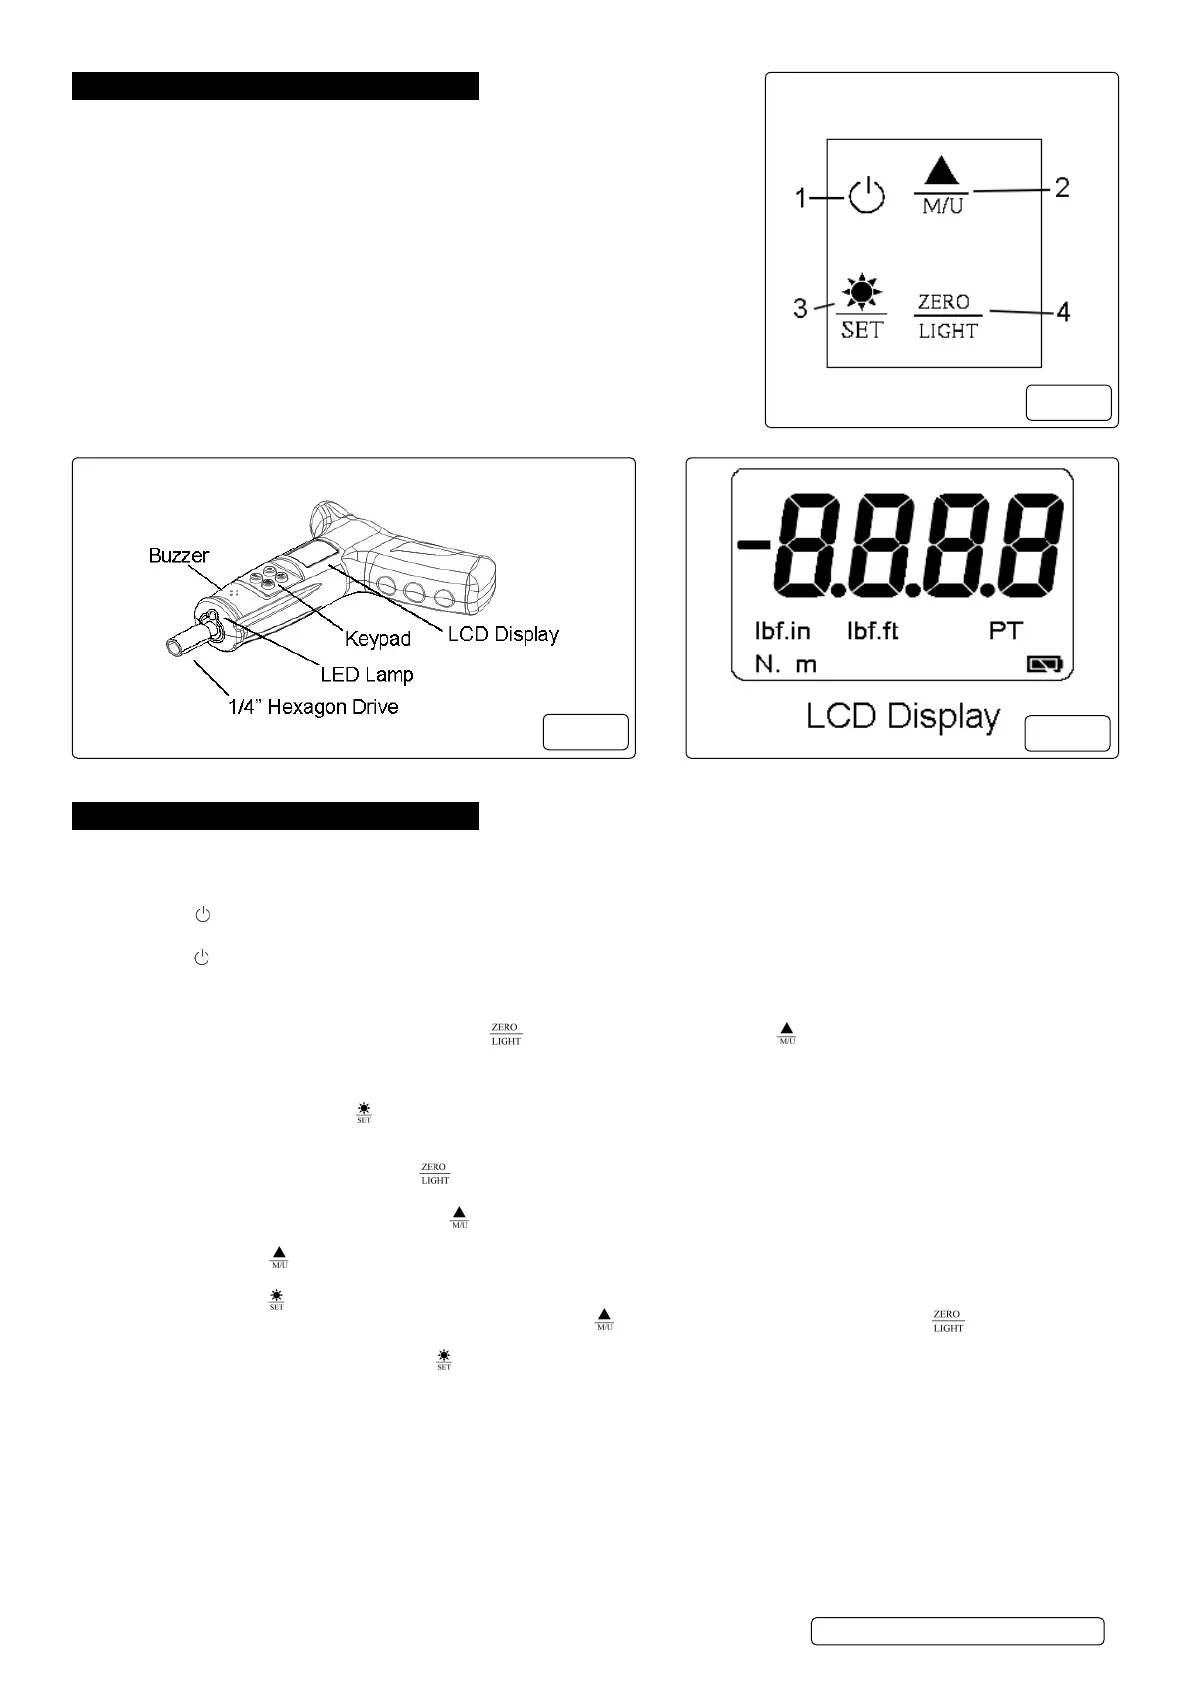
4. FUNCTION KEYS (FIG.1.)
1. Press to turn the unit on and off.
2. Press to select the measurement mode between “track” and “peak”. / Press
and hold the button for 2 seconds to select the units. / Under setting mode, press
to increase the value to program pre-set torque.
3. Under measure status, press to switch on and off the back light. / Under
measure status, press and hold the button for 2 seconds to enter the setting
mode. / Under setting status, press to memorize the setting value and quit setting
mode.
4. Under measure status, press to Zero tare. / Under measure status, press
and hold the button for 2 seconds to switch on and off the LED lamp which is
at the front of the tool. / Under setting mode, press to decrease the value to
program pre-set torque.
5. PREPARATION.
5.1. Install the new batteries.
5.1.1. Remove battery cover on the side of the screwdriver. Place batteries in battery compartment and replace cover.
5.2. Turning the tool on / off.
5.2.1. Press “ ” button to turn on. The buzzer sounds and on the display you can see all readouts at the same time for just a moment. Then
wait the display will show “ 0000 ” on the screen.
5.2.2. Press “ “ button again to turn off the electronic system.
5.3. Activating the “peak mode”
5.3.1. After turning on the display, the default is in “ TRACK “ mode, i.e. the real-time torque reached during operation will be displayed.
5.3.2. During the “ PEAK “ mode, the torque screwdriver will record and display the present maximum value. When the force released, the
maximum value is shown on the display. Press “ “ button to zero the value or press “ “ button switch between TRACK mode
and PEAK mode.
5.4. Turning the LCD Back light on/off.
5.4.1. The LCD Back light can be turned on prior to or after programming the torque.
5.4.2. In order to do this, press the “ “ button to turn on or turn off.
5.5. Turning the LED lamp on/off.
5.5.1. The LED lamp, at the front of the tool can be turned on prior to or after programming the torque.
5.5.2. In order to do this, press and hold the “ “ button for 2 seconds to turn on or turn off.
5.6. Peak & Track mode and Units selection
5.6.1. Turn the torque screwdriver on and press “ “ button switch between “TRACK“ mode and “PEAK” mode. In “PEAK” mode, the display
shows “peak” on the left side of the screen.
5.6.2. Press and hold “ ” button for 2 seconds to select units between N.m / lbf-ft / lbf-in.
5.7. Programming the Pre-set Torque value
5.7.1. Press and hold “ ” button for 2 seconds to enter the setting mode, the display shows “ SET ” on the screen. After 2 seconds, “0.00” or
the last programmed value will be shown on display, press the “ ” button to increase the value, or press the “ ” button to decrease
the value.
5.7.2. Once the target torque is select, press “ ” button to memorize and quit setting mode.
WARNING! If the pre-set torque exceed the 125% Maximum torque value (20Nm), the value will jump back to Zero. The pre-set has
failed. If the warning indication did not work, reset mode again. The last pre-set torque value will be shown on the screen. If no value
shows, it means the pre-set has failed. Please read the Instruction Manual again and follow the procedure of “Pre-set Torque Value”.
g.1
g.2
g.3
STS104 | Issue 1 15/05/17
Original Language Version
© Jack Sealey Limited

 Loading...