Latest products and information available at www.sealite.com
8
SL-60
2–3NM+ Solar Marine Light
3UHVV¿W%LUG'HWHUUHQW6SLNH
7KLVXQLWLVHTXLSSHGZLWKDSUHVV¿WELUGGHWHUUHQWVSLNHORFDWHGRQWKHWRSRIWKHODQWHUQ
,QVWDOODWLRQRIWKHSUHVV¿W%LUG'HWHUUHQW6SLNH
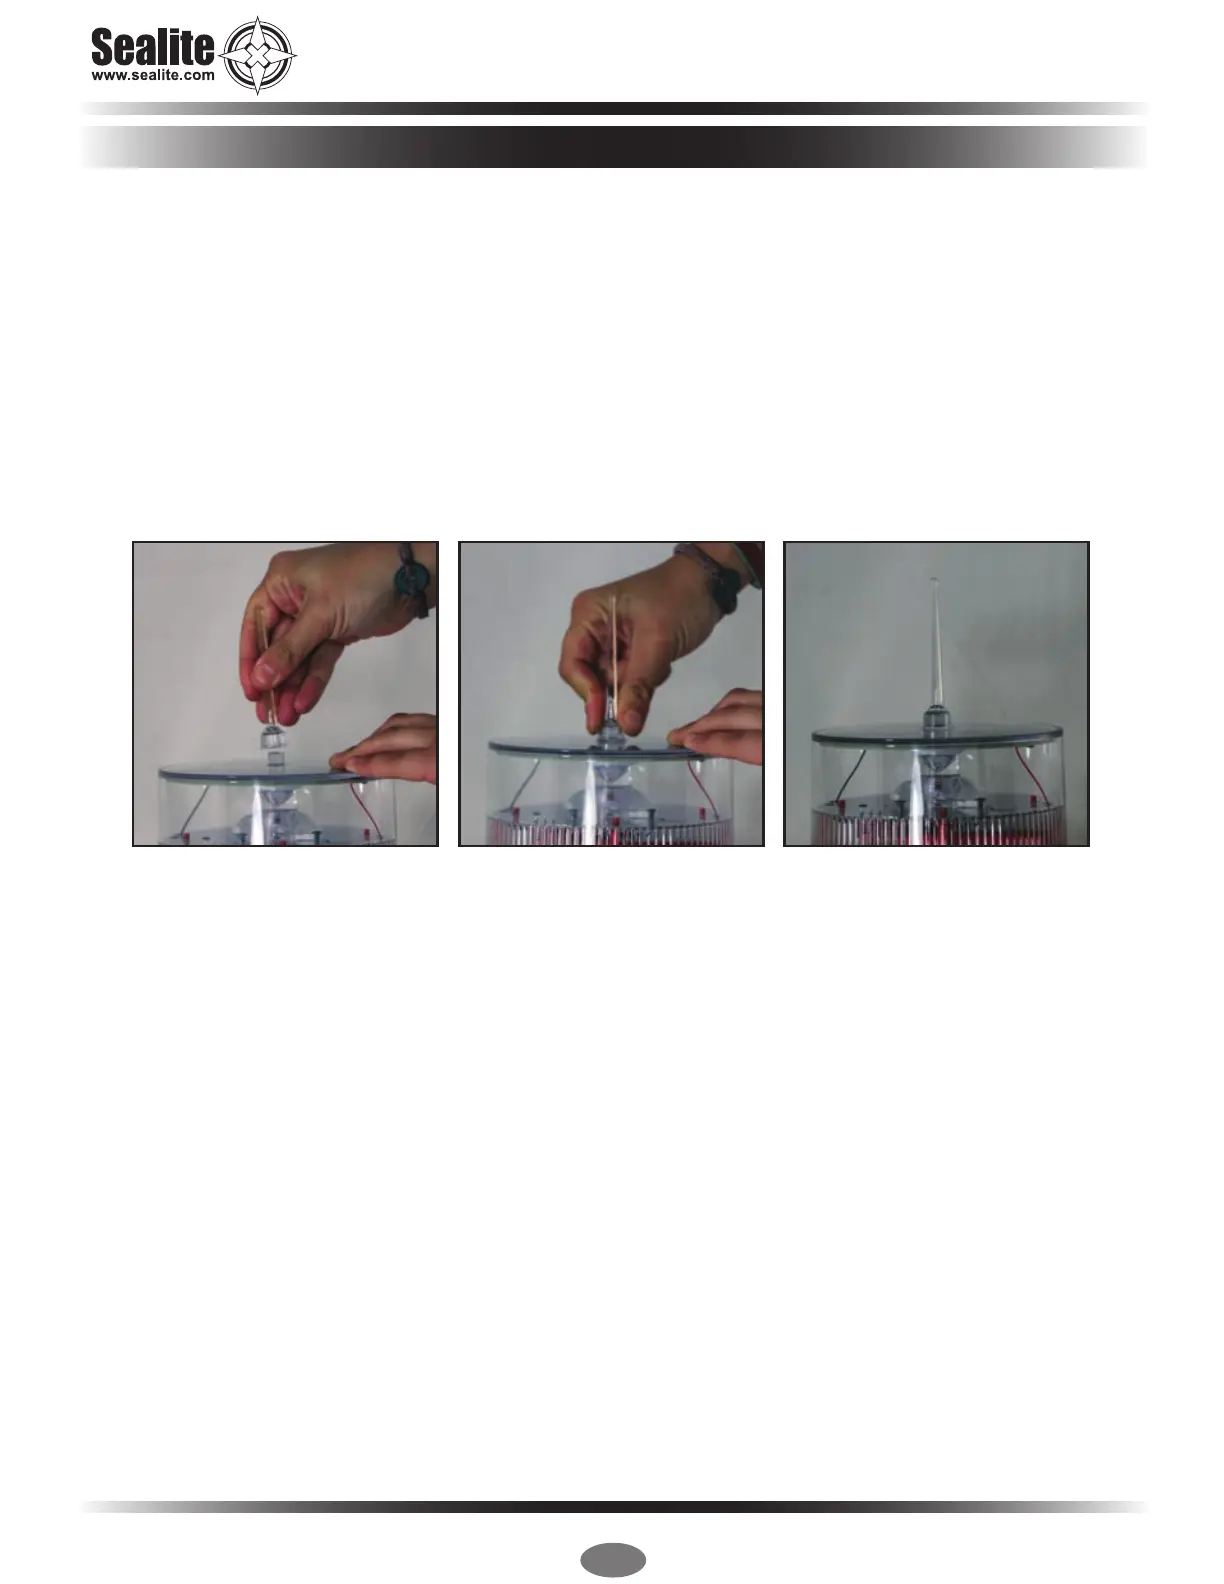
Prior to installing the bird spike, ensure the hole is free of dirt and debris.
Align the bottom hole of the bird spike with the tip at the top of the lantern and push until you have
complete contact as shown in the photo below. Adhesives or locking compounds are not required.
5HPRYDORIWKHSUHVV¿W%LUG'HWHUUHQW6SLNH
Grab the spike and remove as shown below. You may need to apply slight pressure to the area around
the top of the lantern in order to remove the bird spike.


 To Next Page