The SeaStar Solutions ProTrim PT1000/2000 is a replacement toggle switch and decal kit, part number CA76431P, designed for marine applications. This kit is specifically intended for replacing the toggle switch in the PROTRIM® Single or Dual Bezel Switch Assembly found on boats. The switches are engineered to be compatible with various SeaStar Solutions steering systems, including Safe-T®, NFB, Rack & Pinion, Performance Tilt, and Sea Star® Hydraulic Helms.
Function Description:
The primary function of the ProTrim PT1000/2000 kit is to provide a replacement for a worn or damaged toggle switch within the ProTrim assembly, which controls the boat's engine trim. The toggle switch allows the operator to adjust the engine's trim position (upward or downward) to optimize boat performance and handling. The kit includes the necessary components to restore the full functionality of the trim control system. The replacement process involves removing the old switch and installing the new one, ensuring proper electrical connections for the trim up and trim down functions. The kit also includes new decals to refresh the appearance of the switch assembly.
Important Technical Specifications:
The kit includes the following components as detailed in the parts list (Figure 1):
- Item 2: Toggle Switch: This is the core component of the kit, providing the electrical switching mechanism for trim control. The PT1000 kit includes one toggle switch, while the PT2000 kit includes two.
- Item 8: Decal Set: This set includes the necessary decals for the ProTrim assembly, ensuring clear labeling of the trim functions and refreshing the aesthetic. The PT1000 kit includes one decal set, and the PT2000 kit also includes one.
Other components of the ProTrim assembly, though not included in this specific replacement kit, are essential for its operation and are listed for context:
- Item 1: Bracket: The mounting bracket for the switch assembly.
- Item 3: Hex Lock Nut: Secures the switch in place.
- Item 4: Cover: The plastic cover for the switch assembly.
- Item 5: Knurled Face Nut: Holds the plastic cover in place.
- Item 6: Boot: Protects the operating lever and switch from environmental elements.
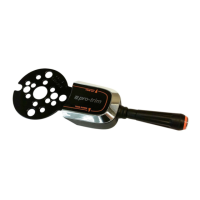
- Item 7: Operating Lever: The physical lever used by the operator to actuate the switch.
- Item 9: Wire Harness (not shown): Connects the switch to the boat's electrical system.
- Items 10-13: Various Screws and Lock Nuts (not shown): Fasteners for assembling the ProTrim unit.
The manual specifies that only the hardware provided should be used for replacement, emphasizing the importance of not substituting components to ensure proper function and safety. The manual number is IS-CA76431-1, Rev 1, dated 03/2014.
Usage Features:
The ProTrim system, once the replacement switch is installed, offers intuitive control over the engine trim. The operating lever is designed for easy manipulation, allowing the boat operator to make precise trim adjustments.
- Ergonomic Design: The switch assembly, with its operating lever and boot, is designed to be easily accessible and operable from a normal driving grip, even when the steering wheel position is adjusted (e.g., with tilt steering).
- Adjustability: The position of the operating lever relative to the steering wheel rim can be adjusted to suit the driver's preference. This is achieved by slightly bending the mounting bracket, allowing the lever to be moved closer to or farther from the rim. This customization enhances comfort and control for different operators.
- Clear Labeling: The included decal set ensures that the trim up and trim down functions are clearly marked, preventing confusion during operation.
- Compatibility: The ProTrim system is compatible with a wide range of SeaStar Solutions steering helms, making it a versatile accessory for various boat configurations.
Maintenance Features:
The replacement kit itself is a maintenance item, designed to facilitate the repair of the ProTrim system rather than requiring ongoing maintenance of its own.
- Simple Replacement Procedure: The manual outlines a straightforward, step-by-step process for replacing the toggle switch:
- Remove the operating lever with boot (counterclockwise).
- Remove the face nut.
- Remove the plastic cover.
- Remove the hex nut holding the switch.
- Disconnect and remove the old switch.
- Connect wires to the new switch (red to center terminal, green to top, blue to bottom).
- Mount the new switch with the hex nut.
- Reinstall the cover, face nut, and operating lever with boot.
- Wiring Instructions: Specific wiring instructions (red to center, green to top, blue to bottom) are provided to ensure correct electrical connections, which is crucial for the proper functioning of the trim system.
- Post-Installation Testing: After installation, it is recommended to test the ProTrim system to ensure it performs correctly. Pushing the lever up should move the engine upward, and pushing it down should move the engine downward. This verification step helps confirm the successful replacement and proper wiring.
- Wiring Inspection: A final inspection of the wiring connections and wrapping them with good quality electrical tape is advised to ensure durability and protection against marine environmental factors.
- Decal Application: The new decals should be applied to a clean, dust-free switch cover for optimal adhesion and appearance.
- Long-Term Adjustment: The manual suggests operating the ProTrim for some time before making final adjustments to the lever distance, allowing the driver to determine the most suitable position based on actual usage.
The ProTrim PT1000/2000 replacement kit is an essential component for maintaining the functionality and aesthetics of a boat's engine trim control system, ensuring safe and efficient operation on the water. The detailed instructions and clear parts list facilitate a smooth replacement process.