EasyManua.ls Logo

SECO-LARM SD-995C-D3Q User Manual

SECO-LARM SD-995C-D3Q
4 pages
To Next Page IconTo Next Page
Page #1 background imageLoading...
Page #1 background image
Manual
SD-995C-D3Q
No-Cut Door Strike
Features:
43RG
Static strength – 1,500-lb (680kg)
Dynamic strength – 70lb-ft (9.68kg-m)
12/24 VDC Operating voltage
Tested to 250,000 cycles (UL Tested),
tested to 1,000,000 cycles (Factory Tested)
Low current draw: 300mA@12VDC,
150mA@24VDC
The SD-995C-D3Q is intended to be used with
UL Listed Exit Hardware
The SD-995C-D3Q shall not impair the intended
operation of an emergency exit
The SD-995C-D3Q shall not impair the operation
of panic hardware mounted on the door
Low profile: Strike is only 1
1
/
16
" deep for
use with aluminum frames
Field selectable for fail-safe or
fail-secure operation
Mounting tabs included for mounting to
hollow aluminum & metal doors
Reversible non-handed design fits either
right-hand or left-hand doors
For indoor use only
NOTE: SD-995C-D3Q has no horizontal or
vertical adjustments.
Question and Answer IconNeed help?

Do you have a question about the SECO-LARM SD-995C-D3Q and is the answer not in the manual?

SECO-LARM SD-995C-D3Q Specifications

General IconGeneral
BrandSECO-LARM
ModelSD-995C-D3Q
CategoryLocks
LanguageEnglish

Summary

Features

Low Profile Strike for Aluminum Frames

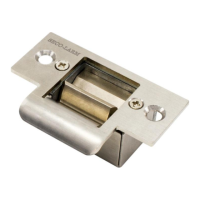
Strike is only 11/16" deep for use with aluminum frames.

Field Selectable Fail-Safe/Fail-Secure

Field selectable for fail-safe or fail-secure operation.

Mounting Tabs for Hollow Doors

Mounting tabs included for mounting to hollow aluminum & metal doors.

Reversible Non-Handed Design

Reversible non-handed design fits either right-hand or left-hand doors.

Indoor Use Only

For indoor use only.

Selecting Fail-Safe or Fail-Secure

Configure Fail-Safe Operation

Rotate field-selectable plug so that '1' is facing up for fail-safe operation.

Configure Fail-Secure Operation

Rotate field-selectable plug so that '2' is facing up (Default).

Installation

Measure Latch and Center Lines

Measure latch line and center line on door jamb for alignment.

Align Mounting Template

Align the included mounting template to the latch and center lines.

Mount Strike to Tabs

Mount the strike to the mounting tabs using machine screws.

Connect to Power

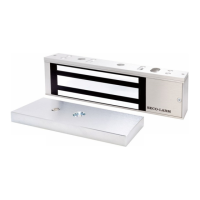
Connect to power according to the wiring diagram.

Troubleshooting

Strike Not Activating

Check wiring, voltage, amperage, and activation device for proper operation.

Door Fails to Open

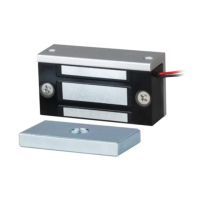
Check door latch operation and adjust strike position if necessary.

Strike Buzzing Sound

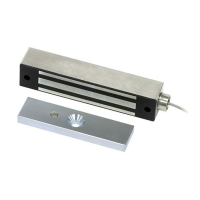
Ensure the strike is connected to a DC power supply.

Related product manuals