Switch Installation Manual
[continued]
1. Screw the switch mounting bracket to the right inside
wall of the PC/Printer tower just above the PC shelf.
2 Mount the switch to the switch mounting bracket.
Remove the nut that is on the switch. Stick the switch
through the hole then put the nut back on to hold the
switch in place.
3. Run the wire from the switch to the credit board.
4. Remove the credit board.
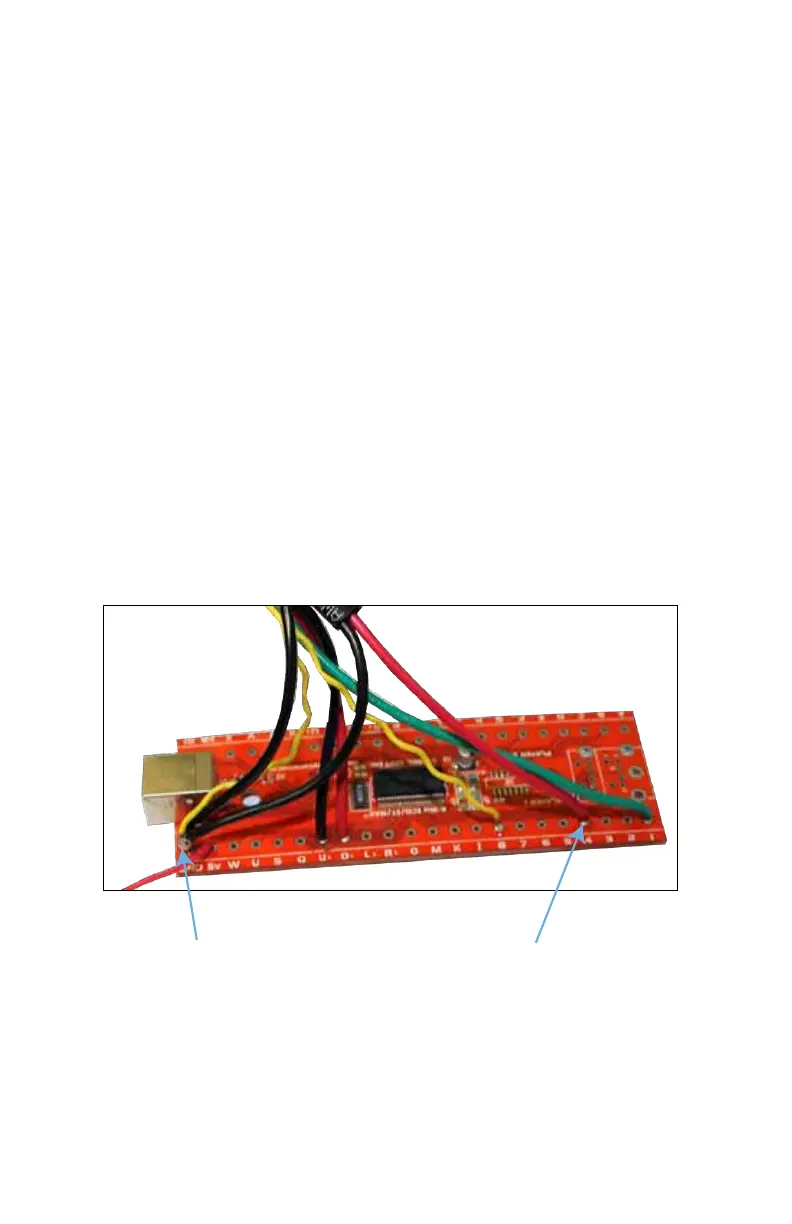
5. Solder the red wire on the switch to the #4 port on the
credit board.
6. Solder the black wire on the switch to the ground port
on the credit board.
Red wire from
switch to port 4.
Black wire from
switch to ground.
7. Turn on the machine and after the Superbooth
program starts flip the switch to on to get to the
blue settings screen.
Switch Installation Manual
[continued]
1. Screw the switch mounting bracket to the right inside
wall of the PC/Printer tower just above the PC shelf.
2 Mount the switch to the switch mounting bracket.
Remove the nut that is on the switch. Stick the switch
through the hole then put the nut back on to hold the
switch in place.
3. Run the wire from the switch to the credit board.
4. Remove the credit board.
5. Solder the red wire on the switch to the #4 port on the
credit board.
6. Solder the black wire on the switch to the ground port
on the credit board.
Red wire from
switch to port 4.
Black wire from
switch to ground.
7. Turn on the machine and after the Superbooth
program starts flip the switch to on to get to the
blue settings screen.
 Loading...