3
10. Apply power supply voltage q to terminals A01+ and A02–, and reconnect the ground wire to the green
ground screw.
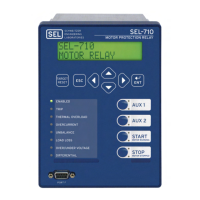
11. If the card is in the proper slot, the front panel displays the following:
STATUS FAIL
X Card Failure
If you do not see this message and the ENABLED LED is turned on, the card was inserted in the wrong slot.
Begin again at Step 2.
12. Press the ESC pushbutton.
13. Press the Down Arrow pushbutton until
STATUS is highlighted.
14. Press the ENT pushbutton.
The front panel displays the following:
STATUS
Relay Status
15. Press the ENT pushbutton.
The front panel displays the following:
Serial Num
000000000000000000000000
16. Press the ENT pushbutton.
The front panel displays the following:
Confirm Hardware
Config (Enter)
17. Press the ENT pushbutton.
The front panel displays the following:
Accept New Config?
No Yes
18. Select Ye s and press the ENT pushbutton.
The front panel displays the following:
Config Accepted
Enter to Reboot
19. Press ENT pushbutton.
20. Use the PARTNO command from Access Level C to enter the exact part number of the relay after the
relay restarts and the ENABLED LED is turns on to indicate the card was installed correctly.
After reconfiguration, the relay updates the part number, except for the following indicated digits. These
digits remain unchanged, i.e., these digits retain the same character as before the reconfiguration. A
communications card installed in Slot C is reflected as an empty slot in the part number. A regular
4 DI/4 DO card and a hybrid 4 DI/4 DO card have the same device ID. When interchanging these two
cards, the part number for the respective slots should be updated manually. Use the STATUS command to
view the part number.
21. Update the side-panel drawing with the drawing sticker provided in the option card kit. If necessary,
replace the rear panel with the one applicable for the card and attach the terminal-marking label provided
with the card to the rear-panel cover. Also, contact SEL for an updated product serial number label with
the updated part number.
22. Reconnect all of the connection plugs and add any additional wiring/connectors required by the new card.
PART NUM = 071001B5X1X7X86020X
 Loading...