TEC Series v 3.2X
Page 5
1. Never install telephone wiring during a lightning storm.
2. Never install telephone jacks in wet locations unless the jack is specifically designed for wet
locations.
3. Never touch un-insulated telephone wires or terminals unless the telephone line has been
disconnected at the network interface.
4. Use caution when installing or modifying telephone lines.
Installation of TEC requires coordination with your telephone company. SES recommends that a
Touch-Tone™ line be installed to allow much faster dialing. If a Touch-Tone™ line is not
available, the TEC can be reprogrammed to dial out pulse (rotary) signals.
The phone company may require the following information:
The ringer equivalence number.
The FCC registration number.
These numbers are on the label on the inside door of the TEC.
The desired location of the telephone jack must be given to the phone company at the
time you order the phone line.
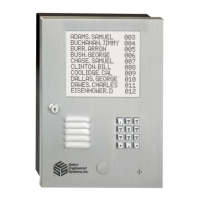
INSTALLATION INSTRUCTIONS
INSTALLATION PROCEDURE
1) The TEC should be mounted approximately 52 inches above finished floor to the center of the
TEC. For drive up applications, TEC should be mounted approximately 42" - 48" above finished
flooring to the center of TEC. Hand set units should be mounted 40" - 46" above finished floor to
help comply with the Americans with Disabilities Act (ADA).
2) To surface mount the TEC, mount the back-box using the holes provided.
3) To flush mount the TEC, cut a hole the size of the back box (9 ½" wide X 13 ½" high) in the wall.
Mount the TEC in the hole. LEAVE ½" CLEARANCE FROM THE REAR OF THE DOOR TO THE
WALL SO THE DOOR WILL OPEN.
4) We recommend an optional weather hood (WH) when mounting TEC in a stand-alone application,
to protect it from direct exposure to rain and snow.
5) The TEC MUST BE AT EARTH GROUND POTENTIAL. Connect a #16 stranded or larger wire
from the ground lug mounted on the back-box of the TEC to a cold water pipe or other suitable
ground. This wire should be less than 50 feet in length.
6) Connect the wires for the power connections to TBS-5 and TBS-6, as shown on Pg. 7. Connect
the other ends of the wires to the screws on the supplied transformer (16.5 vac).
NOTE THE FOLLOWING BEFORE ATTEMPTING ANY INSTALLATION:
Recommended wire gauge is as shown: 16 ga. up to 50 feet.
14 ga. up to 100 feet.
For unusual distances or requirements please consult factory.
7) The ouput contacts for entrances 1 & 2 are Form A or B. If you are using the N.O. contacts on the
entrance 1 relay, connect the wires from the controlled device to TBS-13 and TBS-14, as shown on
Pg. 6. To use the N.C. contacts, move the jumpers on J201-1&2 as shown on Pg 8. Wire
entrance 2 relay to TBS-15 and TBS-16 and J202-1&2 in the same manner. For Entrance 3 & 4
relay connections, see Entrance 3 & 4 control on Page 15.
NOTE: THE RELAY CONTACTS ARE RATED FOR 24 VOLTS AC OR DC AT 3 AMPS MAXIMUM.
8) Connect the modular plug for the telephone line to the RJ-11 jack provided by the phone company.
No other telephones or equipment should be on this line. If attaching multiple TEC's to a single
phone line, the optional OPTKMUI (Multiple Unit Interface) may be purchased. For further
information, see Section on Page 23.
9) All wire openings, or any penetration of the TEC enclosure should be sealed in accordance with
the National Electrical Code or local ordinances.
10) This completes the installation.
INSTALLATION INSTRUCTIONS
 Loading...