DP4
™
Multi-Purpose Faceshield
Assembly, Operating, and Maintenance Instructions
ENGLISH
Instruction: INST-DP4
Eective: 11/2016
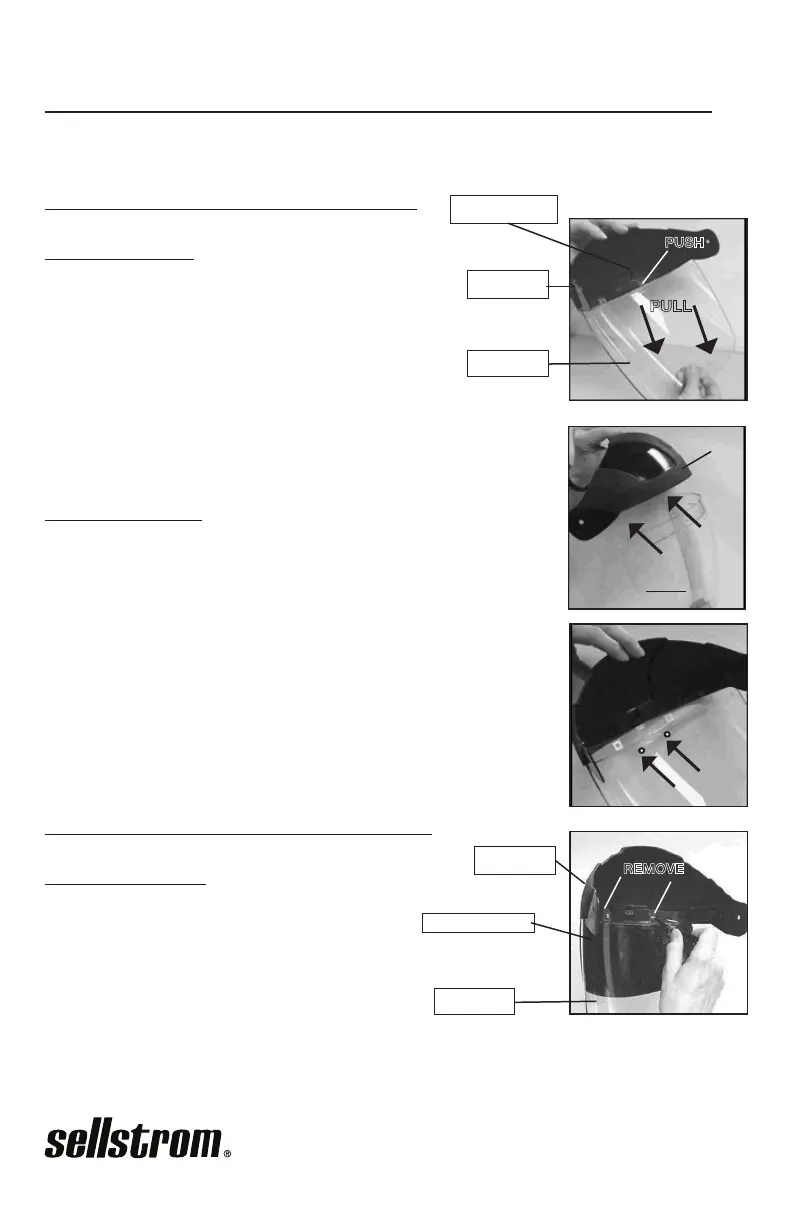
Window Removal and Replacement
Window Removal
1. Depress Release Tab using a hard object or nger, while
pulling down and out on the Window body. When the
Release Tab is depressed, the two Locking Tabs should
move out of locking position.
Window Assembly
1. Slide the Window UP and INTO the Crown at the corners, so
that the grooves in the Window t into the notches on the Crown.
2. Push the center of the Window UP and INTO the Crown. The
Locking Tabs should “snap” into place once properly secured.
The Release Tab will guide the window.
NOTE: Before using, make sure the Locking Tabs are fully engaged!
Flip Front Removal and Replacement
Flip Front Removal
1. Using a Phillips-head screwdriver, unscrew
the two screws that attach the Flip Front to
the Crown and Window.
INST-DP4 rev. 7
WINDOW
CROWN
RELEASE TAB
PULL
PUSH
LOCKING TABS
WINDOW
CROWN
FLIP FRONT
REMOVE
WINDOW
CROWN
Product that works.