The EXS-128 Automatic Strap Machine is designed for automatically applying straps to objects. This operation and maintenance manual provides essential information for safe and efficient use, including assembly instructions, safety guidelines, technical specifications, operational procedures, and troubleshooting.
Function Description:
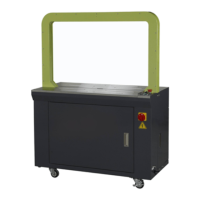
The EXS-128 is an automatic strapping machine that streamlines the packaging process by applying straps to various objects. It features an arch unit, a sealer unit, a pre-feed unit, a reel and brake unit, a pool unit, and an electrical unit. The machine is designed to feed, tension, seal, and cut polypropylene (PP) strap around a package. The strapping process is initiated by pressing a start button, and the machine automatically performs the strapping cycle. It can operate in both automatic and manual modes, offering flexibility depending on the user's needs.
Important Technical Specifications:
- Dimensions: Refer to the provided figure for detailed dimensions.
- Weight: 175 Kg
- Strapping Speed: 28-30 straps per minute
- Dimension of Package:
- Minimum: W 80mm H 30mm
- Maximum: W 850mm H 600mm
- Strap to be used: 9-15mm width polypropylene (PP) strap.
- Power Source: The machine requires a specified power source, with models available for 110V and 220V.
- Motor: Reducer motor, 1Ph, 120W, with a 1:25 ratio.
- Heater Temperature: The heater plate operates at approximately 380°C for strap welding.
- Cooling Timer: Adjustable from 0-0.4 seconds, with a standard setting of 4 (0.15 seconds).
Usage Features:
- Assembly: The manual provides detailed steps for assembling the arch unit to the machine body, including locating and tightening screws, aligning bandways, and removing fixed screws. It emphasizes ensuring the arch and machine are at a 90° angle and that the left bandway moves smoothly with a gap between the adjustment block.
- Safety Instructions: Prioritizing user safety, the manual outlines critical precautions:
- Installation of over-voltage and under-voltage protection.
- Wearing eye/face and hand protection, avoiding loose clothing.
- Keeping hands clear of the strap chute area and hot heater plate (which reaches 380°C).
- Not inserting strap without a package on the table.
- Using only specified safety parts.
- Shutting off all power during servicing.
- Avoiding water or steam for cleaning.
- Recommending floor locking for stability.
- Controls: The control panel includes:
- EMG. Stop: Emergency stop button.
- Power Lamp: Indicates machine power status.
- Tension Dial: Adjusts strap tightening stroke (right for stronger, left for looser).
- Strap Feed / Back Switch: Feeds strap to the right or retracts it to the left.
- Start Button: Initiates strapping or returns the cam shaft to the origin and sets strap in the arch.
- Jog Switch: Allows step-by-step machine operation for troubleshooting.
- Auto/Manual Switch: Selects between automatic and manual operation modes.
- Preparation for Operation:
- Connecting Electric Power: Ensure the power switch is OFF before plugging into the outlet. The earth grounding wire must be connected to prevent electric shock. Upon power ON, the power lamp lights, the heater starts increasing temperature (takes about 1 minute for welding temperature), and the duct fan rotates.
- Setting Strap Coil: Instructions detail how to remove the thrust nut and reel plate, install a new strap coil (winding clockwise), and re-secure the reel plate and thrust nut. Incorrect winding direction can impair the reel brake.
- Threading Strap: The strap is guided through brake rollers, free rollers, and into the entrance until it reaches the pool unit. The manual warns against using split or bent strap ends to avoid machine blockages. After threading, the feed strap button is pressed to fully send the strap to the arch.
- Operation: Place the object on the sealing head, hold light objects if necessary, and press the start button. Do not operate if the heater has not reached welding temperature.
- Stop Operation: To stop during operation, press the power switch to OFF. To resume, pull the strap, press the start button, and the machine will automatically reset the strap.
- Shutting Down: Turn off the power switch, disconnect the plug, and wind back the strap from the pool to the coil by pulling the brake lever and turning the reel plate.
- Adjustment:
- Heater Temperature: A knob adjusts the heater temperature based on strap type and size to ensure proper welding.
- Cooling Timer: A knob adjusts the press cooling time for welding, ranging from 0-0.4 seconds.
- Reel Brake: Bolts can be loosened to adjust the brake belt's tension, preventing loose strap on the coil.
- Feed Roller Pressure: A knob adjusts spring tension, affecting strap tension. Factory settings are standard, but micro-adjustments may be needed based on strap characteristics and environmental conditions.
- Strap-collected Length in the Pool: Adjusting the balance block's position (by loosening/tightening a bolt) controls the length of strap collected in the pool. This length should match the arch size to prevent distortion or incomplete packing.
- Position Adjustment: The manual specifies changing the position of part items 11 and 12 according to the PP strap width, including turning item 12 by 180°C for different strap sizes.
Maintenance Features:
- General Maintenance: Maintenance should only be performed by authorized personnel. All power sources must be disconnected before maintenance. Appropriate tools and devices should be used.
- Cleaning: Regular cleaning is crucial for preventing trouble and extending machine life. Remove strap leftovers and dust, especially from the sealer unit.
- Oiling: The EXS-128 is a non-oiling type machine, so daily oiling is not required.
- Troubleshooting: The manual includes a comprehensive troubleshooting guide for common issues related to power supply, strap setting and feeding, and starting. It lists symptoms, causes (e.g., power blackout, motor overload, jammed strap, incorrect adjustments), and remedies (e.g., re-inserting plugs, cleaning, adjusting settings, replacing parts).
- Heater and Surrounding Area: Do not touch the heater and its surrounding area until fully cooled down, as the heater reaches 380°C.
- Installation Environment: Install the machine on a horizontal floor and keep the surrounding area free from dust and cut strap pieces.
- Service Contact: For any unclear points regarding machine operation or maintenance, contact the service engineer.