Hoverprobe Refurbishment 11
22. Connect the plastic air pipe
(22) to the air switch and
the external air fitting.
23. Press the copper pipe in to
the air-valve (29).
24. Position the copper pipe
(19) as shown to allow easy
alignment to the air fitting.
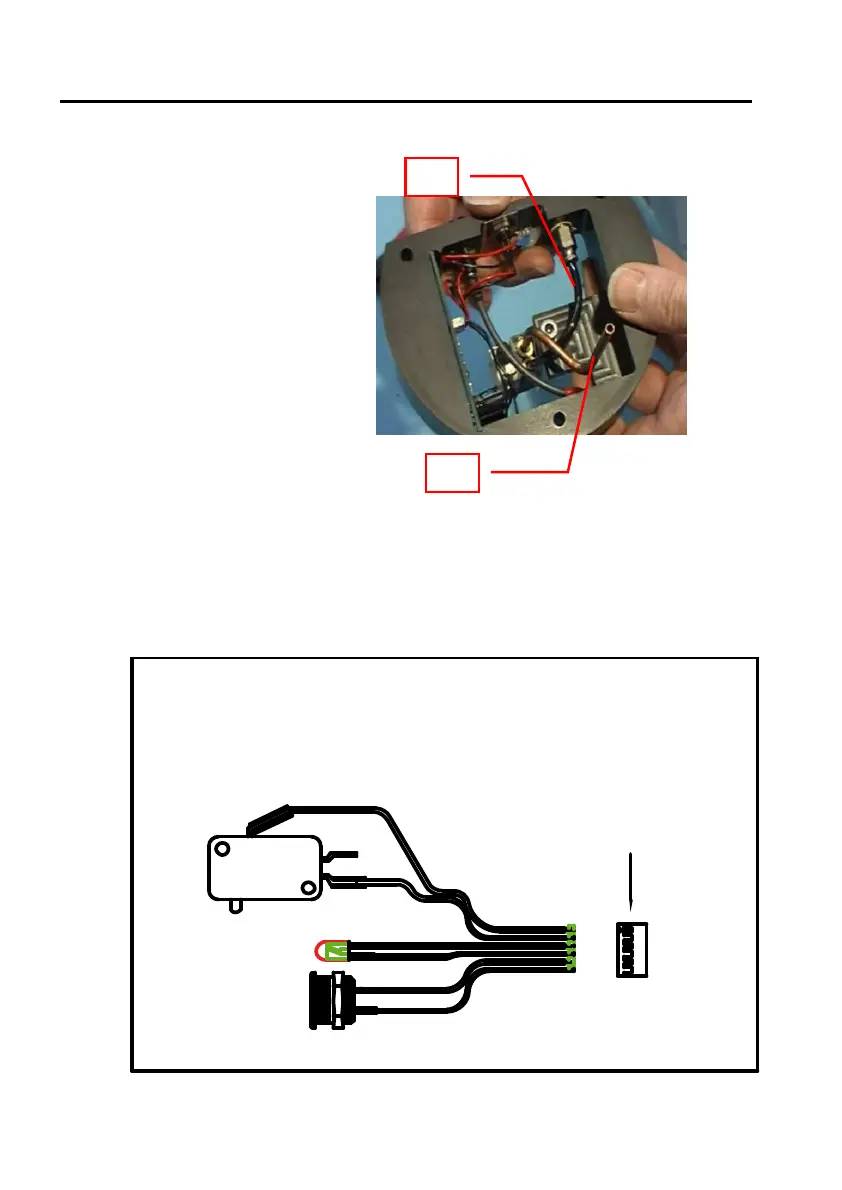
25. Put the PCB in the slot. DO NOT PULL THE WIRES!
26. Solder the wires on to the new micro switch according to the drawing.
Remember to cover the terminals with heat shrink (30).
Detail wire connections
Check th at the black wi re is at the
flat side of the LE D.
Flat side LED =
CONNE C TION 1: 5
CONNE C TION 2: 6
ANODE: 4 RED
CATHODE: 3 BL ACK
2
1
5
6
3
4
2
1
Pin rem oved by ca refully
sk ipping kni fe under tub
on shell , if needed