Product Overview Product Setup Troubleshoot Contact Us
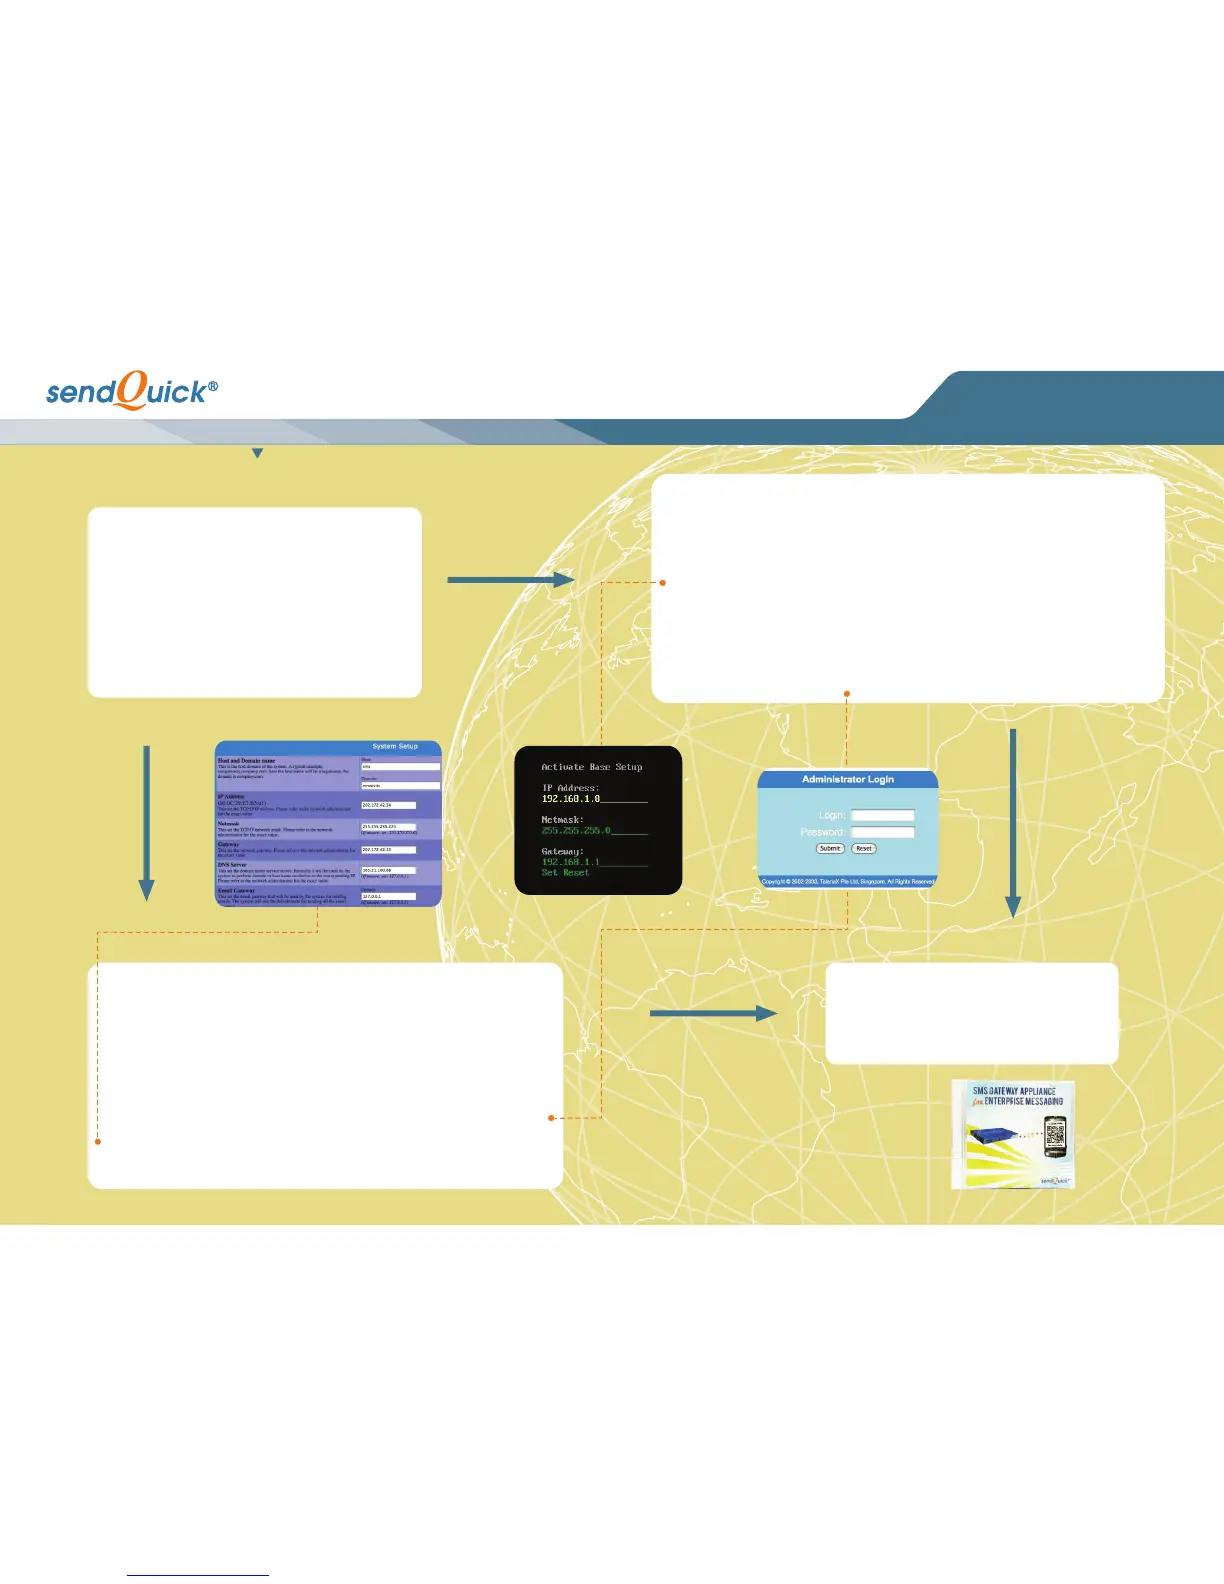
Appliance Setup
Step 1: Connect power supply to the system and turn on the power.
Step 2: Insert the SIM card into the modem and connect the modem to
the rear USB port of the system aer the system is fully started
(approximately 3 minutes aer the system is power on). If you are
using a 3G modem, make sure the modem power is turn on first before
plug-in the modem to the system.
Then proceed to set up the IP address using either Console
Configuraon (Method A on the right) or LAN (Cross Cable)
Configuraon (Method B below).
LAN (Cross Cable) Conguration
The default IP address of sendQuick appliance is 192.168.1.8
Step 1: Connect each end of the cross cable to the sendQuick server (Eth0 Port) and your laptop.
Step 2: Configure the IP address of your laptop with a same subnet mask IP address (e.g. 192.168.1.9).
Step 3: Acvate the web browser on your laptop and enter hp://192.168.1.8/appliance/
Step 4: You will see a login page. Enter username:admin and password:admin123 to login to the system.
Step 5: Go to server setup and change your desired IP address as shown above.
Step 6: Once completed, save and acvate your sengs.
Initial Conguration Completed
To configure the rest of the system, please refer to the user
manual provided in the CD-ROM.
If you need any assistance, please email support@talariax.com.
Console Conguration
Step 1: Connect the monitor and keyboard to the system. (You will see the IP roung table on the monitor display)
Step 2: Enter <ALT> and <F4> simultaneously. You will see the login page and enter the default username and
password (Console default username:admin, Console default password:sqroot).
Step 3: Aer entering the login details, the CHANGE IP interface will show. Please change the IP, Netmask and
Gateway with the keyboard as required. Once completed, follow the instrucons as displayed at the boom of the
screen to Save and Exit.
Step 4: Connect the LAN cable between sendQuick gateway (Eth0) and your network.
Step 5: Open the web browser and enter hp://<sendQuick IP>/appliance/
Step 6: You will see the login page. Enter username:admin and password:admin123 to login to the system.
ENTERPRISE MOBILE MESSAGING SOLUTIONS
Product Installation Guide
START
METHOD A
METHOD B
 Loading...