8 WWW.SENIXTOOLS.COM
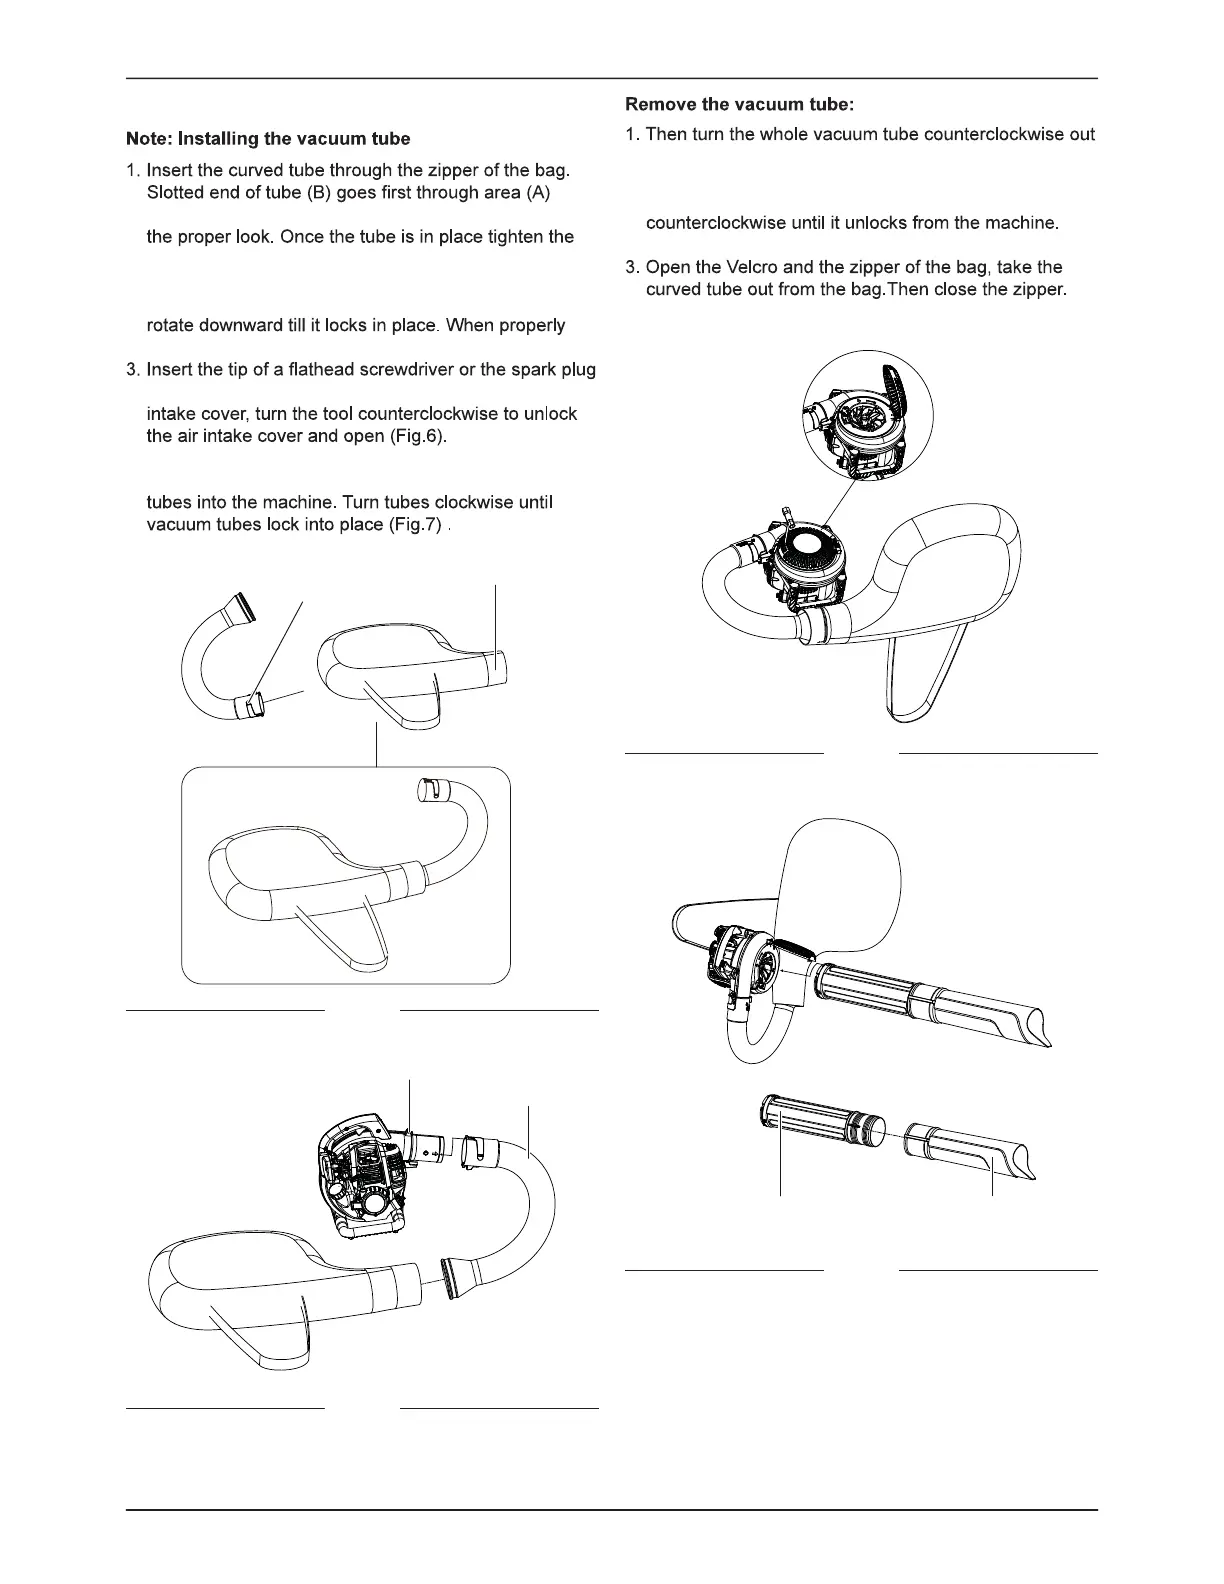
Fig. 4
Fig. 5
Fig. 7
Fig. 6
ASSEMBLY
INSTALLING/REMOVE THE VACUUM TUBE
of bag. See complete assembly picture in FIG. 4 for
Velcro strap.
2. Align the slots in the curved tube (C) with the with the
bumps on the blower outlet (D) Slide the tube on and
assembled the tube will curve downward (Fig.5).
wrench ( provided ) vertically into the slot of the air
4. Assemble the lower vacuum tube (E) onto the upper
vacuum tube (F), ,then insert the assembled vacuum
of the machine and turn the E and F parts of the whole
vacuum tube away. (Fig.7)
2. While holding the machine, twist the the curved tube
( Fig.5)
(Fig.4)
A
B
D
C
F E