Connecting the HDA 300 to an audiometer and calibrating the HDA 300
HDA 300 | 7
Connecting the HDA 300 to an
audiometer and calibrating the
HDA
300
Calibration specifications and intervals
For exact measurements, the audiometry headphones and the audiometer
used must be calibrated by an authorized specialist during putting into
operation and regularly during operation, at least once a year.
If you replace the audiometry headphones and/or the audiometer (even
with the same type), the components must be recalibrated. This also
applies to extreme climatic changes.
Connecting the HDA 300 to an audiometer
▷ Connect the red plug of the headphones to the right channel and the
blue plug to the left channel of the audiometer.
Preparing the HDA 300 for calibration
The reference threshold sound pressure levels can be found on the fold-out
front cover page or on the HDA 300 product page at www.sennheiser.com.
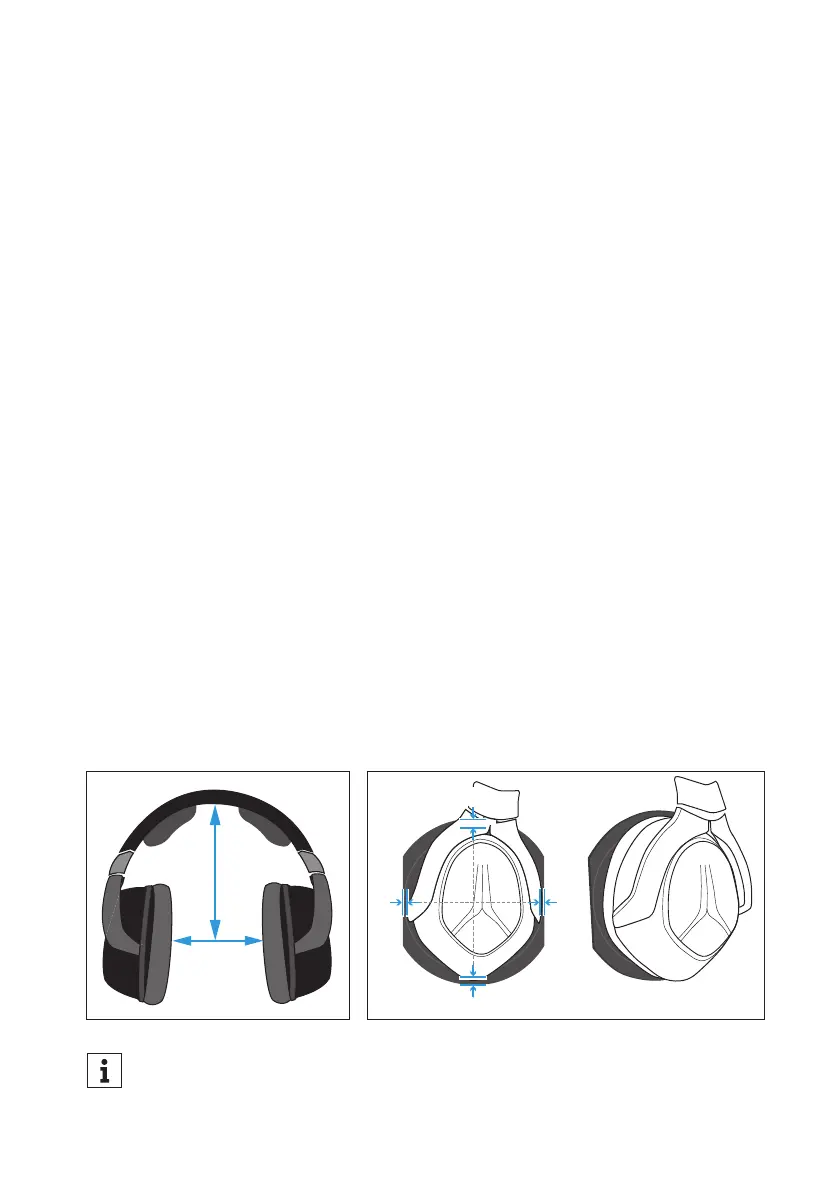
1. Adjust the HDA 300 as shown in the diagram.
2. Place the ear cup on the center of the coupler so that the distance to the
top and bottom as well as to the left and right is identical.
For easy alignment of the ear cup on the coupler plate of the ear sim-
ulator, you can use the optional adapter ring. Information can be
found on the HDA 300 product page at www.sennheiser.com.
145 mm
143 mm
b b
a
a
 Loading...