Eliminator V2-C M-03-17
6
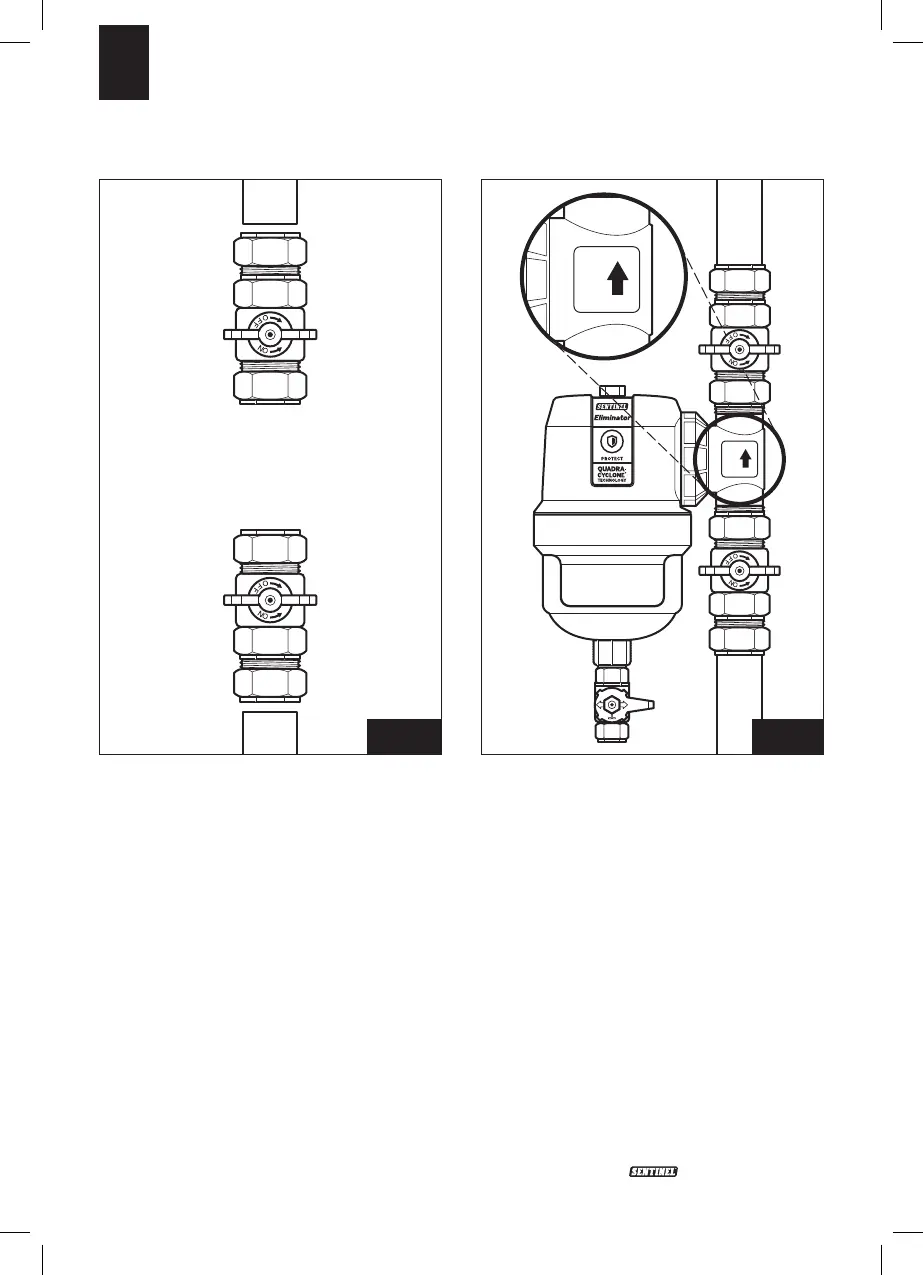
Step 4:
Remove 195mm from pipe in chosen location and attach isolation valves to cut
ends as per Figure 4. Note that the pipe can be horizontal or vertical, but the final
filter position must always be vertical.
Step 5:
Attach the filter to pipe work. Ensure that the supplied washers are in place,
sealing the valves to the plastic T-piece. Ensure filter is mounted vertically by
loosening the collar and rotating the filter body as required. Re-tighten the collar
by hand, checking the flow direction on the T-piece, as per Figure 5.
Step 6:
Set Isolation valves to open, as per Figure 6.
Fig. 4 Fig. 5
Eliminator Instructions V1-CM (14-03-17) (inc Spanish).indd 6 14/03/2017 14:20
 Loading...