Fold Here
2
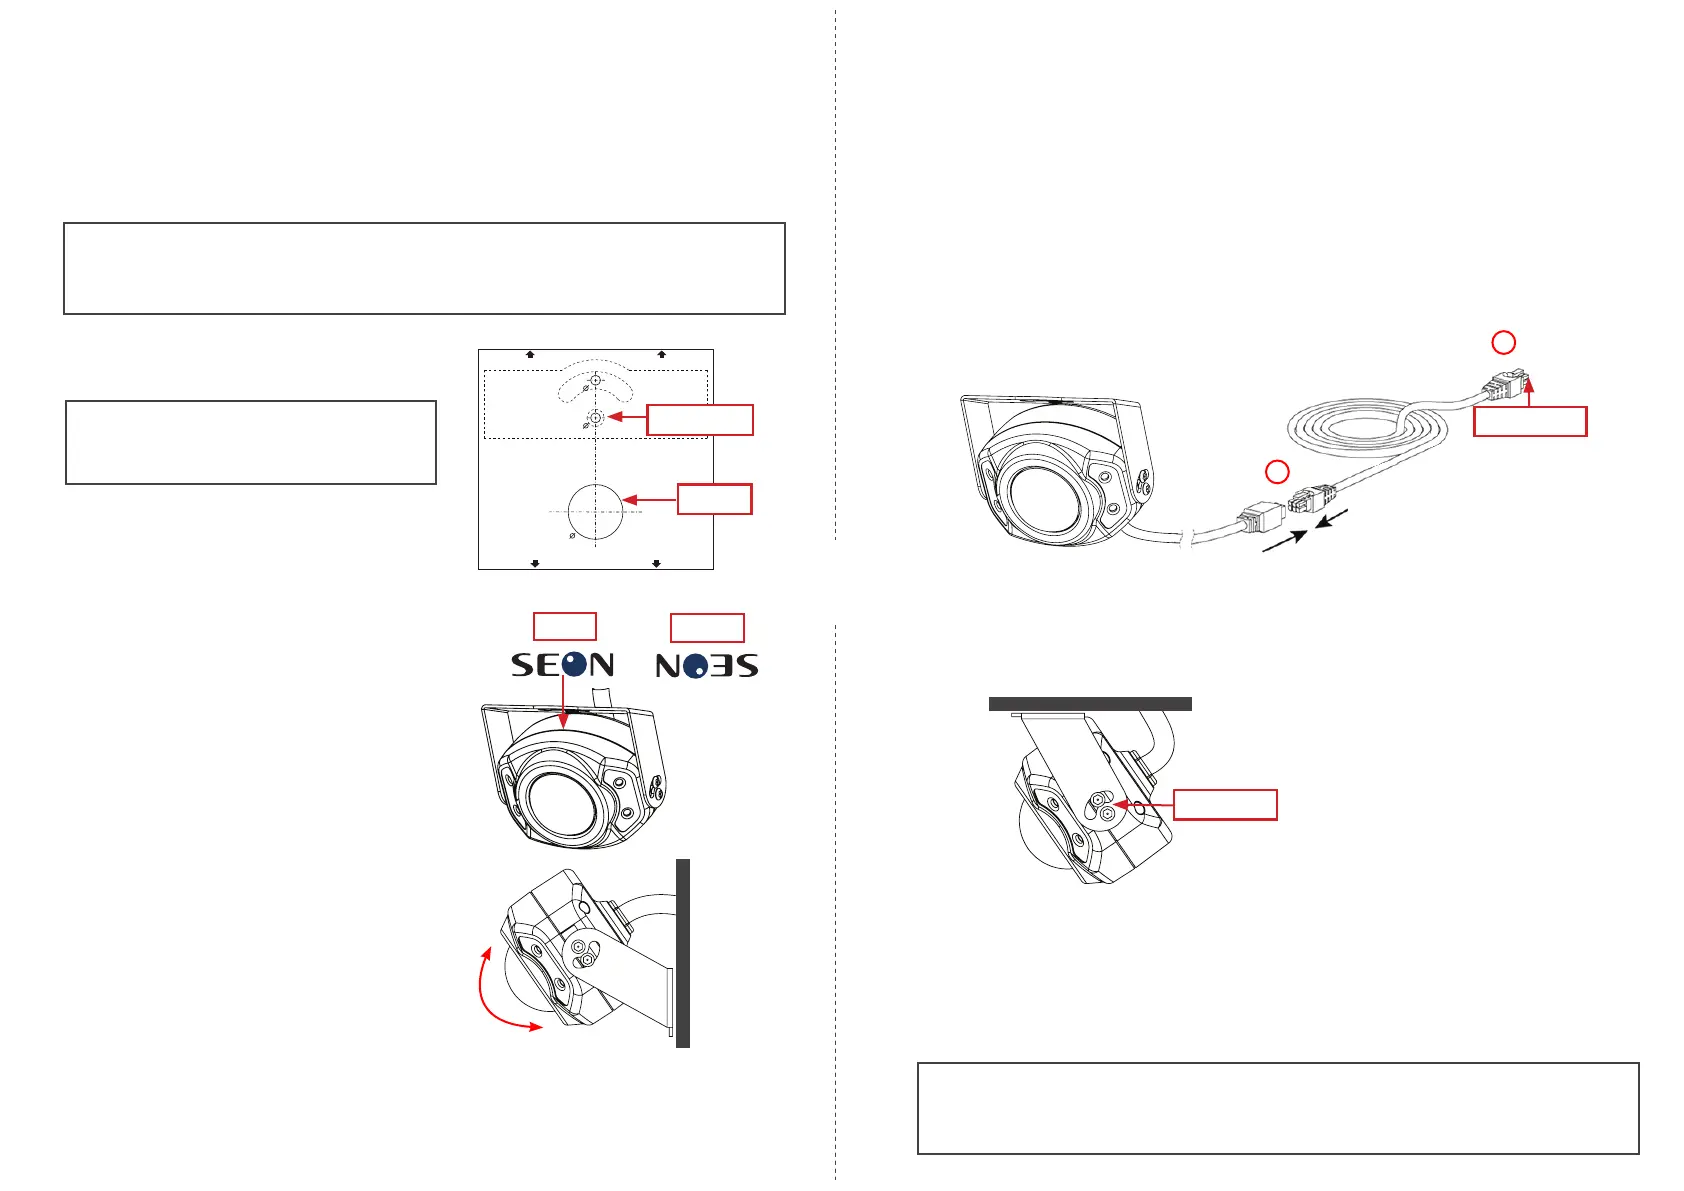
Ensure Top Side of Camera Faces Upward
The camera housing is stamped with "SEON"
branding on both its top and bottom. Looking
into the lens, when the camera is right-side-up,
the branding reads "SEON". If it does not, ip
the camera (i.e. rotate 180 degrees).
Correct
Incorrect
Step 3: Install the Mounting Bracket
1. Use the supplied Torx key to loosen the two security screws on each side of the camera
housing and remove the mounting bracket.
2. Use the supplied drilling template to mark the cable hole (11/16”) and pilot holes (1/8”) on
the panel.
Important: Ensure the drilling template is positioned correctly, according to your
mounting orientation.
The template indicates which end should face upward for ceiling mount or wall mount.
3. Drill the pivot pilot hole (see the image on the
right).
6. Connect the camera to the recorder and check
the image displayed. Conrm the mounting
position and range of motion (camera tilt and
bracket wall pivot or ceiling pan) provide the
required eld of view, and that the image can
be properly aligned.
If necessary, choose a different mounting
orientation and/or location and repeat steps 2
through 4 above.
7. Remove the screw and the bracket from the mounting surface.
8. Use the template marks and drill the other 1/8" pilot hole and the 11/16" cable hole (use a
step-bit to drill the cable hole, and a regular bit for the pilot hole).
Warning: Do not Open the Camera
Adjust the camera on the bracket only. Opening the camera housing voids the warranty.
Step 4: Connect the Camera
To video recorder
1
1. Connect the camera cable to the extension harness through the panel cable hole.
Important: Ensure the extension harness has a blue band in front of the connectors, indicating
it is AHD-compatible.
2. Connect the extension harness’s 2x3 Microt connector to a compatible digital video
recorder.
3. Use the grommet on the camera cable to plug the hole in the vehicle panel.
Step 5: Install the Camera
Use two security screws on each side to attach the camera housing to the mounting bracket
(leave the screws nger-tight).
Security screws
Step 6: Aim the Camera
1. With the camera connected to the recorder and both powered on, access the recorder using
a monitor connected to the local video out.
2. Set the camera's tilt position.
3. Use the supplied Torx key to tighten the 4 security screws.
5. Position the camera on the mounting bracket:
9. Place the bracket on the mounting surface, in the orientation and pivot/pan position
identied above.
10. Use the two #10 ¾” self-drilling screws to attach the bracket to the mounting surface.
11/16 "
1/ 8"1/ 8"
1/ 8"
1/ 8"
TH IS END UP F OR WALL MO UN T
TH IS END UP F OR CEIL IN G MOUNT
Cable hole
Pivot pilot hole
4. Use a single #10 ¾” self-drilling screw in the
pivot pilot hole to hold the bracket in place.
Note: The template image on the right
is not to scale. The actual template is
included with the HD3U Installation Kit.
 Loading...