15
over the rim of the fi lter sieve.
Removing the used espresso pad:
∙ After the brewing cycle is complete, wait
for approximately 30 seconds until the
operating pressure has been suffi ciently
reduced.
∙ Exercise caution when removing
the fi lter holder: it is hot and may still
contain some hot water. Pour out the
water carefully.
∙ Allow the fi lter holder to cool down
suffi ciently before tapping its side against
a vertical surface to loosen the pad
before removing it.
∙ The cut-out on the fi lter holder makes
it easier to remove the fi lter sieve; use
the fi ngers to pull the sieve out from
above. Clean the fi lter holder and sieve
thoroughly.
Drip tray
During operation, any excess water or steam
is collected in the drip tray. The tray must
therefore be fi tted whenever the espresso
maker is switched on. Caution: the drainer
and tray become very hot during use.
Always empty the drip tray in good time to
prevent water spillage.
Do not remove the drip tray unless the
appliance has been switched off and has
had suffi cient time to cool down.
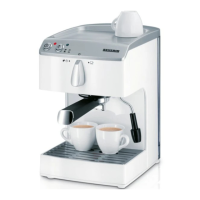
Preparation
Espresso
∙ Fill the container with water.
∙ Insert the plug into a suitable wall outlet
and use the On/Off switch to turn the
appliance on. The main red indicator light
comes on.
∙ Preheat the fi lter holder and the cup.
∙ Remove the fi lter holder, fi ll with ground
espresso coffee or load a pad and re-
attach it.
∙ Place the cup under the fi lter holder
outlet.
∙ Wait until the green temperature indicator
shows a steady light and turn the rotary
control to position
.
∙ The pre-brewing function starts, ie the
ground espresso is pre-moistened with
water to ensure that the maximum coffee
fl avour is released.
∙ The actual brewing process starts after
a short while, and the espresso is now
delivered straight into the cup.
∙ Once the cup is full, turn the rotary control
to its neutral position to switch the pump
off (position ).
∙ Wait for approximately 30 seconds before
detaching the fi lter holder and removing
the espresso grounds.
∙ The espresso maker is now ready for
another brewing cycle.
Cleaning and care
∙ Before cleaning the espresso maker,
ensure it is disconnected from the power
supply and has cooled down completely.
∙ To avoid the risk of electric shock, do not
clean the appliance with water and do not
immerse it in water.
∙ Do not use abrasives or harsh cleaning
solutions.
∙ All removable parts may be cleaned with
warm, soapy water; these parts are not
dish-washer safe.
∙ Empty the drip tray daily and clean the tray
and drainer with warm, soapy water.
∙ The exterior housing may be wiped with a
dry or slightly damp, lint-free cloth.
∙ The boiler outlet may be wiped with a
 Loading...