Do you have a question about the SHARDOR CJ-265C and is the answer not in the manual?
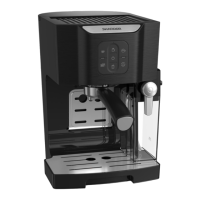
Guidance on device placement, surface requirements, and potential furniture damage.
Instructions for inserting the drip tray and filling the water tank with water.
Steps for filling the milk tank and inserting the coffee filter into the portafilter.
Guidance on filling the filter with coffee powder and inserting/removing the portafilter.
Steps to power on the device, preheat water, and prepare for brewing.
Setting custom quantities for espresso, milk froth, cappuccino, and latte macchiato.
Adjusting milk froth level and resetting device settings to factory defaults.
Detailed steps for programming espresso, double espresso, cappuccino, and latte macchiato.
Customizing the amount of milk froth or hot milk for beverages.
Instructions for cleaning milk container, filters, water tank, and housing.
Running the quick clean for the milk tank system and coffee outlet.
Performing intensive cleaning of portafilter/milk tank and descaling the device.
Guidelines for storing the device when not in use for prolonged periods.
Resolving problems related to the device not switching on or control panel errors.
Troubleshooting water supply problems and function selection errors.
Addressing slow brewing, weak espresso, excessive steam, or unpleasant smells.
Details on model number, voltage, power consumption, and protection class.
| Brand | SHARDOR |
|---|---|
| Model Number | CJ-265C |
| Product Type | Coffee Maker |
| Material | Stainless Steel |
| Color | Silver |
| Voltage | 120 Volts |
| Special Feature | Quiet Operation |
| Included Components | Coffee Maker |