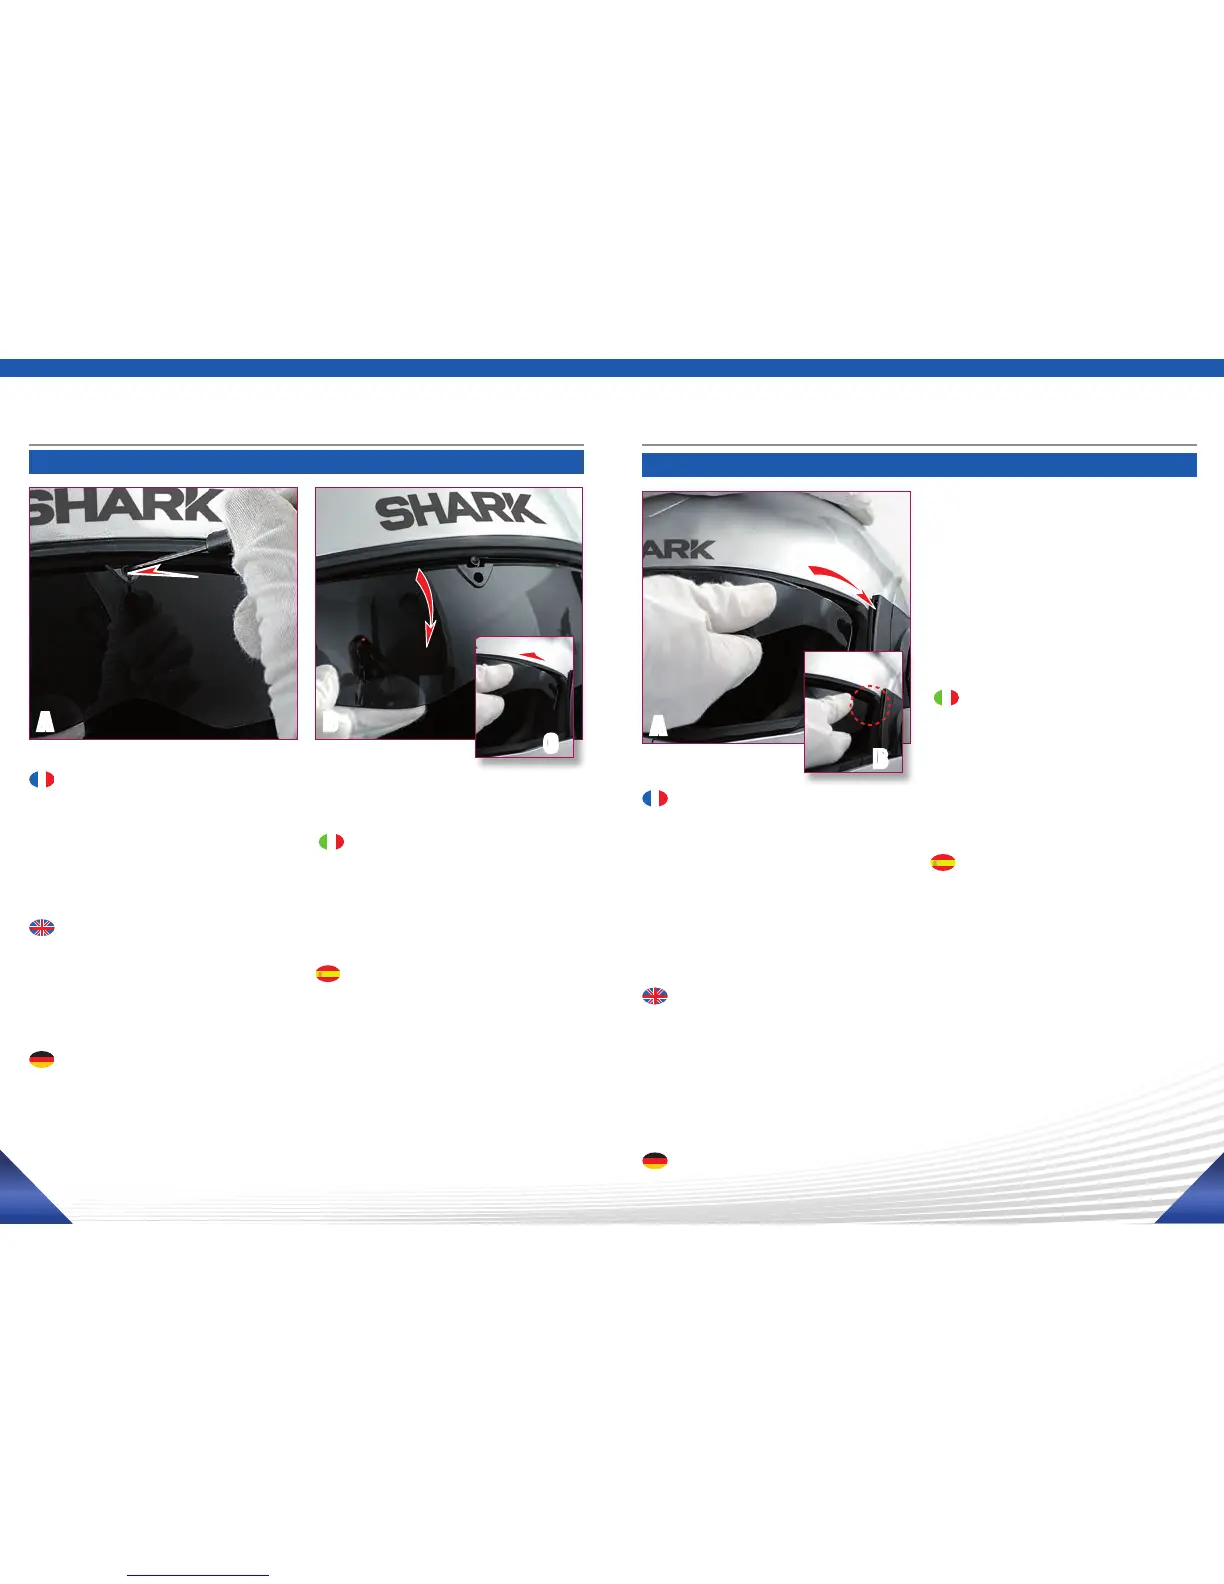
EasyManuals Logo

Shark Evoline 3 Series Manual

Shark Evoline 3 Series
31 pages
To Next Page IconTo Next Page
To Previous Page IconTo Previous Page
Page #20 background imageLoading...
Page #20 background image
3938


  


 


REMOVAL
A/ Removal
- Move the sun shield to the lower position
- Apply pressure to the central fixing button using
a screwdriver or similar pointed instrument (Fig. A);
- Pull the sun shield delicately downward (Fig. B);
- Unclip the sun shield at the sides (Fig. C).



    
    





RIMOZIONE
- Abbassare il parasole;
- Premere il nasello di fissaggio centrale con un
cacciavite o una qualsiasi punta (Fig. A);
- Tirare il parasole delicatamente verso il basso
(Fig.B);
- Sganciare il parasole lateralmente (Fig. C).





 


A B
C
A


-

     

à-

-

REPLACEMENT
Carry out the above operation in reverse order:
- Move the handling button to the low position;
- Clip the sun shield on at one side and then the
other (Figs. A – B);
- Using a screwdriver or similar pointed instrument,
apply pressure to the central fixing button and then
clip the sun shield back on by lifting it slightly.

-


  


     
      -
    
     

RIMONTAGGIO
Eseguire cronologicamente l’operazione in senso
inverso:
- Abbassare il pulsante di manipolazione;
- Agganciare il parasole lateralmente da un lato,
quindi dall’altro;
- Utilizzando un cacciavite o una qualsiasi punta,
premere il nasello di fissaggio centrale, quindi riag-
ganciare il parasole sollevandolo leggermente.


 




    

B




Montage • asseMBlY • Montage • Montaggio • Montaje
déMontage • reMoVal • loesen • riMozione • desMontaje

Other manuals for Shark Evoline 3 Series

Questions and Answers:

Question and Answer IconNeed help?

Do you have a question about the Shark Evoline 3 Series and is the answer not in the manual?

Shark Evoline 3 Series Specifications

General IconGeneral
Helmet TypeModular
CertificationECE 22.05
Sun VisorIntegrated
InteriorRemovable and washable
WeightApprox. 1700g (size M)
Additional Features"SHARKTOOTH" ready

Related product manuals