EasyManua.ls Logo

Shark EvoLine - Page 44

Shark EvoLine
60 pages
Print Icon
To Next Page IconTo Next Page
To Previous Page IconTo Previous Page
Loading...



      
       
      




      


        

      
    

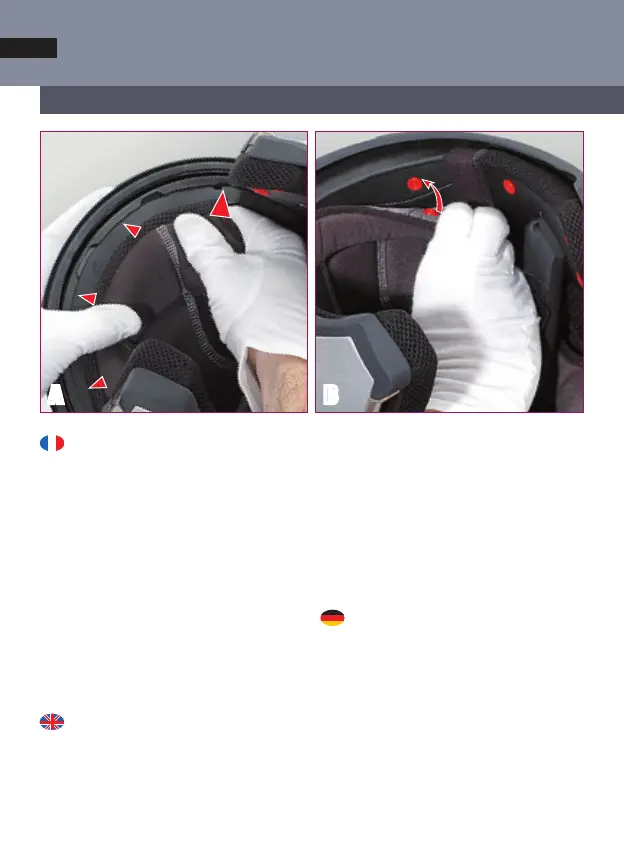
REPLACING THE INTERIOR PARTS
- Start the operation by engaging the plastic
part of the front of the head section in its hou-
sing beginning with one side (Fig. A);
- Position the textile part correctly;
- Attach the two press studs on the rear part of
the head section (Figs. B – C);
- Reposition the cheek pads by passing the
chin straps through the slit in the foam (Fig.
D);
- Attach the 3 press studs and then the Velcro
band;
- Replace the neck pad, inserting one of its
side parts, then position it correctly in its
housing.

-
     
    

-

 

      
     
A B
1
44

Related product manuals