Printed in Malaysia
TINS-F873WJZZ
13P05-MA-NF
1 2
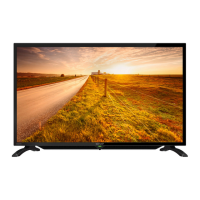
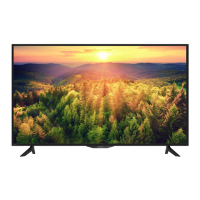
LC-32LE150M
LED BACKLIGHT TV
OPERATION MANUAL
Dear SHARP customer
Thank you for your purchase of the SHARP LCD colour TV product. To ensure safety and many
years of trouble-free operation of your product, please read the Important Safety Precautions
carefully before using this product.
Important Safety Precautions
• Stand base must be attached to prevent the TV set from falling down and cause injuries.
• Cleaning — Unplug the AC cord from the AC outlet before cleaning the product. Use a soft damp cloth to clean the
product. Do not use liquid cleaners, aerosol cleaners or chemical cloth to clean it, as such materials may damage the
product.
• Water and moisture — Do not use the product near water, such as bathtub, washbasin, kitchen sink, laundry tub,
swimming pool and in a wet basement.
• Do not place vases or any other water-fi lled containers on this product.
The water may spill onto the product causing fi re or electric shock.
• Stand — Do not place the product on an unstable cart, stand, tripod or table. Doing so can cause the product to fall,
resulting in serious personal injuries as well as damage to the product. Use only a cart, stand, tripod, bracket or table
recommended by the manufacturer or sold with the product. When mounting the product on a wall, be sure to follow the
manufacturer’s instructions. Use only the mounting hardware recommended by the manufacturer.
• When relocating the product placed on a cart, it must be moved with utmost care. Sudden stops, excessive force and
uneven fl oor surface can cause the product to fall from the cart.
• Ventilation — The vents and other openings in the cabinet are designed for ventilation. Do not cover or block these vents
and openings since insuffi cient ventilation can cause overheating and/or shorten the life of the product. Do not place the
product on a bed, sofa, rug or other similar surface, since they can block ventilation openings. This product is not designed
for built-in installation; do not place the product in an enclosed place such as a bookcase or rack, unless proper ventilation
is provided or the manufacturer’s instructions are followed.
• The LCD panel used in this product is made of glass. Therefore, it can break when the product is struck forcefully or with a
sharp object. If the LCD panel is broken, be careful not to be injured by broken glass.
• Heat sources — Keep the product away from heat sources such as radiators, heaters, stoves and other heat-generating
products (including amplifi ers).
• To prevent fi re, never place any type of candle or naked fl ames on the top or near the TV set.
• To prevent fi re or shock hazard, do not place the AC power cord under the TV set or other heavy items.
• Do not place heavy objects on this product or stand on it. Doing so could cause injury if the product overturns. Take
special care near children and pets.
• The LCD panel is a very high technology product with 1,049,088 pixels, giving you fi ne picture details.
Due to the very large number of pixels, occasionally a few non-active pixels may appear on the screen as a fi xed point of
blue, green or red.
This is within product specifi cations and does not constitute a fault.
• Precautions when transporting the TV
When transporting the TV, never carry it by holding or otherwise putting pressure onto the display. Be sure to always carry
the TV by two people holding it with two hands — one hand on each side of the TV.
• Do not display a still picture for a long time, as this could cause an afterimage to remain.
• Install the product on the place where the AC cord can be unplugged easily from the AC outlet, or from the AC INPUT
terminal on the rear of the product.
Trademarks
• The terms HDMI and HDMI High-Defi nition Multimedia Interface, and the HDMI Logo are trademarks or registered
trademarks of HDMI Licensing LLC in the United States and other countries.
Supplied accessories
Remote control unit
“AAA” size battery (
g
2)
Operation manual Stand unit
Stand base
Screws (
g
5)
Post
Contents
Page
Supplied accessories ...........................1
Dear SHARP customer .........................2
Important Safety Precautions .............2
Trademarks ........................................... 2
Attaching the stand ..............................3
Antenna connection .............................3
Connecting external devices ...............4
Remote control unit .............................5
Part names ............................................6
Turning the TV on/off ...........................6
Initial auto installation ..........................7
Auto Installation ....................................7
Programme Setup ................................7
Selecting a preset AV Mode ................8
Page
Menu operation.....................................9
Picture menu .........................................9
Audio menu ...........................................9
ECO menu .............................................9
Setup menu .........................................10
Option menu .......................................11
Colour adjustment ..............................11
ECO mode ...........................................12
Timer .................................................... 12
Wide mode ..........................................12
USB media player ...............................13
Appendix .............................................15
Specifi cations .....................................16
LC-32LE150M_F873_EN.indd 1LC-32LE150M_F873_EN.indd 1 4/10/2013 3:01:28 PM4/10/2013 3:01:28 PM
