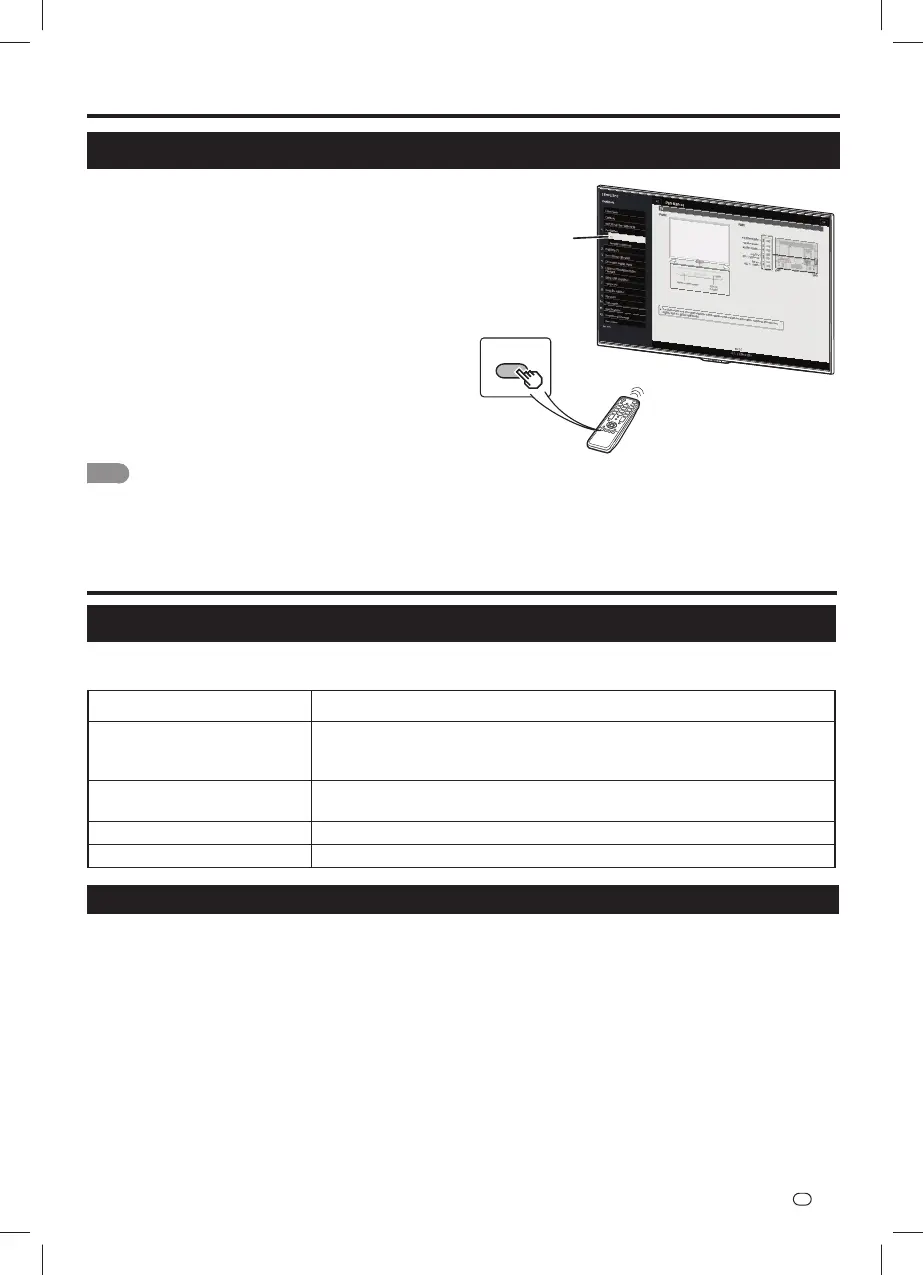
Viewing the Built-in Operation Manual
Press MANUAL on the remote control unit to display
operation information on the screen.
To search for an item from the table of contents, and to
search for a particular term and to fi nd troubleshooting
information, press MANUAL while watching the TV and
then select the applicable item from the manual cover page
that appears.
1 Press MANUAL while watching the TV.
This displays the built-in operation manual
screen.
2 When you select contents, its page will be
displayed.
3 You can turn over the page one by one for
these arrow marks.
NOTE
• You can also display the built-in operation manual by selecting
“Information” > “Manual” from the menu screen.
• When USB mode, Home Network mode, or Internet application is
used, can not be displayed the built-in operation manual.
1
2
MANUAL
Appendix
Troubleshooting
The problems described below are not always caused by malfunctions. Check the TV again before having
the TV serviced.
Problem Possible Solution
• No power. • Check if you pressed POWER on the remote control unit.
• Is the AC cord disconnected?
• Has the power been turned on?
• Remote control unit does
not operate.
• Are batteries inserted with polarity (e, f) aligned?
• No picture. • Is connection to other components correct?
• No sound. • Is connection to other components correct?
CLEARING THE PASSWORD
If you forget the password, clear the password using the following procedure.
1 Press MENU to display the MENU screen, and then press c/d to select “Initial setup”.
2 Press
a
/b to select “Child lock”, and then press ENTER and the password input screen display.
3 If you enter “3001” using 0 – 9, the “Child lock” setting menu will be displayed.
4 Press
a
/b to select “Set password”, and then press ENTER to set the password.
5 Enter the 4-digit number as a password using 0 – 9, and then enter the same 4-digit to confirm. The
new password is now set.
Viewing the Built-in Operation Manual
EN
-
3