CD-BP160W/180W/1500W/1700W
– 12 –
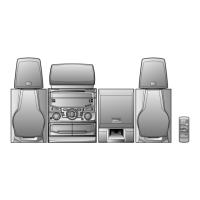
How to remove the pickup (See Fig. 12-2)
1. Remove the screws (B1) x 2 pcs., to remove the shaft (B2).
2. Remove the stop washer (B3) x 1 pc., to remove the gear
(B4).
3. Remove the pickup.
Figure 12-2
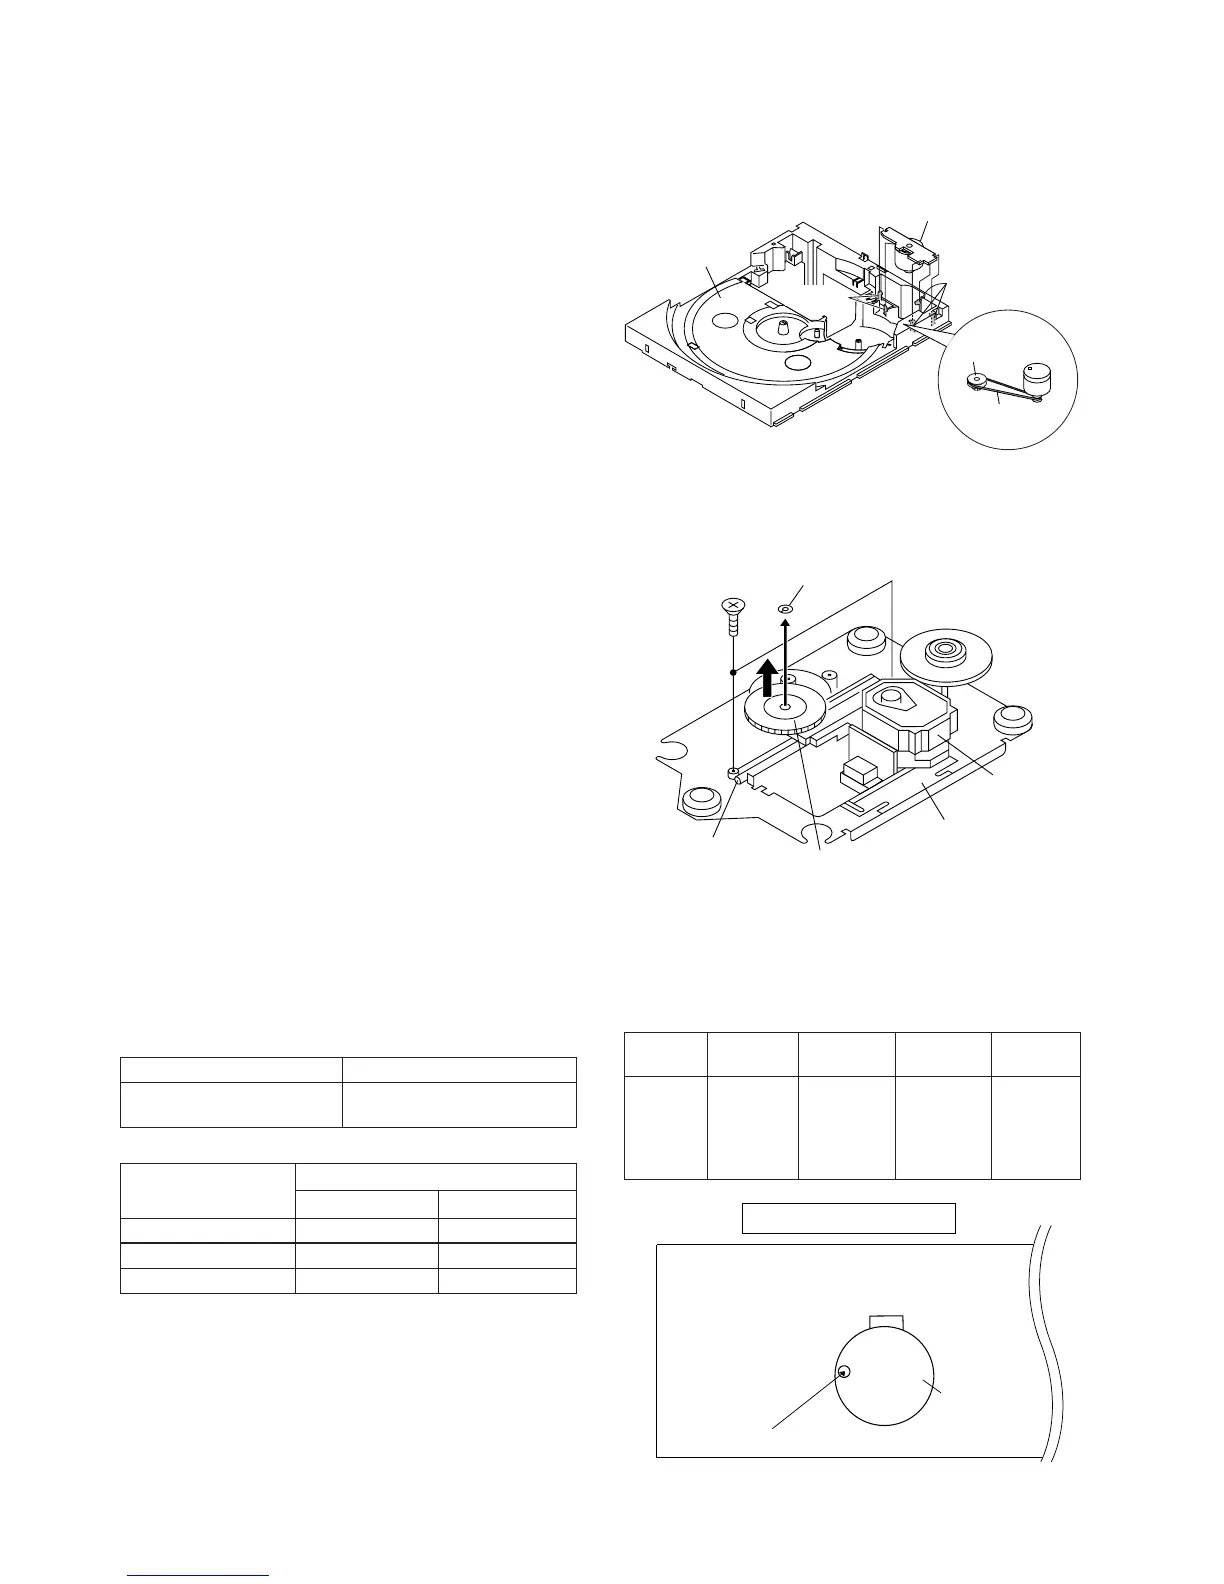
CD MECHANISM SECTION
Perform steps 1, 2, 3, 11, 12, 13 and 14 of the disassembly
method to remove the CD mechanism.
How to remove the T/T Up/Down motor
(See Fig. 12-1)
1. Bend the hooks (A1) x 5 pcs., to remove the T/T Up/Down
motor.
2. Remove the drive belt (A2) x 1 pc.
Figure 12-1
Note
After removing the connector for the optical pickup from the
connector, wrap the conductive aluminium foil around the
front end of connector to protect the optical pickup from
electrostatic damage.
ADJUSTMENT
MECHANISM SECTION
• Driving Force Check
Torque Meter
Specified Value
Play: TW-2111 Tape 1: Over 80 g
Tape 2: Over 80 g
• Torque Check
Torque Meter
Tape 2
Play: TW-2111 30 to 80 g. cm 30 to 80 g.cm
Fast forward: TW-2231 — 70 to 180 g.cm
Rewind: TW-2231 — 70 to 180 g.cm
Specified Value
Tape 1
Specified
Value
Adjusting
Point
Instrument
Connection
Test Tape
Normal MTT-111 Variable 3,000 ± Speaker
speed Resistor in 30 Hz terminal
motor. (Load
resistance:
6 ohms)
• Tape Speed
Figure 12-3
TAPE MECHANISM
Motor
Variable Resistor in motor
(B1) x2
ø2.6 x6mm
Shaft
(B2) x1
Stop Washer
(B3) x1
Gear
(B4) x1
CD Mechanism
Pickup
(A1)x3
T/T Up/Down Motor
Disc Tray
(A1)x2
Pulley
Drive Belt
(A2) x1
Motor