11
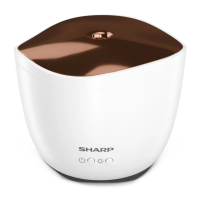
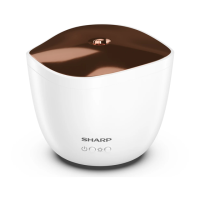
Description of the Aroma Diuser
(Refer to the 1 Main Parts of Your Aroma Diuser on page 1).
Your Aroma Diuser consists of the following parts:
1. Power Cable
2. AC Adaptor
3. Power input
4. Lid
5. Water Cup
6. Maximum mark
7. Ultrasonic Membrane
8.
On/O button
9.
Light control button
10. Air outlet opening (When lling make sure that no water
enters this opening)
11. Fan
Controls
On/O button (item 8)
To turn the unit on and o use the
button this is located on
the side of the unit and requires a simple push to turn on. When
the
button is pressed it will click. Press once to turn on, press
again to turn o.
Light button (item 9)
It is possible to control the intensity of the light by pressing the
light
button. This button operates as below if the light is on.
1. Press once – light dims.
2. Press again – light turns o.
3. Press again – light turns on at maximum level.
4. Pressing the
button repeats 1 to 3 as above.
Top tips and hints
For trouble free use of your SHARP Aroma Diuser, follow
the advice in this user manual and the bullet points below:
• DO NOT block the fan grill as this will cause the mist not to be
emitted correctly.
• Fill the cup to the maximum water level prior to use and
when being used with the Auto Restart function.
• Make sure that the lid is always tted correctly.
Using your new Aroma Diuser
Before lling your Aroma Diuser with water, either turn o via
the
button on the front or disconnect from the mains supply.
Fill the water cup to the maximum mark indicated. Do you not
exceed the maximum mark as this will cause the Aroma diuser
not to operate correctly and cause spillage of water.
This Aroma Diuser is designed to be used with clean water,
ideally this should be distilled water or if this is not available
you can use clean tap water. Once the cup has been lled to the
maximum level essential oils can be added to the water. Be sure
to follow the essential oil instructions to ensure that the correct
amount is used.
(Refer to the
2 Water Level Mark on page 1).
Replace the lid, ensuring that it is correctly aligned and tting
snugly into the base of the unit. If the lid is not installed
correctly there will be a gap between it and the base which will
allow water to drip down the side of the unit. If the lid does not
t correctly rotate and try again.
(Refer to the
3 Correct Fitment of Lid on page 1).
Once the lid has been correctly tted, it is possible to turn
on the unit. To do this press the on o
button located on
the side. The unit will power up and the LED will be at full
brightness.
Connecting power to your Aroma Diuser
Your new SHARP of Aroma Diuser works with an external AC
adapter. It is important that this AC adapter is kept away from
any water and is not operated or touched if your hands are wet.
Your AC Adaptor plugs into the mains supply and then is
connected to the Aroma Diuser via the power cable, This
lead has moulded connectors on each end; the USB connector
plugs into the AC Adaptor; the round plug ts into the Aroma
Diuser.