This document is an operation manual for the SHARP ES-G70G Washing Machine. It provides comprehensive information on the device's functions, technical specifications, usage, and maintenance.
Function Description
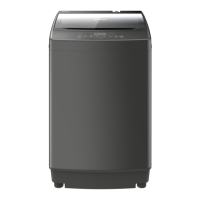
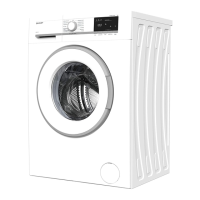
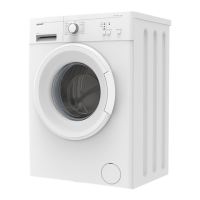
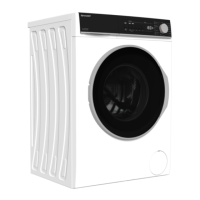
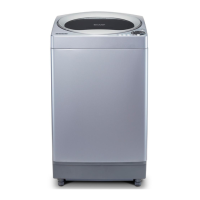
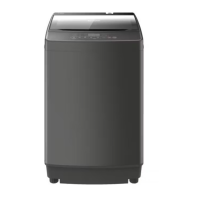
The SHARP ES-G70G is a top-loading washing machine designed for household use. It offers various washing programs and functions to cater to different laundry needs.
Washing Programs:
- Normal: For normally soiled everyday clothing.
- Speedy: For not-so-dirty clothing, offering a quicker wash cycle.
- Eco: For daily clothing, designed to save electricity and water.
- Jeans: For sturdy and heavily soiled clothing.
- Air Dry: A program for reducing drying time by blowing air into the tub after spinning. This helps clothes dry faster in the shade.
- Blanket: For washing blankets or heavy clothing.
- Soft: For not-so-dirty clothing or a small amount of clothing.
- Baby: Washes baby clothing gently and rinses thoroughly.
- Delicate: For clothing with the HAND WASH mark, requiring gentle care.
- Tub Clean: A program specifically for cleaning the washing/spin drying tub itself.
Additional Functions:
- Soak Function: Available for "Normal," "Speedy," "Air Dry," "Blanket," "Soft," "Baby," or "Delicate" programs. It allows for a pre-wash soak to enhance cleaning. Activated by pressing the "WASH" key for 2 seconds after program selection.
- Child Lock Function: Locks all buttons (including POWER) to prevent accidental operation. If the top lid is opened during operation with child lock active, the machine will stop and alarm. It can be set or unlocked by pressing and holding "WATER LEVEL" and "PRESET TIME" keys simultaneously for 3 seconds.
- Add Water: Allows users to add water during wash (including rinse) by pressing the "WATER LEVEL" key. Un-pressing stops water addition. Users can also pause the machine and select a new water level.
- Preset Time: Allows setting a delayed start time for the wash cycle, ranging from 2 to 24 hours.
- Spin Only: A dedicated function for spinning clothes without a wash cycle.
- Water Level Selection: Users can manually select the appropriate water level based on the laundry quantity.
- Wash Time Selection: Adjustable wash times (20 min, 15 min, 12 min, 9 min), with default settings varying by program.
- Rinse Time Selection: Adjustable rinse times (4 times, 3 times, 2 times, blank, 1 time), with default settings varying by program.
- Spin/Air Dry Time Selection: Adjustable spin times (9 min, 7 min, 5 min, 3 min, Soft spin) and Air Dry times (30 min, 60 min, 90 min).
Important Technical Specifications
- Model: ES-G70G
- Rated Capacity (Wash and Spin, Dry Laundries Weight): 7.0kg
- Rated Voltage and Frequency: 220-240V ~ 50Hz
- Water Level / Water Volume:
- 10/56L
- 9/52L
- 8/48L
- 7/44L
- 6/40L
- 5/36L
- 4/32L
- 3/28L
- 2/25L
- 1/21L
- Inlet Pressure: 0.03MPa ~ 0.85MPa
- Rated Input Power:
- Weight: About 30kg
- Dimensions (W x D x H): 547mm x 563mm x 920mm
Accessories:
- Bottom cover (1pc)
- Water inlet hose (1pc)
- Water inlet hose connector (1pc)
- Drain hose (1pc)
- Drain hose clip (1pc)
- Screw (2pcs)
- Fixing foot (3pcs)
Usage Features
Installation and Adjustment:
- Unpacking: Remove all packaging, including the polystyrene base. Keep packaging for future transport.
- Bottom Cover Installation: Install the bottom cover using two screws to protect against rodents and insects.
- Positioning: Ensure the machine is horizontal. The distance from the wall should be more than 50mm. Adjust the adjustable feet to level the machine and allow air circulation, especially on carpeted floors.
- Water Inlet Installation:
- Connect the inlet hose connector to a suitable tap (front end >10mm, flat and smooth exit face).
- Fasten the four bolts on the connector evenly, then twist the fastening nut.
- Connect the inlet hose to the washing machine, ensuring the water absorption cushion is in place and the hose nut is fastened securely.
- Check for leaks after installation by opening the tap.
- Drainpipe Installation:
- Set the drainpipe clip 2-3cm from the drainpipe end.
- Install the drainpipe into the drainpipe connector and fix it with the clip.
- The drainpipe height should be less than 10cm for smooth drainage.
- Do not step on or press the drainpipe.
- If the drainpipe is too long, cut the front end slantingly.
- An additional drainpipe, if needed, should have a diameter of at least 30mm and a length not exceeding 1.5m.
- The manual also details how to change the direction of the drainpipe by disassembling and reassembling internal components.
Preparation Before Operation:
- Connect the inlet hose and open the tap.
- Ensure the appliance is properly earthed.
- Put down the drainpipe.
- Water Temperature: Do not use water hotter than 50°C.
- Laundry Preparation:
- Empty pockets of small objects (coins, keys, screws).
- Knot long bands, fasten buttons, and close zippers.
- Load laundry loosely, alternating large and small items, without overloading.
- Sort laundry by fabric type, color-fastness, and dirtiness.
- Place thin laundries, woolens, and delicate items prone to wear and tear into a washing bag.
- Ensure laundries are washable. Wash new colored items separately.
- Immerse non-absorbable laundries by hand.
- Pre-treat difficult stains (fruit, wine, grass, rust) with specific products or biological detergent.
- Overturn nap fabric and long floss laundries before washing.
- Do not put laundries polluted by chemicals into the machine.
- Wash very small items (handkerchiefs, ribbons, socks) in a washing bag or pillow case.
Detergent Usage:
- Washing Powder: Put washing powder in the detergent box. For instant dissolving, prepare warm water (30°C) in a container, pour powder while stirring to fully dissolve it, then add to the machine.
- Softener: Put softener in the softener box; the machine automatically adds it during the last rinse.
- Bleach: Dilute bleach in a container, then pour slowly into the washing tub. Do not use bleach for colored or figured laundries. Do not put bleach directly onto laundries.
Operation Steps (Basic):
- Put clothes in the tub.
- Press "POWER ON/OFF" key.
- Press "PROGRAM" key to select the desired program (default is "Normal").
- Adjust "WASH," "RINSE," and "SPIN/AIR DRY" settings as necessary.
- Select the appropriate "WATER LEVEL."
- Put in detergent and close the top lid.
- Press "START/PAUSE" key to begin.
The machine will alarm and cut off power automatically when finished.
Maintenance Features
After the End of the Programme:
- The machine stops automatically, and a buzzer reminds you to take out laundries.
- Unplug the appliance and turn off water taps to prevent leaks or fire.
External Cleaning:
- Clean the exterior cabinet with a soft cloth. Do not use cleansers or volatile chemicals that could damage plastic parts or surfaces.
Clean Inlet Gate:
- The inlet filter net can get blocked by dust.
- Procedure: Close the tap, turn on power, run machine for 5 seconds (to fill hose), cut off power, pull off inlet hose, remove and clean the inlet valve and net, then reinstall.
Clean Lint Filter:
- Clean the lint filter after each wash.
- Procedure: Pull out the lint filter, turn the filter net inside out and wash it, then reverse and remount.
- Magic Filter Cleaning: Pull out the magic filter, open the box, clean it, close it, and reinstall. Check if the lint block part is in good condition.
General Maintenance:
- Turn off water taps after use.
- Do not keep water in the tub for a long time; drain it immediately after washing.
- Unplug the machine after use.
- Organize the electric cable and drain hose.
- Wipe water from the surface and tub with a soft cloth and keep the top lid open for a while to prevent mold and stagnant smells.
Winterization (Freezing Prevention):
- If there's a risk of water freezing in the inner tub, remove the water inlet hose and drain water from the hose and inner tub.
- If water freezes, do not operate the machine. Pour 40°C hot water into the tub (submerging the pulsator), wait a few minutes, gently rotate the pulsator by hand, then operate the machine.
Troubleshooting (Common Non-Fault Phenomenon):
The manual provides a detailed list of common issues and their possible reasons, along with settlement steps:
- Control panel has no display: Plug not inserted, no electricity, power switch off, power supply cut off.
- Inlet hose leaks: Connector not fixed tightly, hose and machine connector loose.
- Does not drain: Drainpipe not put down, bended, or blocked.
- Does not water fill: No water supply, tap not open, inlet hose blocked.
- Spin stops and water refills during spin program: Laundries too much/too little, machine not stable.
- Press SPIN but it does not spin: Top lid not closed when drain finished, top lid open when spin starts.
- Spin is intermittent: Laundries unbalanced.
- Water flows from drainpipe first time use: Remaining water from factory testing.
Abnormal Display and Imbalance Adjustment:
- The manual lists various error codes (E0, E1, E2, E3, E4, E5, F1) with explanations and settlement procedures, such as closing the top lid, checking connections, or contacting technicians.
- The machine has an imbalance adjustment function that automatically adjusts if vibration is detected during spinning.
Safety Warnings:
- Do not put hands into the working machine, even if speed is slow.
- Keep children away from the machine.
- Do not alter specifications or modify the product.
- Do not overload or place hot items on the machine.
- Do not wash garments in contact with volatile petroleum products.
- Ensure tap is open and inlet hose is installed properly before washing.
- Keep appliance away from direct sunlight and heat sources.
- This appliance is not intended for use by persons with reduced physical, sensory, or mental capabilities without supervision.
- Supervise children to ensure they do not play with the appliance.
- Maintain lint filter in good condition and clean it regularly to prevent blocking cascade outlet.
- Do not place coins, safety pins, nails, screws, stones, or other hard, sharp materials into the machine.
- Suggested to use low foam washing powder.
- Always unplug and turn off water when moving, cleaning, or not in use. Do not handle plug with wet hands.
- Do not bend, stretch, twist, strap, or nip the power cord. If damaged, it must be repaired by an authorized service center. Keep plug pins clean.
- Do not install in bathrooms or damp places. Do not wash the machine with water or put wet clothes on the control panel.
- Do not share the same socket with other electric appliances. Do not use damaged or loose sockets.