Do you have a question about the Sharp LC-32Q3170U and is the answer not in the manual?
Guides for connecting antennas, HDMI, and component devices.
Instructions for connecting composite AV devices.
Explains the purpose of each button on the remote.
How to plug the power cord into a wall outlet.
Configure how TV channels are received.
Select display language and country.
Solutions for no sound, no picture, or external device connection problems.
Addresses picture delays, sound issues, and distorted video/audio.
Tips for resolving interference and unstable picture issues.
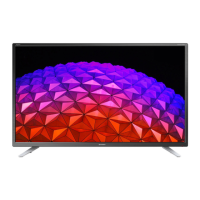
This document is a Quick Start Guide for Sharp LC-32Q3180U and LC-32Q3170U television models, designed to help users set up their new TV quickly. It emphasizes environmental responsibility by encouraging users to access the full User Manual online for detailed instructions and feature descriptions, thereby reducing paper waste.
The guide begins by congratulating the user on their purchase and directs them to register their TV using a QR code, which can be scanned with a mobile phone. It provides customer care contact information (phone numbers and service emails) for the USA, Canada, and Mexico, along with SHARP Support Page links and TV registration links for each region. A disclaimer clarifies that the guide is a general guideline and images are for illustrative purposes.
The "Packaged Contents" section lists all items included in the TV package: the TV itself, two base stands, four screws, a remote control, two AAA batteries, a Quick Start Guide (this document), and an Important Safety Information and Warranty Card. A crucial note advises users to check all foam in the carton box to prevent accidentally discarding accessories. The "Required tools and devices" section specifies that a Phillips screwdriver, HDMI and other cables, and optionally a wall mount bracket are needed for setup.
"Buttons and Ports on the TV" provides a visual diagram of the TV's back and side views, labeling all available ports. These include Digital Audio Out (Optical), AV IN/Component (L - Audio - R, Video / Y, Pb, Pr), RF, HDMI 1, HDMI 2, and USB. This section helps users identify the correct connections for various external devices.
"STEP 1. Attach the TV Stand or Wall Mount Bracket" details the process of attaching the TV stand. Users are instructed to place the TV facedown on a soft, flat surface, insert the two stands into the bottom slots, and secure them with four screws (ST4×12F). For wall mounting, the guide advises placing the TV facedown, removing the TV stand if attached, and placing spacers (not included) in the bracket holes. It specifies that fixing screws (not provided) should be 8-10 mm in length and the wall mount hole pattern is VESA 100 × 100 mm, requiring M4 screws. A caution warns to use spacers provided by the third-party manufacturer between the TV and the bracket.
"STEP 2. Connect devices to your TV" provides a comprehensive table detailing how to connect various external equipment. For RF, an outdoor VHF/UHF antenna is connected. For HDMI, a High Definition Multimedia Interface cable connects external devices. Component video cables (Y, Pb, Pr) and left-right audio cables (L, R) are used for AV devices like DVD players/recorders or set-top boxes. Composite video cables (Video, L, R) are for external AV devices. Digital Audio Out (Optical) connects to an external digital audio system. The USB port is for browsing photos and movies, recognizing only USB Memory Sticks. This section emphasizes the importance of selecting the right cables and ensuring secure connections for optimal picture and color quality.
"Buttons on your TV remote" illustrates and describes each button on the remote control. Functions include Power on/off, Change TV input source, Quick setup menu, Enter Channels/input numbers, Dash button/Select a digital sub-channel, Mute and restore sound, Volume (up/down), Channel (up/down), Enter Live TV, D-pad (up/down/left/right navigation buttons)/Press Up display Info menu, Confirmation button/Display channel list, Return to previous place in menu, Exit application, Set audio language (MTS), Turn Closed Caption On/Off, Media content control function buttons, Choose to leave Video description feature On or Off, Favorite program controlling button & Media player button, Media player button, Select picture mode, Sleep timer button, Select sound mode, Zoom button, and Special function buttons.
"STEP 4. Begin using your remote" explains how to insert batteries into the remote control. Users press and pull the battery case cover, insert two AAA batteries matching the (+) and (-) ends, and then replace the cover. Important information about the remote and batteries includes discarding batteries in a designated disposal area, not throwing them into fire, removing old batteries immediately to prevent leakage, removing batteries if the remote won't be used for a long time, cleaning the battery compartment if chemicals leak, and not mixing old/new or different types of batteries. It also advises calling support if the remote gets warm or hot. Remote control range information states it works up to 26 feet in front of the TV and at a 30-degree horizontal or vertical angle. For USA users, instructions are provided to program universal cable or satellite remote controls, including a list of common codes for DIRECTV and Time Warner Cable. If codes are not listed or don't work, users are directed to contact their cable/satellite provider or the support numbers on Page 2.
"STEP 5. Power on the TV" instructs users to plug the power cord into a wall outlet and then press the Power button on the remote. A splash screen with the logo will appear, followed by the First-Time Setup Menu, prompting choices for Language, Country, Use Mode, and Live TV Source.
"STEP 6. Complete the first-time setup menu" details the initial setup process. Users select their language (English, Français, Español), country (USA, Canada, Mexico), and Mode Setting (Home Mode or Store Mode). A note clarifies that 'Store mode' is for retailers demonstrating the TV. For Live TV Source, users select how they receive channels (TV, HDMI1, AV, HDMI2, COMPONENT, MEDIA). A tip mentions that channel scanning is only needed if the TV is connected to an Antenna. The guide concludes this step by stating "CONGRATULATIONS! You are done with setup" and instructs users to press the OK button if selections are correct, or navigate back to change them.
"STEP 7. Begin to enjoy your TV" encourages users to explore their new TV. It explains that the Home screen is the starting point for navigation, offering live channels, Video on Demand, and other entertainment options.
"QUICK PROBLEM-SOLVING TIPS" offers solutions for common TV issues. For no sound or picture, check the power cord, press the Power button on the remote, and verify the LED light. If an external source has no picture/sound, check output/input connections and input mode selection. A delay before the picture appears is normal. For picture but no sound, check volume settings and if 'Mute' mode is On. For sound but no picture or black and white picture, unplug/replug the TV, check Color setting, and try different channels. If sound/picture is distorted or wavy, check for nearby electric appliances, move them, or insert the power plug into another outlet. For blurry sound/picture or cuts, check external antenna direction/position/connection, or adjust/fine-tune the channel. If a horizontal/vertical stripe appears or the picture is shaking, check for nearby appliances or electric tools causing interference. If the plastic cabinet makes a "clicking" sound, it's normal due to temperature changes causing expansion/contraction. If the remote control doesn't work, confirm the TV has power, change batteries, and check if batteries are correctly installed.
"Need more help?" directs users to online support links on Page 2 for FAQs, downloadable firmware, and more.
"Certification and Compliance" includes the FCC Notice, stating the device complies with Class B digital device limits and Part 15 of FCC Rules. It advises on correcting harmful interference by reorienting/relocating the antenna, increasing separation, connecting to a different circuit, or consulting a technician. It also notes that unauthorized modifications void the user's authority to operate the equipment. The Declaration of Conformity lists the Trade Name (SHARP), Model (LC-32Q3180U/LC-32Q3170U), Responsible Party (Hisense USA Corporation), address, and telephone number. It confirms compliance with Part 15 of FCC Rules regarding harmful interference. Finally, it states that HDMI terms and logo are trademarks of HDMI Licensing LLC, and all other trademarks are property of their respective holders.
| Screen Size | 32 inches |
|---|---|
| Display Technology | LED |
| Refresh Rate | 60 Hz |
| HDMI Ports | 3 |
| USB Ports | 1 |
| Built-in Wi-Fi | Yes |
| Resolution | 1366 x 768 |
| Smart TV | Yes |