MX-M232D (MX-FX13/XB17) 6 - 3
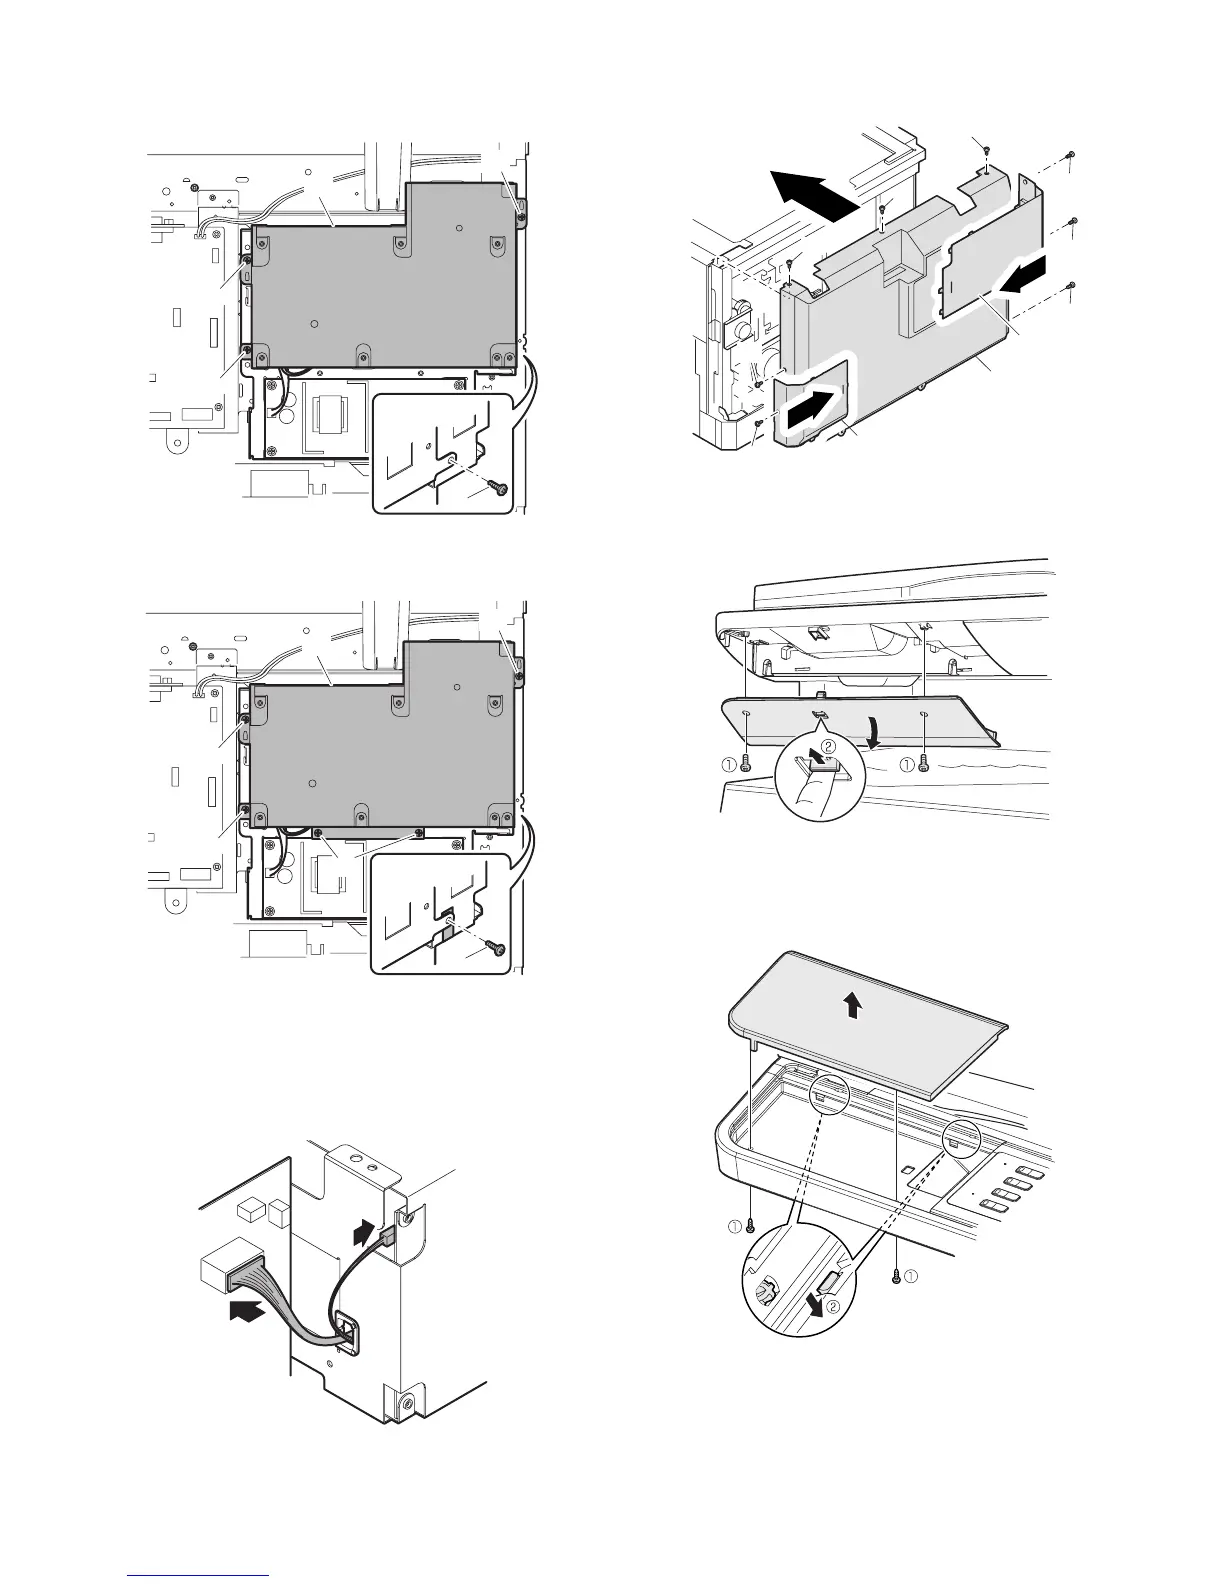
8) Install FAX Expansion Unit.
<1>Hook the FAX Expansion Unit onto the network frame.
<2>Secure the unit onto the machine using 4 screws.
<Taiwan/Brazil/South Africa only>
Secure the unit onto the machine using 6 screws.
9) Connect the MCU PWB and the FAX Expansion Unit.
<1>Connect the FAX power harness to FAX Expansion Unit.
Insert the FAX power harness to the edge suddle of the FAX
Expansion Unit.
<2>Connect the MCU PWB and the FAX Expansion Unit by the
harness.
10) Attach the rear cabinet.
Attach the rear cabinet and the rear cabinet cover. Fix it with screws.
11) Remove keyboard back cover.
<1>Unscrew two screws from the keyboard back cover.
<2>Release the lock as shown, and remove the back cover.
12) Remove dummy panel.
<1>Unscrew from the dummy panel.
<2>Disengage the pawls, and remove the dummy panel from the
machine.
(1)
(2)
(2)
(2)
(2)
(1)
(2)
(2)
(2)
(2)
(2)
(1)
(2)
(4)
(4)
(4)
(1)
(4)
(4)
(4)
(4)
(4)
(2)
(3)