EasyManua.ls Logo

Sharp SPC876 - User Manual

Sharp SPC876
2 pages
Print Icon
To Next Page IconTo Next Page
Loading...
RADIO CONTROLLED
ATOMIC WALL CLOCK
Instruction Manual
Thank you for your purchase. The utmost care has gone into the design and manufacture of your clock. Please read these
instructions carefully and store them in a safe place for future reference.
Buttons and Switches:
A. SET Button: Press to Manually Set the Time. See Point 8; Please ensure sufficient time has passed
overnight to receive atomic signal prior to manual set
B. WAVE Button: See Point 7
C. RESET Button: Press to reset if clock needs resetting
D. TIME ZONE Switch: See Point 2a
E. DST ON/OFF Switch: See Point 2b
1. Quick Start Notes:
a. Start this clock at night and let the clock receive the atomic signal automatically after midnight.
b. Always place the unit away from interfering source such as TV set, computer, metal objects and
electrical appliances.
c. Areas with access to windows are recommended for better reception.
2. Set Time Zone & Daylight Savings Time (DST):
a. On the back control panel: Set the clock to your time zone by moving the indicator arrow to
appropriate zone: P (Pacific Time), M (Mountain Time), C (Central Time), E (Eastern Time)
b. Enable the Daylight Savings Time Auto Adjust feature by moving the DST switch to “ON”. If
you are in a time zone that does not follow DST, make sure you set the DST mode to “OFF”.
The Daylight Savings Time feature is disabled when the switch is set to “OFF”.
3. Initial Set-Up: Insert one AA alkaline battery into the battery holder. This will activate the atomic radio
reception mode and the second, minute and hour hands will automatically reset to the 12:00 position.
Once the hands are in the 12:00 position, the movement will start searching for the radio signal. The
search procedure takes approximately 3 to 10 minutes after all hands have set to the 12:00 position. If a
signal is found within the first 3 to 10 minutes, the clock will set to the correct time. If the clock does not
receive a radio signal soon after activated, the clock will start running from the 12:00 position and will
continue to run. In this case, do not attempt to reset the hands manually even though the time displayed
on the clock is incorrect. The clock is synchronizing to the WWVB signal and once the radio signal is
decoded, the hands will automatically adjust to the correct time.
Question and Answer IconNeed help?

Do you have a question about the Sharp SPC876 and is the answer not in the manual?

Summary

Clock Controls and Setup

Buttons and Switches Overview

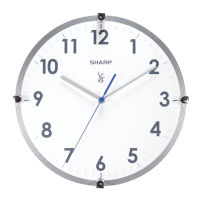
Details the function of each button and switch on the clock.

Quick Start Guide

Basic instructions for initial clock setup and placement.

Time Zone and DST Configuration

Steps to set the correct time zone and daylight saving time.

Initial Automatic Synchronization

Instructions for inserting the battery and allowing the clock to receive the atomic signal.

Clock Operation and Maintenance

Automatic Reception and Time Setting

Explains how the clock receives the radio signal and sets the time automatically.

Signal Interference and Placement

Guidance on minimizing interference and optimizing signal reception.

Forced Signal Reception

How to activate the WAVE button for manual radio signal reception.

Manual Time Adjustment

Procedure for manually setting the time using the SET button.

Overview

This document describes the Sharp Radio Controlled Atomic Wall Clock, an instrument designed for accurate timekeeping through synchronization with the US Government's National Institute of Standards and Technology (NIST) in Fort Collins, Colorado. The clock automatically adjusts its time based on the WWVB radio signal, ensuring the display of the most precise time.

Function Description:

The primary function of this wall clock is to display the current time with atomic accuracy. It achieves this by receiving and decoding the WWVB radio signal, which broadcasts time information daily. The clock features hour, minute, and second hands that automatically reset to the correct time upon successful signal reception.

Usage Features:

  • Initial Setup: To begin using the clock, insert one AA alkaline battery into the battery holder. This action activates the atomic radio reception mode. The clock hands (second, minute, and hour) will automatically reset to the 12:00 position. Once at 12:00, the clock will initiate a search for the radio signal. This search typically takes between 3 to 10 minutes. If a signal is found within this timeframe, the clock will set itself to the correct time. If no signal is received immediately, the clock will start running from 12:00. It is crucial not to manually adjust the hands at this point, as the clock is actively synchronizing with the WWVB signal and will automatically correct the time once the signal is decoded. For optimal reception, it is recommended to start the clock at night, allowing it to receive the atomic signal automatically after midnight.
  • Time Zone Setting: The clock includes a TIME ZONE switch located on the back control panel. Users can set their specific time zone by moving the indicator arrow to the appropriate setting: P (Pacific Time), M (Mountain Time), C (Central Time), or E (Eastern Time).
  • Daylight Saving Time (DST) Adjustment: A DST ON/OFF switch is also located on the back control panel. To enable the automatic Daylight Saving Time adjustment feature, move the DST switch to "ON." If your region does not observe DST, ensure the switch is set to "OFF" to disable this feature.
  • Forced Signal Receipt (WAVE Button): In situations where the clock has not synchronized or if you wish to force a signal reception, the WAVE button can be used. To activate this feature, press and hold the WAVE button for 3 or more seconds. Upon activation, the hands will automatically reset to the 12:00 position, and the movement will attempt to force a signal receipt from Fort Collins, Colorado. This process typically takes between 3 to 8 minutes. If the clock successfully receives the signal, it will automatically reset to the correct time. If the signal is not received, the clock will automatically exit the WAVE mode.
  • Manual Time Setting (SET Button): In rare instances where the radio-controlled function is not feasible due to signal strength or geographic location, the clock can be manually set. To activate manual mode, press and hold the SET button for 3 or more seconds. Once in manual mode, the minute hand can be advanced in two ways:
    • Hold the SET button down to move the minute hand forward continuously.
    • Press the SET button rapidly (more than once per second) to move the minute hand forward in minute increments. Use these methods to set the correct time. The clock will automatically exit manual mode if the SET button is not pressed for 6 or more seconds.
  • Reset Function: If the clock becomes unresponsive to its various function modes, a RESET button is available on the movement case. Pressing this button will reset the clock.
  • Placement Recommendations: For optimal reception, place the clock away from interfering sources such as TV sets, computers, metal objects, and other electrical appliances. Areas with access to windows are generally recommended for better reception. In most areas, the WWVB signal is best received at night. If the clock does not synchronize immediately, waiting overnight often resolves the issue. If the clock still hasn't synchronized after a few days, consider moving it to a different location to improve signal reception.

Maintenance Features:

  • Battery Replacement: For best accuracy results, it is recommended to change the AA alkaline battery once a year. This ensures consistent performance and accuracy.
  • Storage: If the clock will not be in use for an extended period, remove the battery to prevent potential damage from battery leakage.
  • Internal Synchronization: Once the clock has been correctly set by the radio signal, it operates continuously. To maintain accuracy, the clock synchronizes the position of the second and minute hands daily.

Sharp SPC876 Specifications

General IconGeneral
TypeElectronic Time Clock
DisplayLCD
MountingWall
Clockings Capacity1000
Power SupplyAC 120V
Operating Temperature0°C to 40°C