VT-341
8X
i/T-5118X
ADJUSTMENT OF TAPE DRIVE TRAIN
1.
Remove the cassette housing control assembly.
2.
Check and adjust the position of the tension
pole. (See page
29.)
3.
Check and adjust the video search rewind back
tension. (See page 28.)
4.
Set the tilt angle of the A/C head. (See page
32.)
5.
Rough adjustment of tape drive train.
a)
b)
d
Connect the oscilloscope to the test point for
PB
CHROMA
envelope output
(TP2201).
Set
the synchronism of the oscilloscope to EXT.
The
PB
CHROMA
signal is to be triggered by
the head switching pulse
(TP2202).
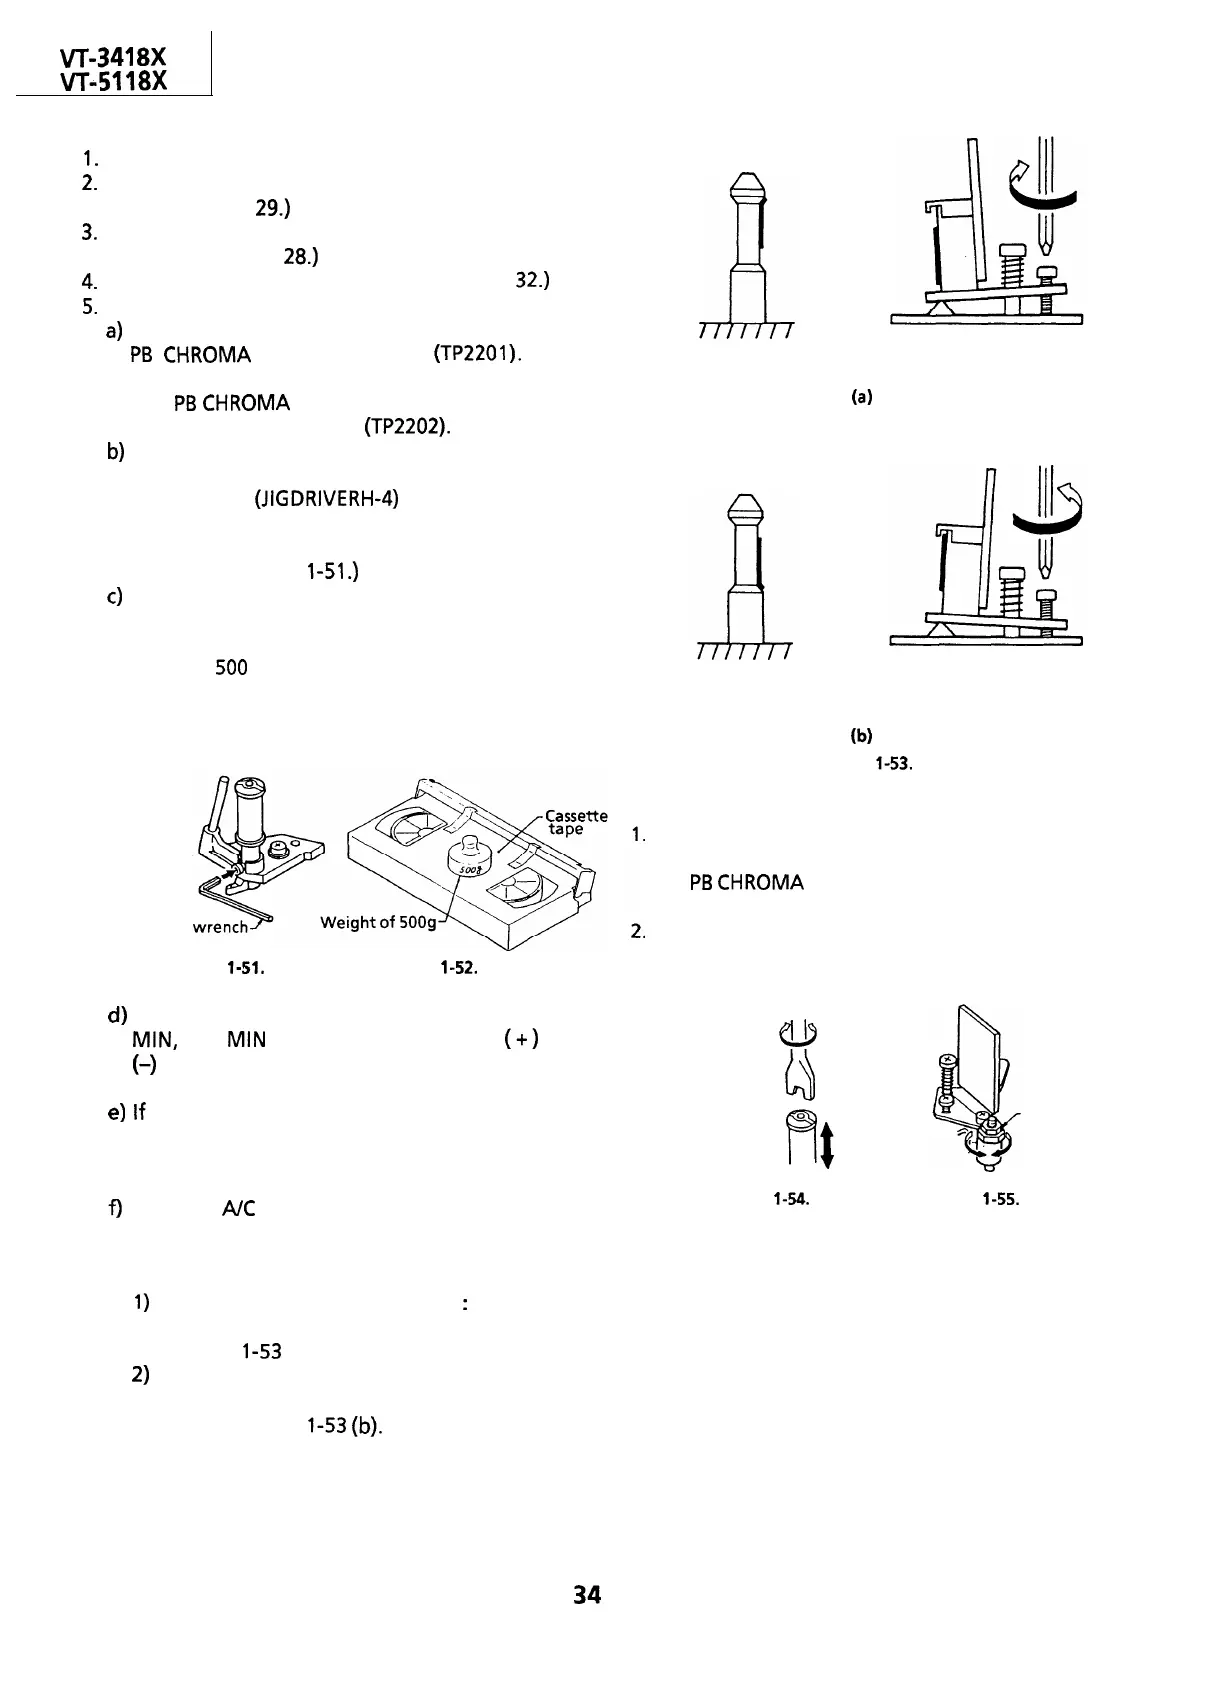
Loosen the setscrew at the lower part of the
guide roller, and adjust it with an adjusting
screw driver
(JIGDRIVERH-4)
so that the guide
roller turns smoothly. (Do not overloosen the
setscrew, which causes insecurity of the guide
roller.) (See Figure
1-51.)
Set the alignment tape (monoscope pattern)
on the reel disk, and place the unit in the
playback mode.
(Place a
500
g weight on the cassette tape to
prevent floating of the cassette tape.)
Guide roller
Hexagon
d)
e)
Figure
l-51.
Figure
l-52.
Change the envelope waveform from MAX to
MIN, and MIN to MAX by pushing the
(+)
or
(-) tracking button, and check a flat response
is obtained on the waveform.
If a flat response cannot be obtained, roughly
adjust the guide rollers on the supply side and
take-up side using an adjusting screw driver
until a flat response can be obtained.
Turn the
A/C
head tilt adjusting screw with a
screwdriver to prevent the tape from
wrinkling at the upper and lower flanges of
the fixed guide.
1)
Wrinkles at the upper flange
:
Turn the
above adjusting screw clockwise, as shown
in Figure
l-53
(a).
2)
Wrinkles at the lower flange : Turn the
above adjusting screw counterclockwise, as
shown in Figure
l-53
(b).
.;w;;
Wrinkles at upper flange
Clockwise
(a)
Wrinkles at lower flange
Counterclockwise
b)
Figure
l-53.
Notes:
Place the tracking control in the center position,
and adjust the X-position adjusting nut so that
the
PB
CHROMA
envelop becomes maximum for
easier rough adjustment of the tape drive train.
In the rough adjustment, pay particular
attention to the outlet side.
0
. .
w
Loosen the setscrew o
R#
Figure 1-54.
X-position
adjusting nut
Figure
l-55.
34
 Loading...