n
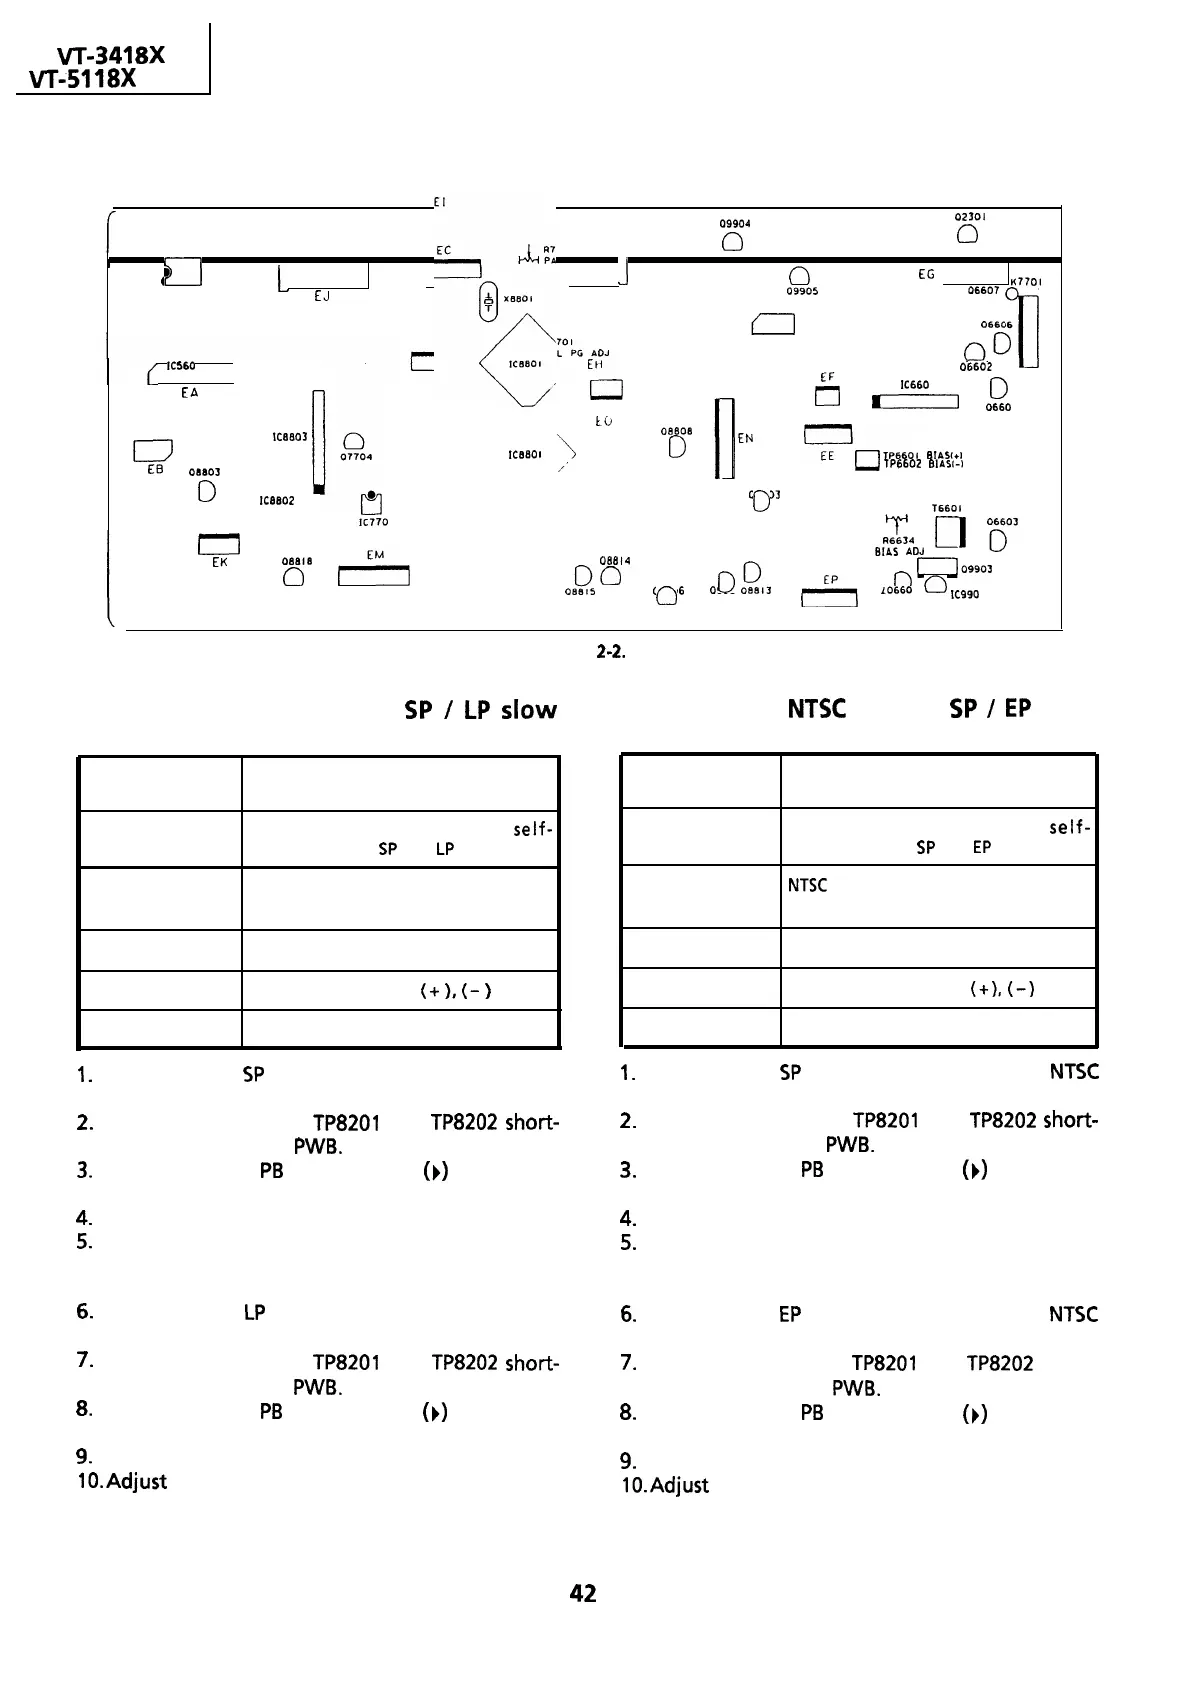
Test points layout of VCR Main Unit.
VT-341
8X
VT-5118X
I
0
El
J
0
EG
K7701
EJ
06607
.
KS60
I
EH
09905
06606
EL
ED
f
1
0
II
00
06602
EA
J.
X6BOl
U
IC660
I
8
I
fg
I
0
0660
I
to
I
ICfmO?
\
OEEOB
lc&so
I
0
EN
El3
08603
:
I
yoQi
E’/_
,,’
~p.s50,
BIASI+
TP6602
BIASI-
0
IceaOZ
05603
0
IC770
I
0
T6601
0
RIL
0
yy
BIAS
ADJ
EK
OEEl6
08814
0
ok
o
0990
0
I
09906
o
ii?,,
lAl
0
uoggo’
10660
0
IC990
I
09904
0
02301
0
Figure 2-2.
Adjustment of PAL System
SP
/
LP
~10~
Adjustment of
NTSC
System
SP
/
EP
slow
tracking Preset
tracking Preset
Measuring
instrument
Monitor TV
Mode
Recording and playback on
self-
recording tape at
SP
and
LP
mode.
Measuring
instrument
Mode
Monitor TV
Recording and playback on
self-
recording tape at
SP
and
EP
mode.
Input signal
PAL System
Commercial broadcastor video signal.
Input signal
NTSC
system
Commercial broadcast or video signal.
Test point
Monitor screen
Adjusting point
Tracking control button
(+
),
(-
)
Specification
No noise bar on the monitor TV screen.
1.
Play back the
SP
self-recorded tape in the PAL
System slow mode.
Test point
Adjusting point
Specification
Monitor screen
Tracking control buttons
(+),
(-)
No noise bar on the monitor TV screen.
1.
Play back the
SP
self-recorded tape in the
NTSC
System slow mode.
2.
Make the test points
TP8201
and
TP8202
short-
circuited in the Jack
PWB.
3.
Be sure that the
PB
mode display
(b)
disappears
on the screen.
2.
Make the test points
TP8201
and
TP8202
short-
circuited in the Jack
PWB.
3.
Be sure that the
PB
mode display
(b)
disappears
on the screen.
4.
Remove the short-circuit.
5.
Adjust the tracking control using the TRACKING
buttons on the remote controller so that there is
no noise on the screen.
6.
Play back the
LP
self-recorded tape in the PAL
System Slow mode.
4.
Remove the short-circuit.
5.
Adjust the tracking control using the TRACKING
buttons on the remote controller so that there is
no noise on the screen.
6.
Play back the
EP
self-recorded tape in the
NTSC
System Slow mode.
7.
Make the test points
TP8201
and
TP8202
short-
circuited in the Jack
PWB.
8.
Be sure that the
PB
mode display
(b)
disappears
on the screen.
7.
Make the test points
TP8201
and
TP8202
short-
circuited in the Jack
PWB.
8.
Be sure that the
PB
mode display
(b)
disappears
on the screen.
9.
Remove the short-circuit.
lO.Adjust the tracking control using the TRACKING
buttons on the remote controller so that there is
no noise on the screen.
9.
Remove the short-circuit.
lo-Adjust
the tracking control using the TRACKING
buttons on the remote controller so that there is
no noise on the screen.
42
 Loading...