- 3 -
Step 3:
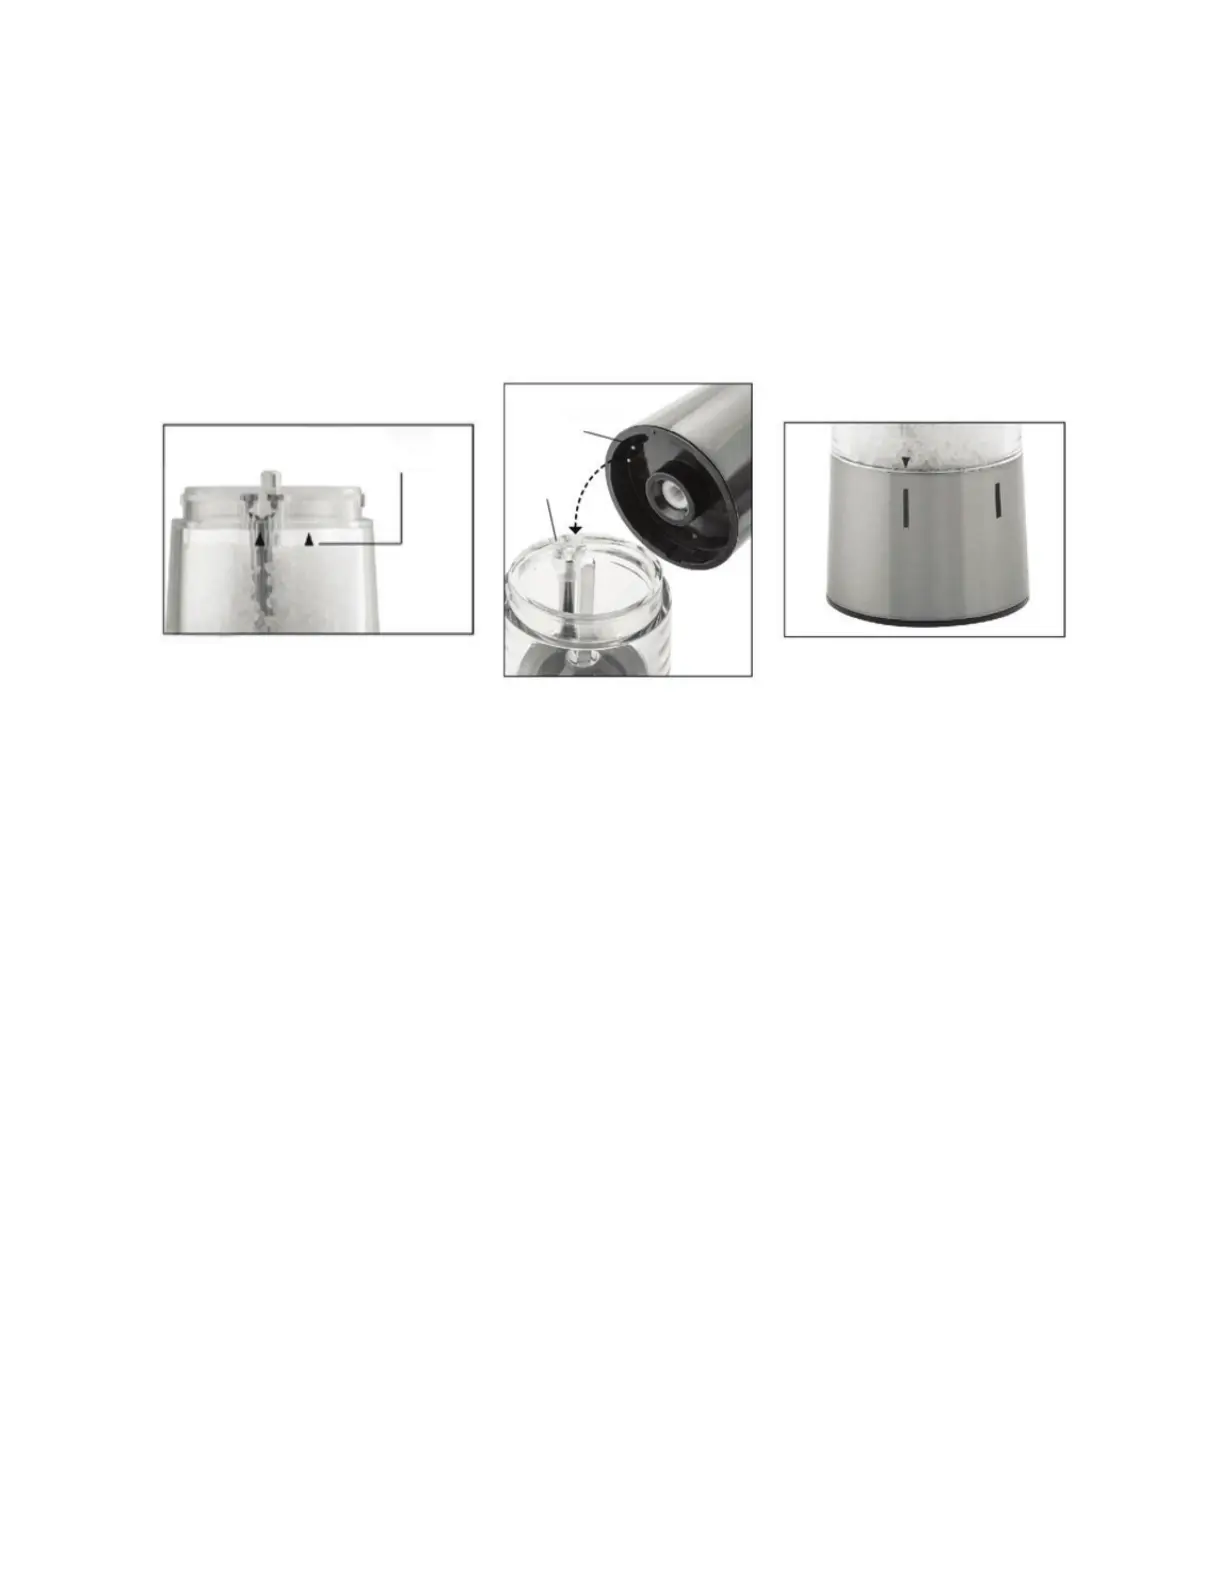
Reposition the mill body (B) onto the spice chamber (D) aligning the arrows on the left-hand
side. Make sure the contact points (E) on the mill body fit snugly over the contact surface (F) of
the chamber. (See figure 2)
Step 4:
Hold the spice chamber (D) and turn the mill body (B) counterclockwise. The top arrow will shift
right, indicating that the mill is locked.
INSTRUCTIONS
Step 1:
The mill features six (6) adjustable grinding settings. Each setting is denoted by a line on the
base (C). The size of the line directly corresponds with the grind size.
Coarse grind: Long line
Fine grind: Short line
Step 2:
To adjust the grind, turn the base (C) and align the arrow on the spice chamber (D) with your
desired grind setting. (See figure 3) The base is not designed to turn 360°. Forcing the base in
the wrong direction can cause the grinder to jam.
Step 3: Push the top button (G) to activate the mill.
CLEANING
• To clean your mill, wipe with a damp cloth or sponge.
• Do not use harsh cleaners or abrasive cleaning pads as this may damage the finish.
• Do not submerge the mill in water or let the battery compartment come into contact with
water.
DO NOT FILL ABOVE
ARROW MARKING
FIGURE 1
FIGURE 2
FIGURE 3
CONTACT
POINTS
[
E
]
CONTACT
SURFACE
[
F
]