EasyManua.ls Logo

Shelly DUO WW User Manual

Shelly DUO WW
14 pages
To Next Page IconTo Next Page
Page #1 background imageLoading...
Page #1 background image
SHELLY DUO SMART BULB
The Shelly DUO (WW/CW or RGBW model) smart WiFi LED bulb by Allterco Robotics
is intended to be installed into a standard light socket (E27/E26 or GU10) in order to
change the white temperature or color (depending on model) and to dim the light.
Shelly may work as a standalone device or as an accessory to a home automation
controller.
Specification
Power supply
110-230V ±10% 50/60Hz AC
Socket
E26/E27
GU10
Power Rating
9W
5W
Brightness
Up to 800
lm
Up to 400 lm
Color Temperature
WW/CW (2700K-6500K); RGBW
Beam Angle
190°
36°
Working
temperature
From -20°C to 40°C
Complies with EU
standards
RED 2014/53/EU, LVD 2014/35/ EU,
EMC 2004/108/WE, RoHS2
2011/65/UE
Radio signal power
1mW
Radio protocol
WiFi 802.11 b/g/n
Question and Answer IconNeed help?

Do you have a question about the Shelly DUO WW and is the answer not in the manual?

Shelly DUO WW Specifications

General IconGeneral
Product NameShelly DUO WW
CategoryHome Lighting
TypeSmart LED Bulb
SocketE27
Power Supply AC110-230V ±10%, 50/60Hz
Power Consumption9W
Wattage9W
Luminous Flux800 lm
Color Temperature2700K - 6500K
DimmingYes
Radio ProtocolWi-Fi
ConnectivityWi-Fi
CertificationCE, RoHS
Operating Temperature-10°C to +40°C
RangeUp to 50m
Dimensions60 x 110 mm
ProtocolMQTT
CompatibilityAmazon Alexa, Google Assistant

Summary

Shelly Duo Smart Bulb Specification

Introduction to Shelly

Installation Instructions

Declaration of Conformity

Initial Inclusion

Control Your Home With Your Voice

Shelly Application Guide

App Registration

Create an account for managing Shelly devices via the cloud.

Password Recovery

Process for recovering account password if lost.

Getting Started with App

Create rooms and scenes for device automation.

Device Inclusion Process

Step 1: Power On

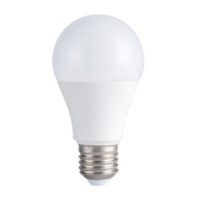
Install Shelly into light socket and turn on power.

Step 3: Connect to Wi-Fi

Connect phone/tablet to Shelly's Wi-Fi network.

Step 4: Device Discovery

Devices appear in 'Discovered Devices' room after scanning.

Step 5: Select Device

Select device from 'Discovered Devices' to include.

Step 6: Name and Save

Name, position, and save the device in the app.

Step 7: Enable Cloud

Enable Shelly Cloud connection for remote control.

Shelly Device Settings Overview

Timer Functions

Weekly Schedule

Night Mode Configuration

Internet and Security Settings

Advanced Device Settings

Embedded Web Interface

Network and Security Options

Operational Settings