.-
-
.
.
..
YO
OUTPUT
Continued)
dotor
mns
but pump doe
ot stroke
KCESSIVE
PRESSURE
IUCTUATIONS
,ray pattern variations.
ITOR
IS
HOT
e
NS
INTERMlllENTLY
WHAT TO
CHECK
If
check is
OK,
IIO
to
next
check
4.
Check to
see
if
intake valve
ball
and piston
ball are seating properly.
See
page
26.
5.
Check for leaking around throat packing
nt
which may indicate worn or damaged pack
ings.See page
26.
1.
Check displacement pump connecting rod
pin.
See
page
28.
2.
Check connecting rod assembly for damage
3.
Be
SUA
mnk
in drive housing rotates; piu(
in sprayer and turn
on
momentarily to chec
Turn
off
and unplug sprayer.
See
page
30.
see
page
m.
I
4.
Check to
see
if
pinion gear in motor front
sprayer and turn
on
momentarily to check.
end bell
is
slipping.
See
page
31.
Plug in
Turn
off
and unplug sprayer.
1.
Be sure both G1 and
G2
leads from bridge
(306)
to circuit board
(121)
are firmly
connected.
See
page
22.
2.-
Check stall presure.'kefer to Calibration
procedure
on
page
24.
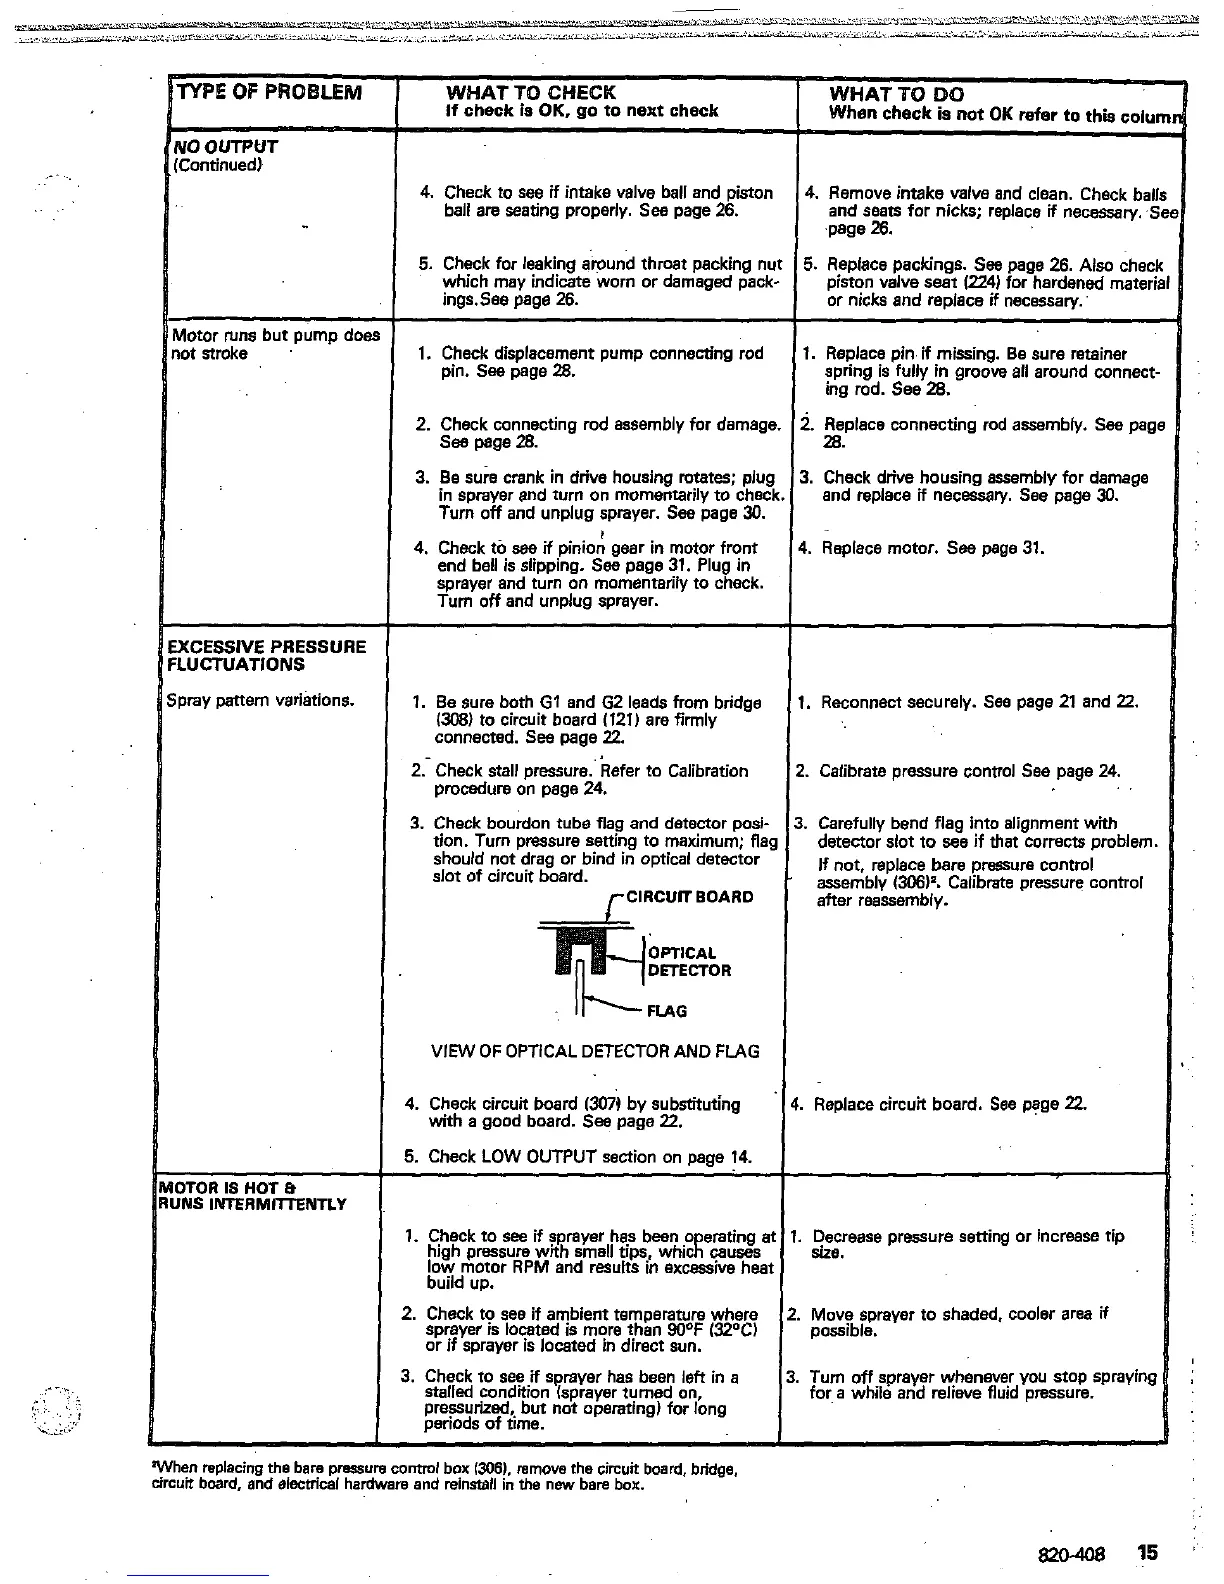
3.
Check bourdon tube flag and detector posi-
tion. Turn pressure setting
to
maximum;
fla!
should not drag or bind in optical detector
slot of circuit board.
rClRCUlTBOAR0
VIEW
OF
OPTICAL DETECTOR AND FLAG
4.
Check circuit board
1307)
by substituting
with
a
good board.
Sea
page
22.
5.
Check
LOW
OUTPUT section
on
page
14.
1.
Check to
see
if
sprayer has bean
o
erating
a
high pressure with small tips, whicR
muses
low motor RPM and results in excessive hear
build up.
2.
Check to see if ambient temperature where
sprayer
is
located is more than 90°F
(32W
or
if
sprayer is located
in
direct
sun.
3.
Check to
see
if
sprayer has been
left
in
a
stalled
condition (sprayer turned
on,
perlods of hme.
preqrized but not operating) for long
"
It
!
"
3.
:
k.
4
"
1
2
3
3.
4.
"
t
1.
2.
3.
WHAT
TO
DO
When check
is
not
OK
refer
to
this
COIU
4.
Remove intake valve and clean. Check bal
and seats for nicks; replace
if
neceaary.
.$
5.
Replace packings.
See
page
26.
Also
chec
piston valve
seat
(224)
for hardened mater1
or nicks and replace
if
necessary.
.page
26.
I.
Reolace Din
if
rnissino. Be sure retainer
spring is7fully in groob
all
around connect
ing rod. See
28.
~ ~ ~~~ ~
i.
Replace connecting rod assembly.
See
pag
I.
Check drive housing assembly for damage
and replace
if
necwry. See page
30.
m.
..
Replace motor.
See
page
31.
.
Reconnect
securely.
See
page
21
and
22.
.
Calibrate pressure control
See
page
24.
,
Carefully bend flag into alignment with
detector slot
to
see
if
that corrects problem
assembly
(306)'.
Calibrate pressure control
If
not, replace bare pressure control
after reassembly.
Replace circuit board.
See
page
22.
SUE.
Decrease pressure setting or increase tip
Move sprayer
to
shaded, cooler area
if
possible.
Turn
off
sprayer whenever
you
stop spraying
for
a
while and relieve fluid pressure.
When replacing
the
bare
pmure
conuol
box
1306).
rarnove
the
circuit board, bridge,
urcuit board, and siecuical hardware and
reinstall
in
the
new bare
box.
 Loading...